
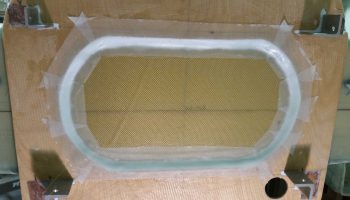
I started off today making a paper template that will allow me to fill in the oval cutout of the firewall with 1 ply of Kevlar to add a bit physical and heat protection –as well as some noise dampening properties– to the bare shear web. To be clear, the CS Spar will be bare during the build then covered with Fiberfrax and 6061 firewall covering (yes, regarding using aluminum as the firewall covering I’ll reiterate that I ascribe to Burt’s design that uses the aluminum as the structural covering for the firewall that also serves to protect the Fiberfrax… which is the REAL fire barrier in this configuration).
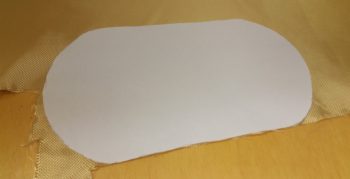
I then used my oval firewall template to mark and cut out the ply of Kevlar.
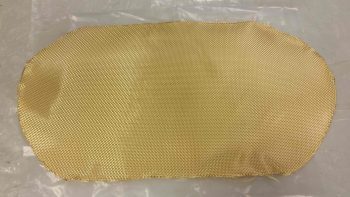
I prepregged the Kevlar ply then laid it up on the bare CS Spar shear web, peeking out of the oval cutout in the firewall. I used fast hardener so that it would cure as quickly as possible.
I then peel plied the Kevlar ply layup and let it cure well into its green state.

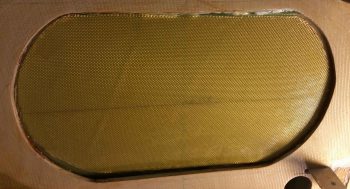
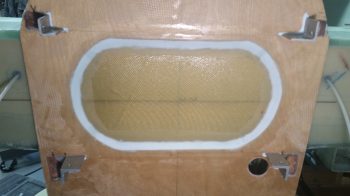
With the Kevlar layup still slightly tacky but cured enough to let me carefully pull of the peel ply, I then created a fairly dry flocro fillet (about 70% micro/30% flox) around the edge to transition the 1/4″ plywood edge down to the surface of the CS Spar for a good glass flow. I then laid up my prepregged 1-py 1.5″ wide BID tapes around the perimeter, covering the flocro fillet and overlapping onto both firewall face and the ply of Kevlar I had just laid up. [Note that in this pic and a couple below you can see where I flocro-filled the gaps in the “L”-shaped firewall openings around each engine mount extrusion].
Here’s a full firewall view shot of these layups.

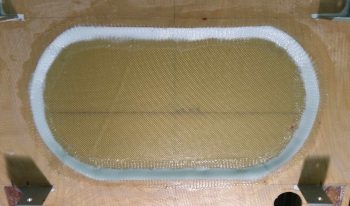
To both prep the surface for better adhesion to the 3M high temp RTV that will secure the Fiberfrax in place to the firewall, and to remove the nasty, jagged sharks teeth of death that await unsuspecting fingers and forearms, I peel plied the perimeter BID layups.
A few hours later I pulled the peel and was somewhat pleased with the results. I say “somewhat” because the actual layups are fine, but I think I allowed myself to fall a little prey to groupthink here in that I have seen this style firewall layup done on a number of Long-EZs. However, with hindsight being 20/20, if I could go back and do it again, I think I would simple bevel the firewall plywood with a router to provide a simple transition from the firewall surface to the CS Spar. Although I used somewhere between a paste to dry flocro, it still added more weight than I would have preferred, even though I tried to balance weight vs strength. Oh, well. It’s done and I’ll press on!
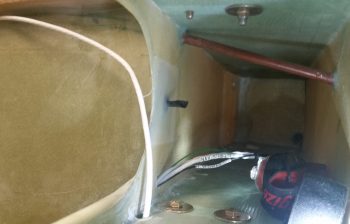
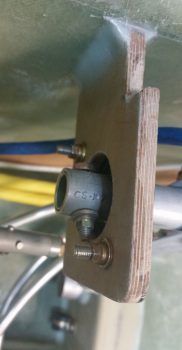
I then set my focus on installing a Clickbond on the right inside edge of the oval opening of the CS Spar to be used as an Adel clamp hardpoint. The Adel clamp will secure the wires transiting from above the CS Spar to the Hell Hole, keeping them both secure and out of the way of the opening to allow for placing stuff into the spar and removing it without getting hung up on loose wires.
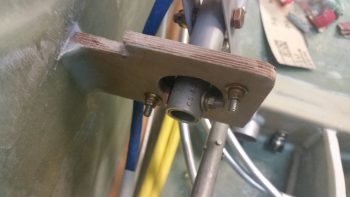
As per normal, after I sanded the surface and 5-min glued the Clickbond in place, I then laid up 2-plies of BID over the Clickbond and peel plied it.
My final official build task of the evening was to finalize the install of the right side flight controls to the mini-bulkheads in the front and GIB side consoles (CS109 & CS118). I gathered up all the hardware per plans and then bolted the bearings in place, again to the CS118 mini-bulkhead aft . . .

and to the CS109 mini-bulkhead up front. I’m using the Cozy Girrrls control system hardware, so their bearing assemblies at each end of the control tubes may be less thick than stock, because the AN3-7A bolts called out for in the plans are a bit too long in my book. But again, they work and the control system is installed, so a short thought to ponder.
I have a few more minor tasks to complete tomorrow and then I will be moving into –either tomorrow or Monday– what I’m going to call the “3-DAY BLITZ” (….key dramatic music!), whereupon I will be solely focused on FINISHING UP THE WHEEL PANTS INSTALL. Yes, I just said THAT! . . . In short, I want to get some of these half-finished mini-projects off the list of things to do and on the finished column.