
I started off today doing hours of research on the wheel pants installation. I’m not sure what happened, but I compiled a bunch of info on wheel pants in a PowerPoint slide deck earlier this year and couldn’t find the darn thing! I did go back and review Wayne Hick’s sage advice on his phenomenal web page: Chapter 9: Wheelpants and also Bernie Siu’s, Nate Mullins’, and Joe Coraggio’s sites for wheel pants install info. I compiled a bunch of it into a doc and printed it off as my “Everything you needed to know about installing wheel pants” guide!
In fact, while reviewing Nate & Joe’s adventures on their recent (respective) finished flying Long-EZs it was then that I made the decision NOT to move forward with a full-on install of the wheel pants. Why? Well, after a fair number of high-speed taxi tests and numerous landings both Nate & Joe have had significant tire wear issues. Keeping Nate & Joe’s experiences in mind, I figure at some point I may very well need to modify the wheels’ camber in addition to possibly having to modify the toe-in. If those issues do play out, then having hard mounted wheel pants would require a significant rework of the wheel pants. Taking all this into account, I simply don’t feel that it’s prudent to move forward with the actual full-on wheel pants install. However, I do want to lean far forward and be as prepared as possible when I do go to install the wheel pants so that the installation will be optimized, smooth and quick.
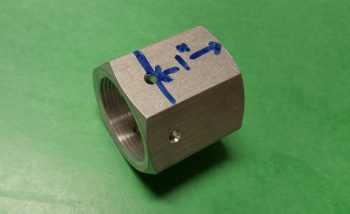
As I’ve stated before, I’ll be using the Vans axle nut that has a K1000-4 nutplate installed in the end of it specifically for mounting wheel pants.
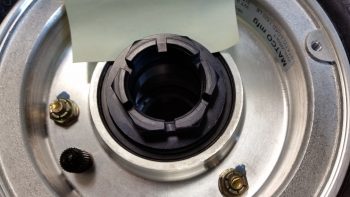
As you can see in the pic above, the Matco axle nut has essentially a built-in washer at its base. Thus, I cannot simply use the Vans axle nut as a replacement for the Matco axle nut (which it was designed to do). If you look at Bernie Siu’s website you’ll see that the Matco wheels that he and Wayne use incorporate a separate washer underneath the axle nut, unlike my wheels. The separate parts enabled Bernie to machine a lip on the Vans axle nut to keep the washer centered. Again,as you can see above, my version of the Matco wheel does not have a separate axle washer and nut, so doing what Bernie did is simply not an option. However, cutting the Vans axle nut shorter to only 1″ in length (pic below), will allow me to mount the Vans axle nut over the Matco axle nut in the same manner that Wayne Hicks did.
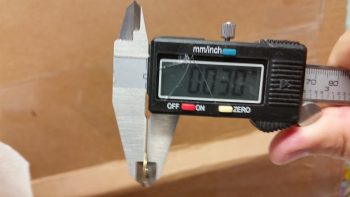
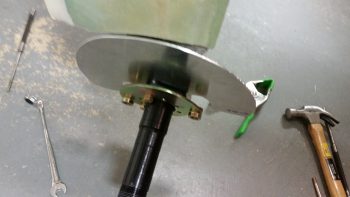
 While I had all the parts in front of me, I measured the tire valve stem distance from axle center line to locate a good mounting position for the spring-loaded valve stem hatch.

In pondering how to fix the Right side toe-in that points inboard just a tad too far, I considered using AN960-416L washers as shims on the forward axle bolts to kick the toe-in back out.
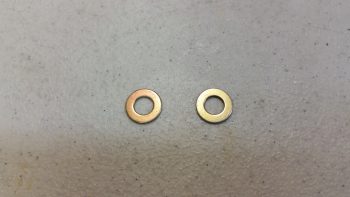
But that turned out to be a no-go, since these washers are a 0.030″ thick. That would equate to over 0.3″ back outboard at the 24″ forward (of the axle) mark, in effect creating a toe-out vs. toe-in! So I did the math and concluded that I actually need a 0.007″ shim, which would result in the right wheel’s toe-in very closely matching the left.
I removed the Right side axle bolts in prep for eventually installing shims on the forward 2 bolts. In addition, I’m going to swap out the longer axle bolts for slightly shorter ones.
Another piece of information that I serendipitously discovered today concerns my instrument panel. The other day when I cleaning up the shop I ran across the sheet of 0.090″ 6061-T6 aluminum that I used for the heat shields. I quickly measured the instrument panel to see if I could use the remainder of this 6061 piece for the instrument panel (there’s enough), since it just seemed like a good thickness for the panel. Well, lo & behold as I was researching wheel pants today, I saw on Nick Ugolini’s site the he specifically recommends using 0.090″ 6061-T6 aluminum for making an instrument panel! Sold! Say no more Nick, I will comply!!
Ok, finally, just as a historical record, I also filled up the nose wheel tire with air!
Tomorrow, I’ll be prepping the wheel pants and hopefully getting the first initial steps in to widen them by the 1″ I decided to widen them. As I stated before, I’ll be getting all possible tasks on the wheel pants completed up to the point of actual install.