
I started out today by updating my Master Project Build Schedule which I call my “Order of Battle.” I figured I need to start with the master schedule to better detail what tasks that I am specifically going to do on my Chapter 9 To-Do sheet. In doing so, I broke out the hell hole cover and RAM air scoop for a later date after other prerequisite tasks are completed.
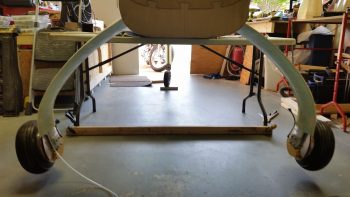
I then set about to figure out this pesky toe-in issue that needs finalized. I put the fuselage up on a fold out table vs. fuselage dolly so that I could get a clear shot of the CL & the front gear leg.
I started by leveling the longerons side-to-side. I also clamped a board onto the table legs perpendicular to the fuselage and then positioned the fuselage so that the axles were set back from this board 24″.
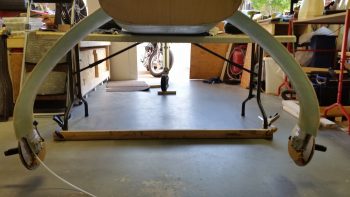
I then removed the wheels/tires, brake disks and pads off of each axle.
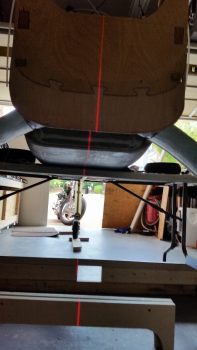
At this point I needed to find the aircraft CL, so I shot a laser line which allowed me to check the toe-in of each wheel not just in comparison to each other, but to the CL as well. I took the pic below a little off center, that’s why the line seems a bit askew.
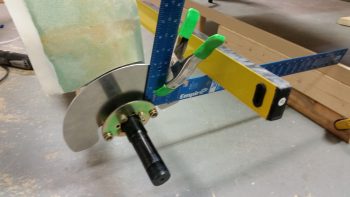
I then clamped a 24″ square to each side and checked the toe-in. The plans say that the max toe in delta between the “B” measurement (at the axles, or 0 inches) and the “A” measurement (at 24″ forward of the axles) should be between 0.2 and 0.45 inches. Right now, I’m sitting at 0.62 inches, with my right wheel toed-in 0.08″ more than my left. If I can get the right wheel toe-in the same as the left, then at 0.54″ I’ll be happy and call it a day. This may be a bit more than Burt called for in the plans, but then again, my aircraft weight is a bit more than what Burt advised as well. One other thought is that I’m not going to jump through a lot of hoops now until I start doing some high speed taxi tests & a few landings, at which point I’ll tweak what needs tweaking!
Now, a few more figures. Before I took the wheels off I measured from the front center of each tire near the ground to the large nut on the nose wheel fork. Each side came out very close to 110″. Then, after I removed the wheels I also measured from the bottom of each axle to the 6-foot level I had across the longerons, with each side measuring close to exactly 48.5 inches. I then measured from the aft side of each of the inside, top-forward axle mounting bolt to the fuselage CL at the back edge of the fuselage bottom: Right side 34.32″ and left side 34.25″. I also checked the dip angle of each axle hanging free, both came out to 12.4°. Finally, with the longerons level I laid the long level across the squares as close to the gear legs as possible: perfectly level as well!
So . . .
Interestingly, when I checked the distance between the end of each axle, straight out perpendicular to the fuselage, I kept coming up with the left side axle end being 0.7″ closer to the fuselage than the right side! I did this a number of times, in a number of different fashions, and each time it told the same story. Very odd! The only correlating data that helps support this –that I didn’t mention above– is that through my “A” & “B” measurements for the toe-in, I again measured that my left AXLE is 0.33″ closer to the centerline than is my right. This actually makes some sense, because I mistakenly added nearly 0.2″ more BID to the right side gear leg due to my misID’ing the CL when the fuselage was upside down and I read the wrong mark on the freshly extended firewall.
My conclusion is that I MAY add a spacer to help clean some of this up. I talked to my buddy Marco and he advised to leave it and press on (good advice), but a big factor in this decision will be the affect it has on the asymmetry between the wheel pants. I’ll being doing a fair number of measurements tomorrow on those in prep of installing the wheel pants. In short, more to follow on this.
In other news, I was able to trim the offending right heat shield on the aft side where it was barely touching the brake caliper (actually visible in last pic above). I also topped off the tire pressure raising it to the recommended 70 PSI from the 50 PSI I had filled them up to (actually, after 6 months, both tires were down to 30 PSI each).