
Finished! As are all the major install steps for the wheel pants . . .
I started off today checking the alignment on the right wheel pant with both the inboard and outboard doublers’ glass cured. I need to reglass the top of each outboard doubler for some minor air pocket/delam issues I had on each with such sharp bends of the glass (even though I weighed them down during cure). Regardless, the doublers are solidly in and the re-glassing a minor issue.
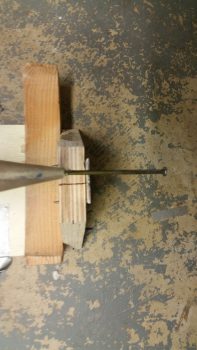
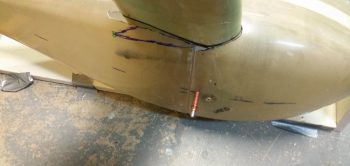
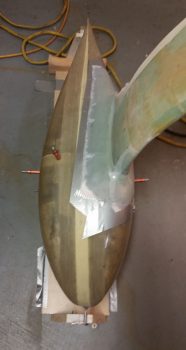
With the Clecos, outboard and inboard mounting screws in place the right wheel pant was dead on parallel with the A/C centerline marks. However, what is a slight ailment to the left wheel pant (below) in windage, my right wheel pant suffers from a very slight 0.1″ difference in elevation between aft/tail wheel pant height off the jig and the nose. So, while the nose nail comfortably rests on the jig, the tail nail hovers –again– about 0.1″ above it. Of course, this is all imperceptible if no jig is present.
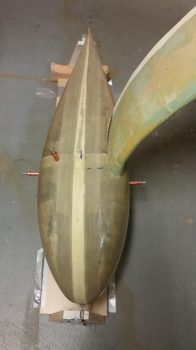
Here’s a shot the right wheel pant with the outboard mounting screw installed.
As well as the inboard mounting screw installed.
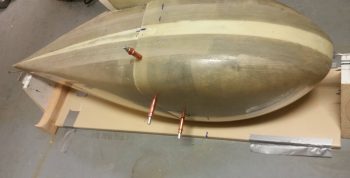
The left was not bad at all, however it was about 0.1″ off wheel pant nose vs. tail as compared to parallel to the A/C centerline marks. Not a big deal, and really took some work to find it against my marks (Instead of moving the entire wheel pant jig left or right, I simple went off how far from my A/C centerline mark the nail on each end was. Say, if both were 0.3″ from the mark it’s the same as being right over the mark on each end…).
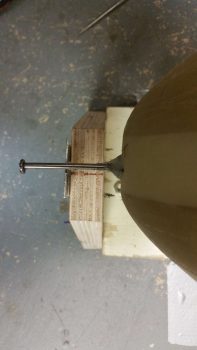
I tried to capture this with pics, but the cell phone’s camera is off to one side, so by looking at the angled sides of each jig upright you can see if I’m straight overhead (the two angled edges should be equal). I took a number of pics but never got exactly overhead… the bottom line is I’m about 1 nail widths off between front and back on the left wheel pant.
Of course 0.1″ is not at all noticeable on just looking at the pant, and I doubt has very minimal –if any– impact on aerodynamic performance. With the wheel pant locked in position with Clecos, inboard and outboard screws in place, I’ll take the 0.1″ off and press on.
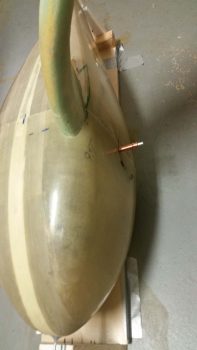
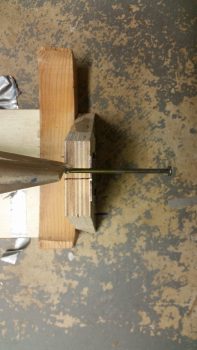
Here’s a shot of the outboard mounting screw installed on the left wheel pant.
And the inboard screw as well.
Two things had to happen before I would get to the point that I was ready to glass the bonnet onto each wheel pant. The first was a WANT and was related to making the second REQUIRED task a little easier . . . attaching the 3/16″ SS brake line to the 9.25″ SS braided brake line coming from the brake caliper.
I started by removing the lower part of the gear leg fairing that was situated inside the wheel pant. With both wheel pants in place I marked the gear leg opening of the wheel pants to depict the no-kidding line where each wheel pant intersected the gear leg. Just to ensure that I had no clearance issues pop up on me, I dropped the line down approximately another 1/4″ as my cut line.
I then removed the extraneous portion of the gear leg fairing that would have been inside the wheel pant whenever the wheel pant was mounted. Not only does this give me more maneuvering room and space inside the wheel pant and saves a tiny bit of weight, but the main thing is that it allowed me access to the brake line that runs inside a plastic tube inside the gear leg (visible just aft of the gear fairing mid-point in the pic below).
I then eyeballed how the brake line tube plastic conduit traveled up through the gear leg fairing. Now, hindsight being 20/20, if I had known then what I do now, I would have simply ordered a 6″ long -3 braided SS brake line . . . but I didn’t, and these things are expensive as all get out. I don’t normally like burying things that are a probably a good idea to have access to when there’s a potential spot for leaks (aka “fittings”). So if required, I’m making this so I can simply cut out a rectangular piece of glass and have the fitting right at my disposal… it won’t be pretty, but it will be accessible, in a PITA sort of way.
Optimal? No. Am I doing it? Yes. I figure unless there’s a leak, it will most likely serve as any other brake line does in these birds and become a distant memory of the oddball installation.
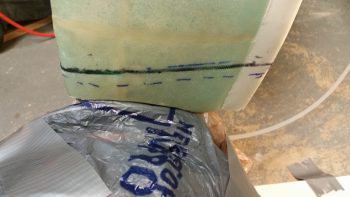
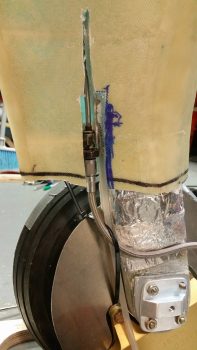
I cut out a channel a few inches high to gain access to a good portion of the 3/16″ SS brake line that I had just ran last week into the hell hole.
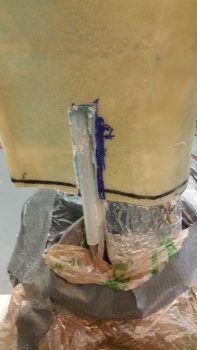
I then managed to get the plastic tubing conduit cut away. What I was after here was enough length of brake line to bend it out, flare it with a fitting end attached, and then stow it away (bend it) back into the gear leg fairing.
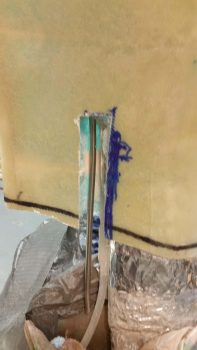
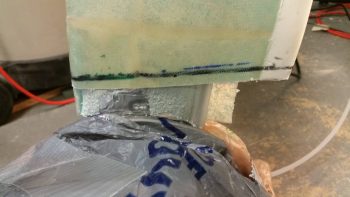
With the length of the -3 hose, I needed access to a bit more tubing to cut and flare the end, so I cut a narrower channel going up the gear leg fairing. This allowed me to pull enough of the brake line out to cut it, then flare it.
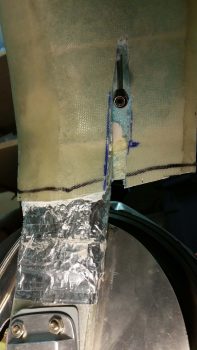
Which is exactly what I did, with just the barest amount of space enough to get the crimping tool on the end of the 3/16″ SS brake line.
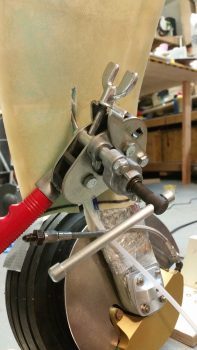
But I prevailed in the end, with a pretty decent flare if I say so myself (smile).

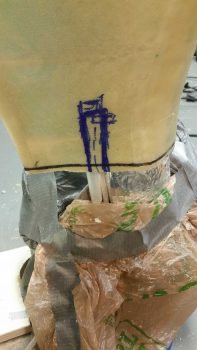
I then shoved it all back into the ugly gaping channel that I had just made on the inside of the left gear leg fairing.
I then did the same thing with the right brake line on the right gear leg fairing.
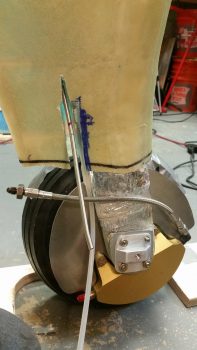
Then, just as I did on the left gear leg, I connected the 9.25″ -3 braided SS hose to both the brake caliper fitting and the (now) in gear leg fairing 3/16″ SS brake line fitting. This finishes the brake line run from wheels all the way to master cylinders.
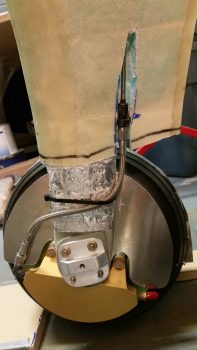
I forgot to snap any pics, but my next task was to whip up some thick 30/70 flocro paste (heavy on the micro) and embed just the 3/16″ SS brake line in the gear leg fairing. This was after I wrapped the fitting in protective plastic wrap and covered it with a piece of electrical tape. To be clear, the fitting did not get any flocro covering it, just the brake line tubing.
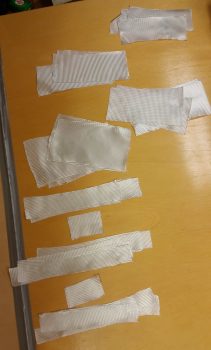
While the flocro cured, I developed my layup schedule for the wheel pants bonnet layups, and then got busy cutting a bunch of BID.
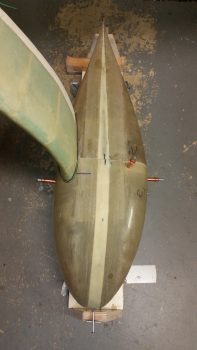
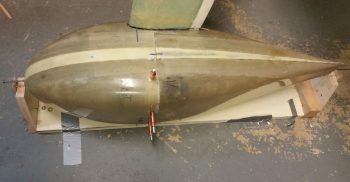
After having craft hour with Play-doh making the fillet at the intersection of the main gear leg to wheel pants (this was after re-reviewing Terry Schubert’s very informative presentation on drag) I then proceeded —for the next 5 hours!— to layup the wheel pant bonnet on the right wheel pant . . .
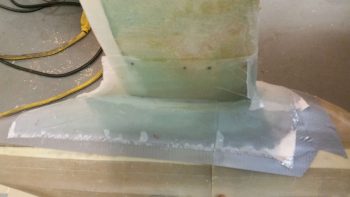
And the left.

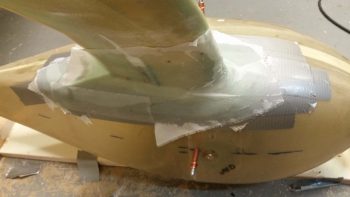
I then peel plied the bonnet layups. Allthough I still have some reinforcement layups to do around the wheel openings and a ply or two on the face of each outboard reinforcement doubler… and let’s not forget the drilling and installing of nutplates, screws, and CAMLOCs… clearly the lion’s share of the wheel pants install is COMPLETE. Thus, I’m calling my 3-DAY . . . er, ah, 4-DAY BLITZ a success!
Tomorrow I’ll be prepping to have a good friend come to stay overnight and we’ll be heading out for social hour with some other friends…. so not a lot of build work will get done. I’m going to celebrate finally getting these darn wheel pants installed!