
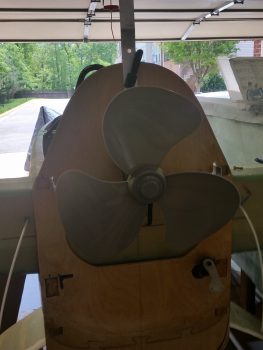
To start out this post right, I thought I’d show you my new environmentally friendly electric engine install with its high efficiency 3-bladed prop (no, NOT a Catto!).
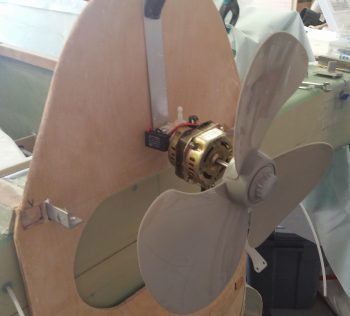
You can see this will save me a ton of weight and I’ll probably be the first Long-EZ that has NO aft CG problem! HA!
Ok, all kidding aside, I started off today writing out & organizing my required task list for the next couple of days. I decided to continue the work that Marco and I had started on –the P5 connector (stick grip)– and knock out another 5-6 wires.
One of those wires in that connector is the wire that goes from the taxi light switch to the taxi light actuator relay in the nose (RL011). I terminated the wire with a pin and then quickly realized that I was supposed to have TWO (2) wires in that pin terminal: 1) one going to relay RL011 and, 2) another going to the “TAXI LIGHT” LED indicator on my panel.
Being cheap and not wanting to waste a pin terminal, I decided that instead of cutting off the pin and reterminating the wire, that I would simply find the point on the wire that I had just run that was physically closest to where the taxi light ON LED indicator would be located. I then stripped away the insulator on the wire I had just run, cut a new 22AWG brown wire with blue stripe, and solder-spliced it into place.
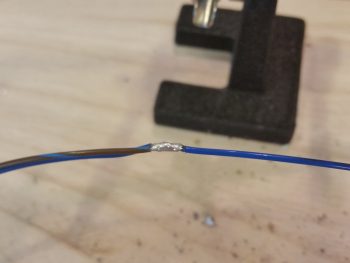
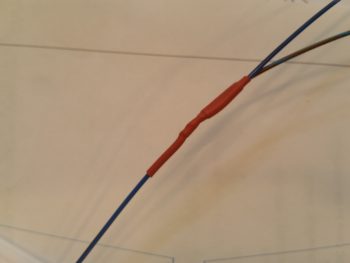
Since these wires both carry positive current, I covered the solder splice joint with a nice long piece of red shrink tube.
I then decided to terminate the other end of the brown & blue wire with a mini-connector that came with the LED indicator lights. I realized that I had not finished identifying all the LED indicators, so I took a few minutes to update the info on my panel switches, indicator lights, LEDs, components page. I then took another 15 minutes, cut up the labels I had printed out quite a while back and labeled each of the LED indicator lights. With these minute tasks out of the way, I then terminated the brown & blue wire and slipped it into the mini terminal.
I then annotated the wiring label IDs on the new nose gear diagram for the Nose Gear Up Transit and Nose Gear Down Transit LED indicators. I quickly printed out some labels for those wires, grabbed my stuff and took it all down to the shop to label and terminate these 4 wires.
After I cut these wires (that come out of the P2 connector) to a more workable length, I then labeled each one with the appropriate label [these were peel & stick labels since I’m currently out of the heat shrink labels]. I then terminated a socket onto the end of each wire and mounted them into their respective mini connectors.
I then tested out the gear up transit and gear down transit LED indicator lights as you can see in the very short video below (sorry, I didn’t get a shot of the LED indicator mini terminals).
I then spent a decent amount of time sanding down the perpetual painting project from hell: the nose tool box lid. This thing has given me an amazing amount of grief in trying to simply get it painted black… to the point of being comical. I also sanded down the GPS antenna cover that will sit atop the pilot head rest. It too has presented a fair number of challenges. I’m hoping over the next week to get these darn things knocked out!

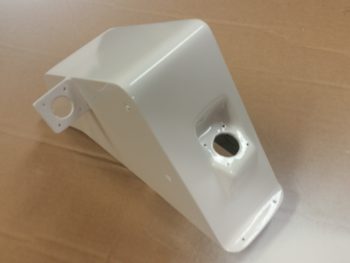
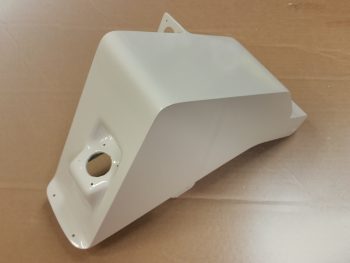
Before I actually started sanding & priming the 2 items above I found about 6 pinholes that had crept back up on the surface of the aft NG30 cover, so I filled those with tiny dabs of Metal Glaze. I then went on to sand and prime the lid and cover above.
Well, lo and behold there were a few more pinholes that I hadn’t noticed in the shop light, until I took the aft NG30 cover outside. I then whipped up a tiny bit more Metal Glaze and repeated the process (it’s very workable in 20 min, versus the long cure time for epoxy).
Finally, after messing around with the items above for a good bit of time, I was able to do a final EZ sand down of the aft NG30 cover, give it a good bath in Simple Green, and hit it with 3 coats of gloss white paint.
Tomorrow I have another friend coming over, so it may be a very light build day, which is ok because it will allow time for this stuff to cure longer. I will push forward to finish all my nose-related components, including the electrical system stuff of course, to get them all knocked out so I can move forward on the wheel pants and upper nose build.