
Today I crossed the proverbial Rubicon in my initial steps of the thigh support fuel sump by glassing the fuel lines into place, but more about that in just a bit.
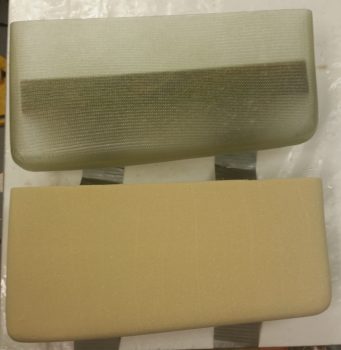
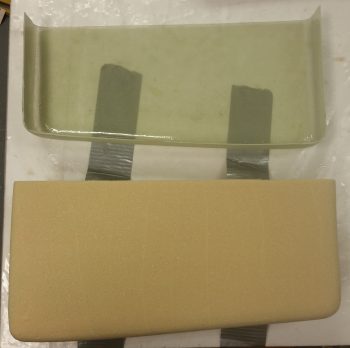
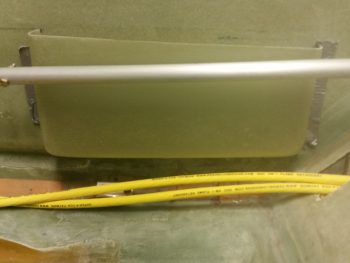
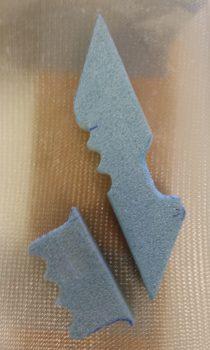
I started out today by trimming up the GIB right armrest storage pocket and removing it from the foam plug. The pics below show both the front and inside of the storage pocket.
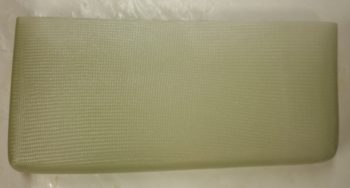
Here it is again, solo.
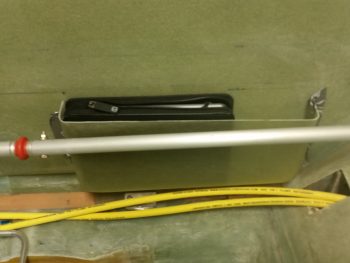
I then mocked it up in place to see how it fit. I can say I’m happy with it, so it will soon be getting glassed into place so I know exactly how to route all my stuff around it!
I had to lower it about 0.20″ for the iPad to fit, while in its case. But mounting it just a tad lower also helps me with some lid ideas that I have.
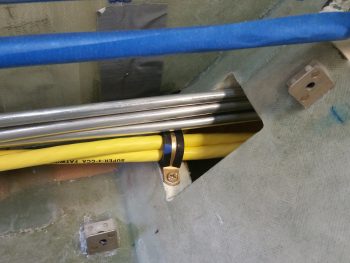
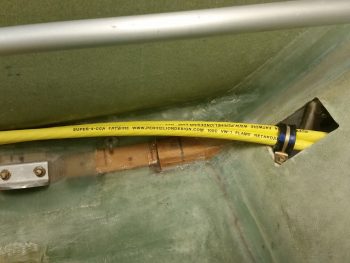
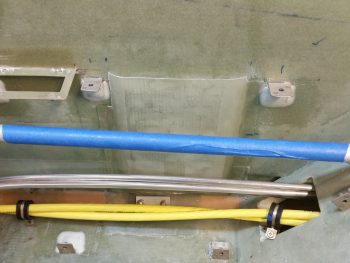
Moving on: I’m happy to report that the big pair of yellow cables are finally secure from the nose to the back seat. Again, I will most likely have to secure them in one or two places in the Hell Hole, but beyond that, the task of routing these big suckers and securing them is complete!
Starting from the front part of the aircraft, here are the two newly mounted Adel clamp hard points in the pilot seat area: one Clickbond (forward) and one RivNut (aft).
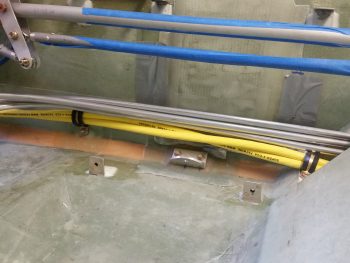
Here’s a closer shot of the Adel clamp Clickbond hardpoint.
And a closer shot of the Adel clamp RivNut hardpoint.
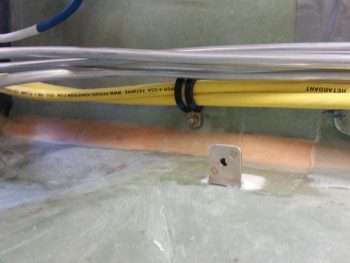
I also mounted a Clickbond just aft of the pilot’s seat as you saw in yesterday’s post.
Here’s a clearer shot of that hardpoint with an Adel clamp mounted & in use to keep the big power cables secure.
And here’s the RivNut Adel clamp hardpoint in the lower right side opening of the back seat.
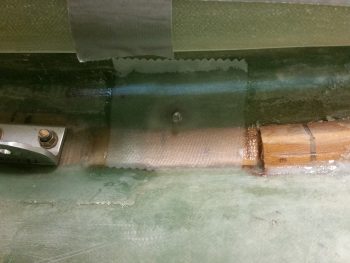
A little wider shot reveals the Clickbond that I floxed in place last night.
A bit later, I covered the Clickbond addition with 2 plies of BID and some peel ply.
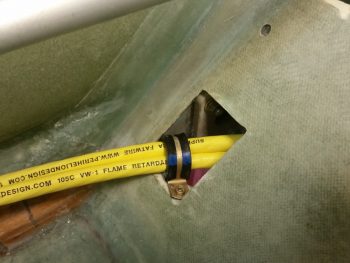
I had an issue with the right side armrest today that needed some cutting to solve. I simply couldn’t get the armrest mounted since the fuel lines were in the way. I wanted to be able to mount the armrest since I was going to install the “map” pocket permanently to get a final idea of fuel line routing… and just to get it done!
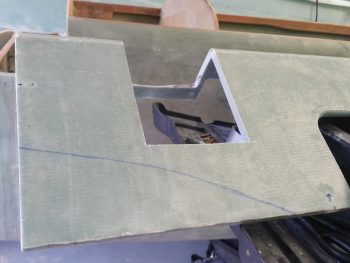
I taped in my 12″ flexible decimal ruler to get a good estimate of what the pilot thigh support ribs profile will be, and then cut it out. Of course, I also wanted to get this area cut out in my continuing effort to get the pilot area sorted out as well to allow me to move on to the nose build.
I did flox in the map pocket at this point (final pic is below) during the same round of glassing that I did the big power cables’ “final” Clickbond above.
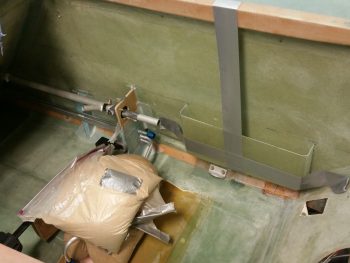
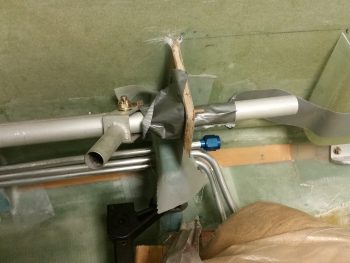
I then moved on with the prep to start glassing the fuel sump right forward wall extension piece to get it installed tonight. This may seem like not such a big deal, but this piece is a major lynch pin to the entire fuel sump build. Not only is it a part of the front wall –making the front wall a bulkhead by traversing from one fuselage sidewall to the other– but it also ties the sump to CS118 for added strength. Finally, it secures the 3 fuel lines heading aft: one to each sump tank and the other to the engine.
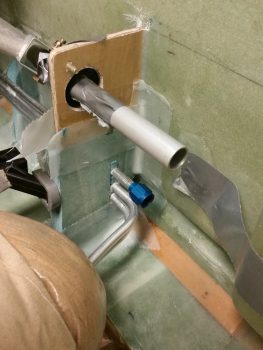
One of my tasks was to make foam fuel line mounting brackets that –at least the bigger one– will need to be glassed in place when the fuel sump right forward wall extension piece gets glassed in. I’ll most likely wait on the smaller bracket. If you’re wondering why I went with foam and am using fiberglass to secure the fuel lines, I actually got the idea when I queried Nick Ugolini on it.
To use Adel clamps, I would have had to spread out the fuel lines much farther apart (unless I grouped them together, which was not something I was so keen on doing). Plus, the way the fuel lines go through the pilot seat back opening, they either have to have a significant bend or slant to get them to the sidewall an inch away to use the Adel clamps, or they still need some type of bracket built to provide the required standoff from the sidewall.
Yes, if my “map” pocket wasn’t installed I could have possibly drilled or removed the edge of the pilot seat back that sticks out from the sidewall, but I wouldn’t prefer to do that anyway . . . and of course it’s not an option in this case. To be clear, I have been researching this topic online and talking to folks for over a week now regarding the securing of fuel lines, and when Nick mentioned this, it was simply an Aha! moment.
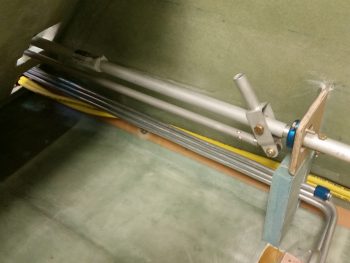
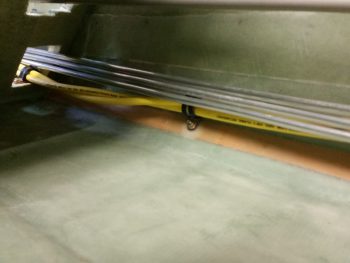
After a grinding few hours, here’s the final glassing-in of the fuel sump right forward wall extension piece. Obviously in the pic you can see where I’ve also 5-min glued the right armrest storage pocket. As for the sump wall extension piece, I floxed it in place first after sliding the 3 fuel lines into the initial slot I created on this 1″ thick Divinycell extension. I then used a clamp as a spreader to keep the extension piece firmly pressed against the right sidewall. A bit later I had to remove the clamp for a bit while I mounted the foam fuel line bracket, but then it went right back into place.
I used a couple of pieces of the original foam I cut out of the wall extension piece to place back under the bottom fuel line. To lighten up the fuel line install I resorted to using flocro with a bit more micro than flox. I flocro’d the bottom foam piece back into place under the bottom fuel line, then had to add another 0.4″ thick foam piece to get the height correct. I then slathered up the channel for the middle fuel line with flocro and added a 0.35″ foam spacer between the first and second fuel lines. Again, I added more flocro and then another 0.40″ foam spacer between the middle and top fuel lines. Finally, I closed up the space above the top fuel line with another foam piece flocro’d in place. The top fuel line has a tad more space between it and the middle fuel line to provide just a bit of clearance for the fitting that’s right there.
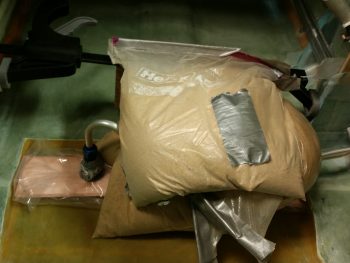
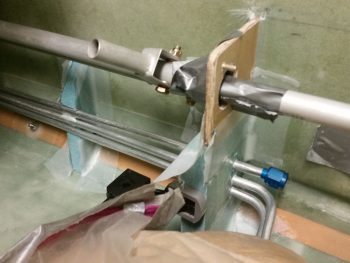
Once I knew the wall extension piece was securely in place, as were the fuel lines, I then carefully used sandbags to weigh down both fuel lines going to the Hydramats in an effort to have them cure in the correct position. I of course am hoping that there is minimal spring back and that this works . . . to make it easier when mounting the middle and right side walls. Not a huge deal if they don’t, but again, it would make the upcoming wall installations easier.
Besides using 2-ply BID tapes to secure the sump wall extension piece to the right sidewall & fuselage floor–respectively, I also laid up 2-ply BID tapes between the CS118 mini-bulkhead and the sump wall extension, also on both the front and aft sides.
In the pic below you can also see the foam fuel line bracket that I floxed & glassed in place. For this I simply used 1 ply of BID on each side. After I ensure the fuel lines are in the correct position, tomorrow I’ll secure each fuel line in place with flox in its respective notch, then I’ll layup a 1″ wide ply of BID over the entire edge of the fuel line bracket, from floor to sidewall. I’ll most likely mount the other fuel line bracket, and probably even get the fuel lines nice and situated, then mounted at the pilot seat bulkhead opening.
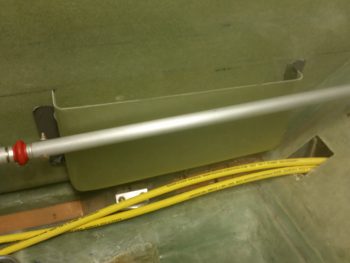
A few hours later after I finished the layups above, here’s the floxed in place and 90% cured pilot right armrest “map” pocket. I ended up mounting it about 0.050″ lower than I had marked, which actually works out perfectly because there is literally no sign of the actual “map” pocket visible when the armrest is installed.
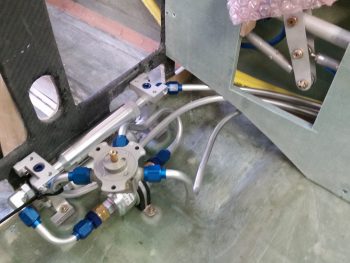
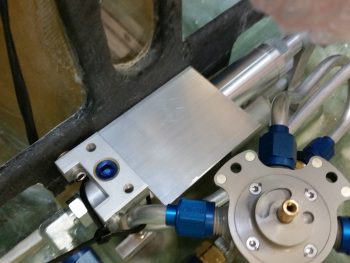
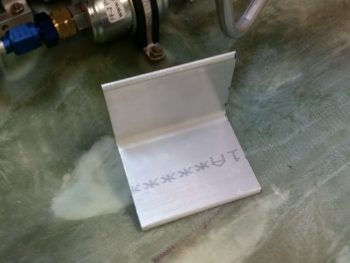
I actually did this early evening before it got too dark, but I placed it here in the blog for better topic flow. I went out to my shed and pulled out the big miter saw to cut this 2.5″ x 2.5″ x 3″ wide 6061-T6 angled aluminum bracket piece for the initial fuel selector valve bracket. This bracket will be the base for the “S” curve bracket that will attach to it. In turn, the “S” curve bracket will be what the fuel selector valve actually mounts to. The position shown here is way low since I just have it setting there. However, the left/right position shown is pretty much spot on.
Here’s a shot of it free & clear.
Tomorrow I’ll continue to work on the thigh support fuel sump and should get the front side of the front sump wall glassed, and then actually get the front wall installed tomorrow night. Then I’ll start working on getting the 2 side walls & 1 interior rib cut out, shaped and glassed.