
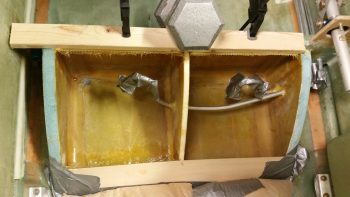
Today I started by cleaning up both sump tank sides with a bunch of sanding to remove the peel ply boogers, dead glass and cut down the ridges at the glass intersections. I also wanted to ensure the floors got a good sanding, with all the shiny spots removed in prep for the micro pour I’ll be doing on each side to cause any potential water in the tanks to flow outboard and forward to the fuel sump drain valves.
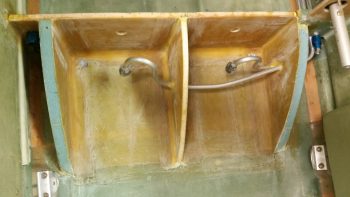
In addition, I looked around for some good material to make a dam to layup a ply of glass on the aft side of the left sump tank –starting out– then after the poured micro has cured I’ll use the in place dam for the right sump tank.
After not being able to find anything, I went to the usual aviation departments at the various stores. Finally, at Michael’s (arts & crafts) I found some balsa wood that was thin, flexible but strong enough to keep its shape. So I bought it, came home and resumed my build task after my multi-hour mini quest.
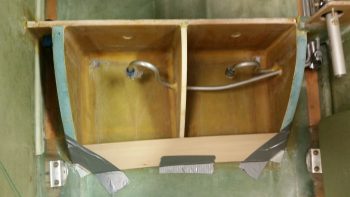
I then prepped the balsa wood by notching each aft corner so that it’d fit in place, then I taped up the front side with clear packing tape. I then attached a piece of 3″ wide peel ply across the front by taping it at each end.
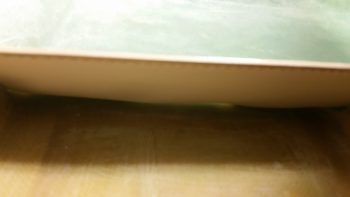
Here’s a not-so-great shot of the peel ply, which you can just make out the edge of at the top of the dam.
I then finished securing the dam with tape, and one small finish nail in the center. I also placed a couple of sandbags pressing against the aft side of the dam to keep it nice and tight against the aft edges of the sump walls. The middle rib dips forward just a bit which is fine because I actual wanted a bit of a dished shape for a better seat contour. But really, it’s not much at all. [Also note: the dam looks really askew in these pics, but it must be the camera angle because the sump sides are not different lengths as it looks to be portrayed in these pics].

I then mixed up a bunch of micro and stuffed it down in the corners along the intersection of the dam and the sump floor. I then laid up 1 ply of BID onto the floor and dam front face (leaning forward) and also overlapping a bit onto the sidewalls. I then let the layup alone to cure for a few hours before pouring in the micro floor contour. Again, I am only laying up one side at a time to allow each layup to cure a bit before pouring in the micro, thus alleviating having to peel ply one side since I need to jack up the plane in a certain configuration for the floor to be “level” and cure to provide a correct flow.
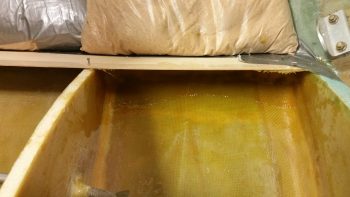
I also cut to length and then taped up the bottom side of a 1.5″ wide Aircraft Spruce shipping board with clear packing tape before mounting it on the front top edge of the sump, overhanging aft over each sump tank an inch from the front sump wall. After creating a micro fillet in the front top corner, I then laid up 2 plies of BID on the underside of the board overlapping onto the top aft of the front wall, and a little bit onto each sidewall. This 1″ overhang will create a “top cap” that will give me more area to flox the sump top on before glassing the outside of it to the external sides of the sump.
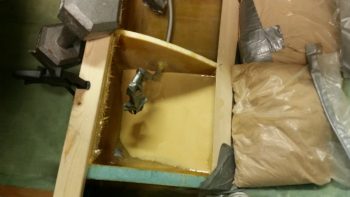
I then went to dinner with a buddy of mine, and upon returning –at the 4 hour cure mark– I placed a 4×4 under the left wheel and one under the front wheel as well. I then whipped up some E-Z Poxy and made some wet, just soupy, micro. I needed 2 batches to get the micro right and I had to adjust the elevation of both the front and left side of the aircraft to get the micro to spread out towards and up to the fuel drain valve.
I have to say pouring in the micro soup was a bit of a compromise. I used as much micro as I could to lighten up the epoxy in the micro pour, but it took a fair amount. I did’t originally shape the floor for water runoff aggressively at the beginning since I wanted A) the floor to have some depth to it to allow the installation of the fuel drain valves up deeper into the belly skin, and B) I needed to be careful around the outboard sides of the cutout floor foam because the embedded brake lines were very close to the outboard edges of the newly created fuel sump floor.
The consequence of all this is that I estimate I lost about a third of a gallon in volume tonight by pouring this micro in place, leaving me with about 1 gallon in this sump tank. Obviously, this leaves me with an estimated 2 gallons total in the sump tanks if this plays out the same on the right side. I will of course have to confirm the actual capacity of each sump tank after I get them built.
Tomorrow will be a light build day, but I do plan on getting the right side dam layup done, and the subsequent micro floor contouring poured into place so I can hit the ground running on Monday.