
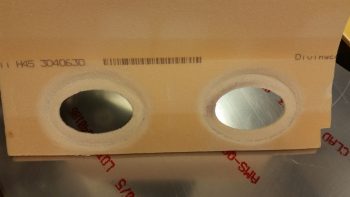
Today I started off by sanding the internal foam edges around each sump tank access port hole. Since the sump top is angled and slopes down almost immediately from the front sump wall, I want to get the sump access port covers configured so that they are as level & parallel with the aircraft’s waterline (0°) as possible. To do this means that the foam around each opening is actually shaped so that on the top side (remember, I was working on the bottom side of the sump top foam piece) the foam is low on the forward side of each opening and as high as possible in the back.
To prep the inside foam for glass, I simply reversed what will be seen on the top with the front side getting a slight depression –in preparation for the 0.040″ thick nutplate ring– and the aft side getting a much deeper depression, when inverted, meaning that it will place the nutplate ring nose side low and tail side high. Exactly what needs to happen to get the access port cover as level as possible. I spent well over 1.5 hours sanding & shaping the foam around each opening (and my aching shoulder can confirm that it was that long!).
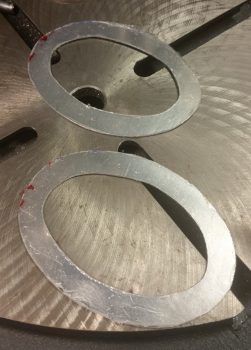
Since I’m meeting friends early this evening for dinner, I wanted to ensure I got all the noisy stuff for today’s build out of the way as early as possible. I loaded up a new bit on my Saber saw and cut out the 2 nutplate rings out of 0.040″ 2024 aluminum. I then spent a good 5-10 minutes on each one cleaning up the inner & outer edges with a file. Of course cutting them with a Saber saw meant they didn’t come out perfect, but they certainly meet my requirements and will do the job fine.
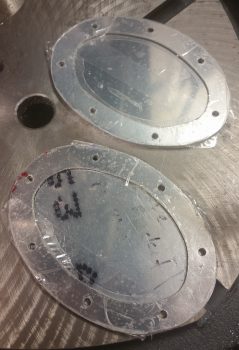
I then matched each ring up with a port cover plate as best they aligned and then taped them together with clear packing tape.

I then used my paper template and marked the 7 screw holes on each ring. I then drilled out the screw holes to attain a spot-on alignment between each nutplate ring and cover. To ensure I didn’t get the cover plates or sides mixed up, I used a scribe to place a small “A” on one set, both cover and ring, and a “B” on the other.
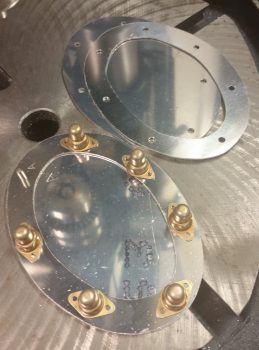
I then pulled the protective film off all the aluminum, set up a screw to show the alignment between cover & ring, and then set a number of the covered nutplates in their positions to provide a general idea of how these pieces work & go together.
Tomorrow I’ll Alodine these aluminum pieces and glass the internal side of the sump top cover. I’ll then rivet all the nutplates to the sump access port cover rings. Since E-Z Poxy needs a good cure, I won’t really get to glassing the sump top in place until either Sunday night or Monday.