
I started off today making a quick plan for wiring up the instrument panel. To be clear, the instrument panel is mocked up, but the wiring I’m doing now is the real deal… always subject to some upgrades (read: changes!).
The plan was to get the TruTrak ADI and MGL clock rewired since I pulled them off the P6 PQD connector and am now running all the wires from point A to point B, as I noted in yesterday’s blog. I did get them rewired, but not without the requisite issues along the way. Nonetheless, in the end they are wired & labeled correctly. So, check one!
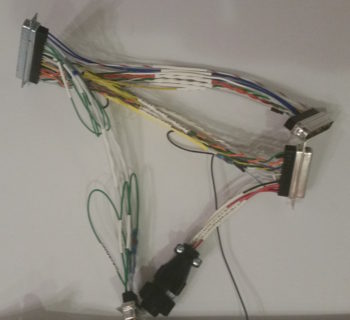
My next task was to get the wiring harness for the HXr EFIS built, which is made up of wiring leads of the 3 HXr connectors: A, B & C being consolidated into one 37-pin D-Sub connector which makes up side B of the J4 connector. Again, as I noted yesterday, since I’m a hair short on connector positions, I pressed a 4-pin AMP CPC connector into service to handle the HXr’s primary, secondary and tertiary power wires along with the single ground wire.
In the pic below, J4B is at the top left. Then clockwise are HXr B, HXr A, P7B and HXr C connectors. HXr A and HXr B have a smattering of different types of connections, while P7 –again- is only for power and HXr C is all ARINC 429. In addition, as you can see I didn’t just get the wires cross-connected, but all labeled as well. Finally, any wire loops you may see are the loopback grounds for the shielded wiring.
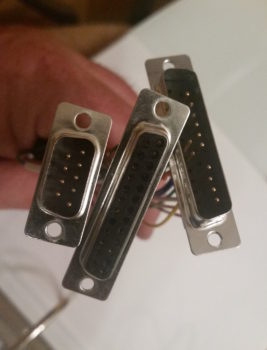
The 3 HXr EFIS connectors, in their final, populated state (l to r) HXr C, HXr A, HXr B.
I then did a test fit of the HXr wiring harness. Below is a top-down shot. Yes, it is REALLY tight, but it all seems to fit so far.
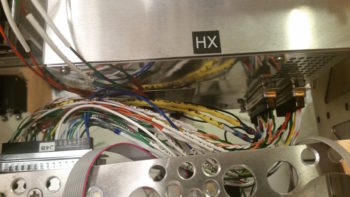
And a shot of the 3 HXr connectors . . . installed.

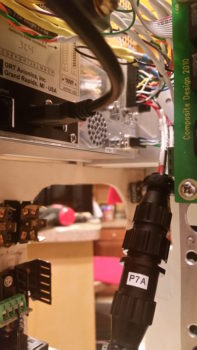
And a shot of P7 connected as well.
Tomorrow I’ll continue to work on the panel with the goal to get the front (Triparagon) sides of the J4 (HXr) & J3 (Mini-X) connectors wired up, as well as the last big bubba left: the GNS480 GPS unit [the Trio autopilot will be a big task as well, but it came with a populated D-Sub wiring harness, so labeling the wires and terminating them with connectors will be the time-consuming part on the autopilot].