Remember, the oil heat system is listed in Chapter 22.
Today I started out by actually finishing up my blog that I was too tired to do last night.
I then sat down and went over some info my buddy Dave Berenholtz had sent me on oil heating, reread Nick Ugolini’s write-up in the latest CSA newsletter, and then proceeded to finalize my oil heat and fresh air intake ductwork plan.
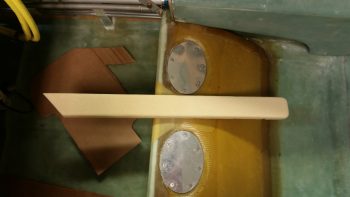
I then went out to my shed, pulled out the table saw and ripped some urethane foam in 3/4″ wide pieces. With the thickness of the foam being 2″ (I didn’t forget this time!), that makes for the perfect form –according to Nick U.– for making homemade fiberglass heat & air ducting. According to Nick this glass ducting weighs about 25% of the equivalent length of 1.5″ round SCAT duct tubing.
I then cut each foam piece to length and radiused the outer corners.
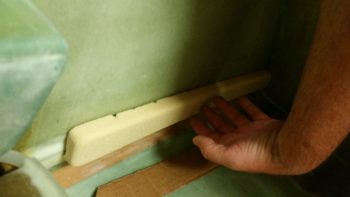
For the piece running horizontally over the antenna cable channel conduit I had to create a trough along the entire length of the back side of the foam form.
I then taped the urethane foam form in place and marked the centerline. Marking the centerline is a fairly important thing not to forget since it allows perfect alignment with the CL of the prepregged glass as it’s laid up.
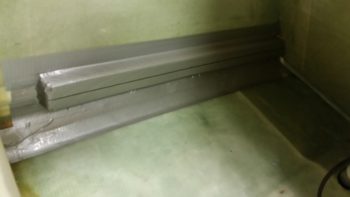
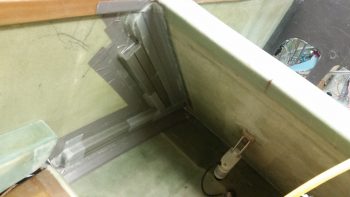
I then cut the main air feed foam form to shape and length to run from the air inlet that I just drilled last night down to the lower corner to intersect the horizontal duct form that I just taped into place. I then taped the main air feed duct foam form in place as well.
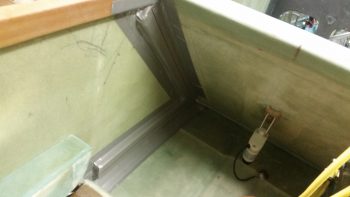
I didn’t get a pic of the last duct piece before I glassed it all, because it actually got mounted after the main air feed duct UNI glass was laid up to provide a dividing wall between the two ducts via the aft wall of the main air feed.
I then glassed the parallel duct aft of the main feed and overlapped the glass onto the main feed top to created two channels with a dividing wall. The glass at the bottom edge of both of these leaning vertical upright feeds overlapped onto the bottom horizontal duct, so that when I glassed the bottom duct form it simply created one big layup with the 3 ducts all tied together. In fact, these ducts will be very close to final configuration without much cutting or major work needed for the airflow to get to where it needs to . . . pretty cool, eh?!
Another cool thing about the layups for these ducts is that I did them ALL with leftover “trash” glass by using overlapping plies of UNI to create a 2-ply prepregged setup with each ply of UNI biased at around 30°-45° in opposite directions.
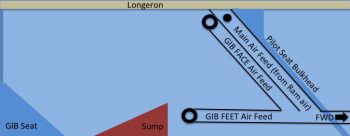
I’m calling this Phase 1 of the ductwork glassing & installation. Here’s a diagram showing the ducts I glassed tonight:
And here are the remaining phases (a loose guideline of how this install will flow . . . I won’t necessarily be strictly adhering to it):
- Phase II – Heat exchanger glassing
- Phase III – Ductwork interface holes drilled and valves built
- Phase IV – Ductwork installed with heat exchanger and valves in place
- Phase V – Oil pump installed & oil lines run
- Phase VI – Pilot seat area ductwork constructed and installed
- Phase VII – Instrument panel forward ductwork constructed and installed
- Phase VIII – Valve cables terminated and handles installed
Obviously I didn’t get to the left GIB armrest forward bracket, although I did spend a good 20 min today locating my 39/64″ drill bit to create the PTT button installation hole! Tomorrow I plan on glassing the left GIB armrest forward bracket and should have it finished no later than Monday. In addition, I plan on glassing the oil heat exchanger as well in prep for mounting it over (eg inboard) of the Phase I ductwork I did tonight.
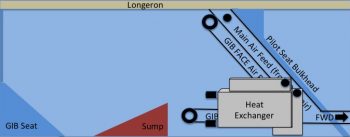
Here’s a general idea of how the heat exchanger box will tie into the ductwork that I glassed tonight:
It may a bit difficult to follow in diagram form, but after it’s glassed and installed it should become much clearer on how it all operates.

