
Today was a bit heavy on research and planning… which I grabbed breakfast down the street and did a fair bit of that there.
At the risk of sounding like I’m obsessively repeating myself, my attempt over the next few days is to knock out some of the smaller tasks that are just that: smaller tasks now, much more difficult tasks later. It may seem like I’m nibbling around the edges of the pie vs just jumping in and scarfing down the good stuff in the center (it does quite often to me!!) but I think –again– knocking out the small, easy stuff while it’s small, easy and ACCESSIBLE is a much better way to go in the long run.
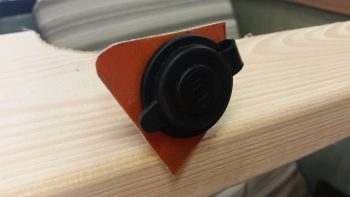
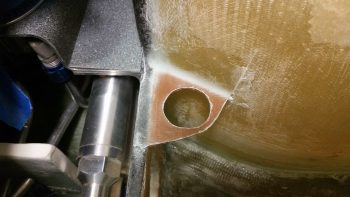
Case in point is the USB charger bracket that is the twin of the left side nose wheel cover cigarette lighter charger. My front seat USB charger will be located at the intersection of the nose wheel cover (NB) and the lower instrument panel’s center strut, on the right side… about as close the gear viewing window as you can get. As I see it, this is otherwise dead space so a good corner spot to stuff something into. And back to my original point, I can’t imagine trying to construct this somewhat innocuous little bracket in place with the top nose panels constructed.
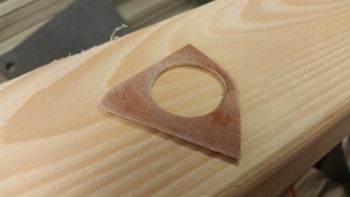
I spent well over 2 hours on this USB bracket today, starting off with a good 45 minutes of trial and error measuring, test fits, mockups and tweaking to get the final USB charger’s bracket –which is a tad bit bigger than the cigarette lighter charger’s bracket– cut and drilled to the right shape and dimensions. As you can see, the USB charger bracket was cut out of my 1/16″ phenolic stock.
I then sanded down the 1/16″ USB charger bracket to prep its surfaces for glass.
I then 5 min glued it in its place at the aft corner intersection of NB and the lower instrument panel cross piece.
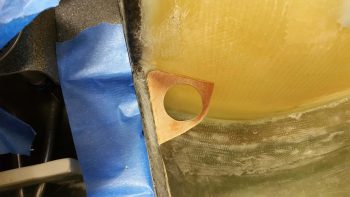
I then prepregged and laid up 2-plies of glass top (I used scrap glass, so 1 ply BID over 1 ply UNI) and 1 ply of BID on the bottom side. I used small flocro fillets for the corners, heavier on the flox. I then peel plied the top side layup.
I then went out to dinner with my buddy Rob for a couple of hours while the glass cured. When I returned I pulled the peel ply, knife trimmed the layup and then sanded the rough edges to clean it up.
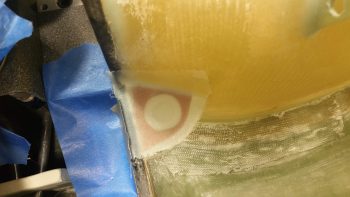
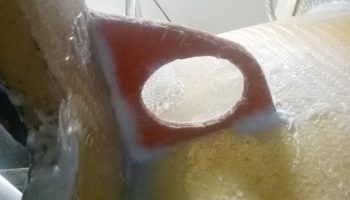
Here’s a shot of the lower layup… this is the first I’ve had eyes on this bottom layup since I did it all by feel the when I laid it up initially. I intentionally drove the fillet away from the spot where the mounting hole is closest to the NB side to allow room for the large plastic mounting nut that secures the USB charger in place. Of course viewing this pic did identify one more spot that I needed to knife trim.
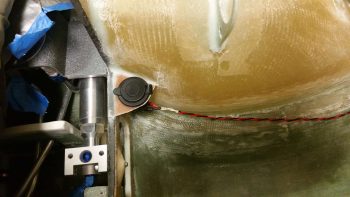
And Voila! Here’s a test fit of the USB charger . . . fits like a champ!
I don’t have any pics this time around of the next 2 items, but I spent well over an hour taping up one of the plastic aviation oil bottles I saved to create an oil storage box that will secure a quart of oil in the nose. With oil being a bit heavy I figure why store it in the spar or headrest when I can eek out a spot for it towards the very front of the plane. Plus, with a storage box with a securing lid just big enough to slide a quart bottle of oil into, I can also stuff a rag in there for use as well. This may be round 1 since it might not come out as nice as I had hoped…. we’ll see (literally since I’ll make sure I grab some pics tomorrow).
I also spent a good hour doing the initial clean up with a straight razor blade on the myriad of runs I had when I clear coated the NG30 cover. I swear it looked like the first time I had spray painted ANYTHING and had zero understanding of the whole concept of spray painting something!! IIRC it was outside at night so my pushing to get it done then just caused a bit more work for me now!
So with the USB charger bracket mounted in place, I can now press forward with my plan to insulate the nose wheel cover and secure it in place with a ply of BID. I’ll also continue with my 3-DAY BLITZ to work all things internal to the nose and avionics bay before closing up the nose.