
Late Friday I laid up 1 ply of BID across the front face plate of the GIB left armrest. I pulled the BID down through the hole in the foam recessed housing for the PTT button.
Well, when I trimmed the glass off on Saturday, unfortunately a good chunk of the foam came with it. I then needed to repair it of course. Being in a rush for a social engagement, I quickly wrapped up the PTT button in saran wrap & tape, and then set it in what remained of the hole and weighed it down. I then whipped up some flocro and –using the taped-up PTT button as a form– rebuilt the recessed housing “frame” around the PTT button.
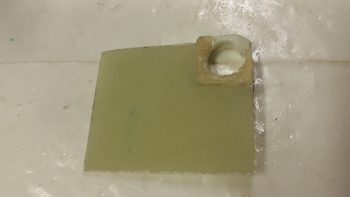
Here’s a shot of the left GIB armrest’s front face plate, with the repaired PTT button foam recessed housing.
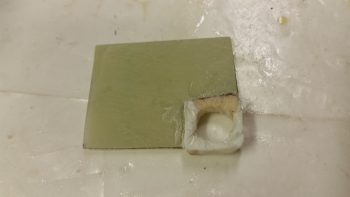
I haven’t sanded down the repaired PTT button foam recessed housing to its final shape yet, but will get to it after the July 4th holiday festivities are over. Still, here’s the aft side of the left GIB armrest’s face plate.
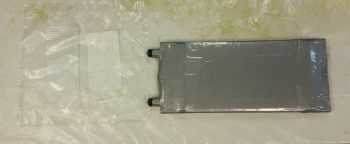
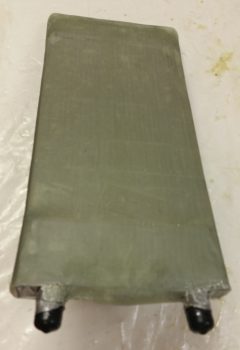
Today I focused on glassing the heat exchanger. With help from my lovely assistant (Stacey is visiting from North Carolina and helped with both the prep and the glassing of the heat exchanger… and I have to say, it was great having an extra pair of hands on this somewhat challenging layup! Thanks Stacey!) I taped on two 1/4″ thick rounded wooden runners on top and bottom (that I cut on the table saw Saturday), made some flat cardboard end caps for the U-shaped tubing on each end to make the whole cover a more even rectangular shape, and then wrapped it all in plastic. I then taped it all up, first with duct tape, then with clear packing tape.
We then cut out BID to make up a 2-ply prepreg setup for each end.
We then wet out the prepregged BID and laid up the end pieces. Then over the end pieces, we wrapped and wet out 3 individual plies of BID, one at a time around the entire middle area of the heat exchanger. The corners did give us a hassle, so on the non-AN fitting end I used a bit of micro in each corner and laid up some “corner cap” pieces of BID. I left the corners on the AN fitting side alone for now and will glass them during round 2 of enveloping the heat exchanger in glass. After laying up all the glass, we peel plied it all and let it cure as we went out to meet some other friends for dinner.
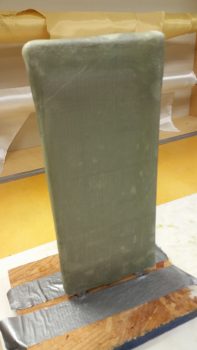
Above and below are actually shots of the glassed heat exchanger after I pulled the peel ply.
Tomorrow we’ll be celebrating July 4th, so no building is planned. I do plan on getting a fair amount knocked out starting back full steam on Thursday.