“MC” for those of you never having filed a travel voucher for an Air Force mission was always the last 2-digit code annotated and stands for “Mission Complete” . . . which is currently the status of my engine pickling endeavor.
I will note that with the big task of welding up the engine stand mounting brackets and seeing my buddy Greg off over a couple of nights really put a dent in my schedule, and put me way behind the power curve time-wise. Since I had a locked in rental on a moving trailer, and a locked in timeframe that I needed to be in NC, my back was somewhat against the wall. Still, the primary goal here for me was to get this engine pickled, and then move what I could in the allotted time I had left. I just was not going to risk any internal engine corrosion with any more time than was necessary. In short, it was time to get this engine pickled.
With having removed the engine last night from the fuselage, I then did the limited trial and error dance for getting the bottom engine stand mounting bracket mounted to the engine mount.
However, the top mounting bracket was the big dance, and it took a couple of hours to dial that baby in. The primary issue was that I forgot how the engine mount stubs –and thus the engine mount extrusions– are at a slight angle to follow the fuselage angle (this is denoted in the plans).
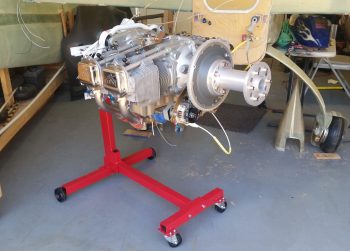
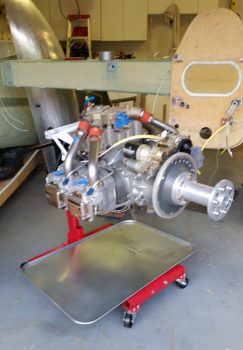
After much wailing & gnashing of teeth, a number of expletives and my new boneyard of broken drill bits (I think one side of the mount ended up so hot that it was in an annealed type state… since drilling a hole into it was like going through stainless steel) I finally got it all put together and then the engine mounted to the stand!
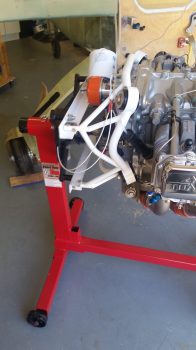
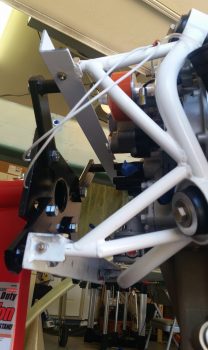
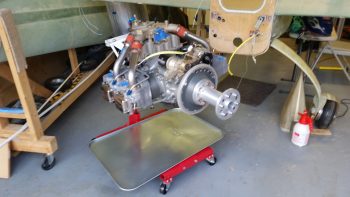
Here’s a better view of the engine mount attached to the engine stand mounting brackets.
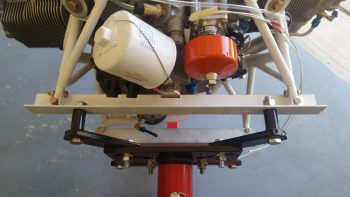
And a couple of views from the top.
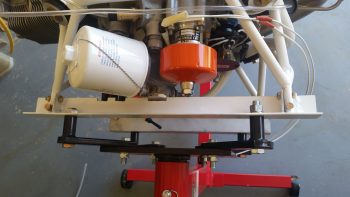
Ah, yes, and of course here we have a view more from the lower side.
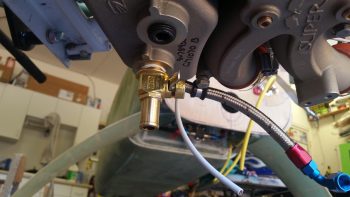
I also drilled a hole through the lip of the oil drain valve to accept a 0.041″ piece of safety wire. I then threaded the oil drain valve in place. Unfortunately I was remiss in remembering that this was a Japanese made oil drain valve, and thus metric, so my 3/4″ wrench was just a hair loose on it. When I really went to snug it up that last little bit I rounded a couple of the wrench flat corners over. I then grabbed a 19mm wrench to finish up the last little bit of snugging it up tight.
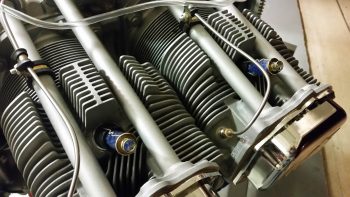
I removed the spark plug cylinder dehydrators from the bottom side of each cylinder and replaced them with standard aircraft spark plugs. I then removed the top spark plugs while I squirted preservation oil into each cylinder, and then replaced them with standard aircraft spark plugs as well.
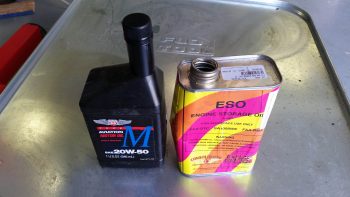
I sprayed approximately 2 oz of PolyFiber Engine Storage Oil (ESO) into each cylinder when its piston was in the down (inboard) position. I will admit that I realized as I was prepping for the pickling of the engine that an optimum solution would have been to have cover plates for both the intake and exhaust manifold ports, but I didn’t have either, and again, since I was in a time crunch I pressed forward and simply placed an oil drip pan underneath the engine for any runoff.
I will say that I shown a pen light into each cylinder with the top plug out, and what I saw on the each cylinder wall gave me a huge sense of relief. I could see the honing of each cylinder wall with bright shiny metal and NO corrosion…. which I’m very thankful for.
I then poured 3 quarts of Phillips 66 20W-50 oil into the engine, fed in the remainder of the ESO and then poured in an unused quart of Harley-Davidson 20W-50 to top it off.
With my 4+ quarts of oil in the sump, I then flipped the engine upside down and let it sit that way for a good 5+ hours as I loaded up my rented moving trailer. My goal here of course was to bath the top-mounted camshaft in a bunch of oil.
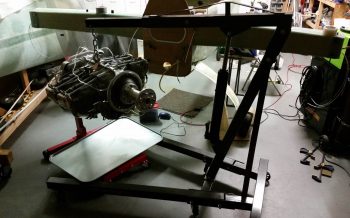
In my haste I failed to cap the oil heat return fitting so it spit out a bit of oil when I flipped the engine upside down. Beyond that little issue the engine stand seemed to work exactly as I thought it would in allowing me to wrench on the engine and also rotate it as if it were on an “engine spit.”
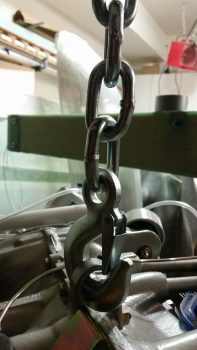
Before I left for NC I turned the engine back right side up and attached the hook of the engine hoist to the top engine lifting tab. I’ll turn the engine back upside down when I return from NC, but since I just welded up the engine stand mounting brackets I didn’t want to test my luck (just in case).
I did leave a bit of a gap between the engine hoist hook and the engine lift tab to allow me to quickly identify if any of the welds on the engine stand mounting brackets gave way while I was gone…. again, just a precaution with an expensive aircraft component.
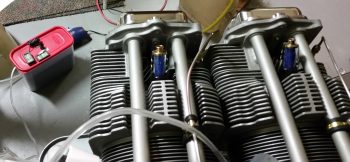
For the final push on the engine pickling, as I was working on the engine I was also concurrently baking up another batch of pink desiccant. Once it had turned blue and cooled, I then recharged all the cylinder dehydrators and the main engine dehydrator bin. I then removed the top spark plugs and replaced them with the spark plug cylinder dehydrators. Note that now the spark plugs are mounted on the bottom of each cylinder with the spark plug cylinder dehydrators on the top.
Again, I’ll be gone for a few days, and with the engine now off the fuselage and pickled for the time being, when I return I’ll be putting all my energies into building the nose and canopy to finish off the aircraft centerline build.

