
I started off today prepping some of the metal that I’ll use in constructing the mounting brackets that I’ll mount the engine & engine mount to on the engine stand (say that 3 times fast). That didn’t last very long before I had to pack all the compressor hoses back in the shop to go to a Dr’s appointment that took a good 3 hour chunk out of my day.
From there I grabbed lunch and headed to my local Village hardware store for some 1/2″ nuts & bolts for the engine mount stand brackets. My best bud Greg from my Air Force days, who I rarely get to see, stopped by shortly after I got home for a few beers in the shop as I gave him the rundown on my build progress. Greg got a new job down in the Norfolk area and will no longer be in this area as of Friday. Since I’m leaving Thursday for North Carolina for a few days, I wanted to carve out some time to spend with Greg to send him off.
As you can see, the way my day unfolded I didn’t get much done on the build.
I did remove the prop and get it packed back up and put away . . . without incident.
I then decided to get something done on the build, and since it was too late to do all the grinding and metal cutting that I needed to do for the engine stand mounting brackets, I pulled off the -4 stainless steel braided fuel hose that runs from the fuel injection servo that’s mounted on the bottom of the engine to the fuel injection fuel distribution spider on the top of the engine. I then took it upstairs and fire sleeved it.
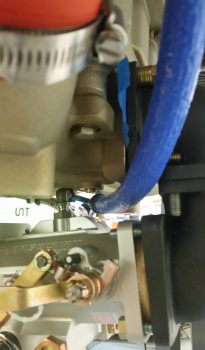
As most of you are (painfully) aware, my phone camera is just not that good at capturing pics, and since I just couldn’t get both ends of the entire hose in focus….
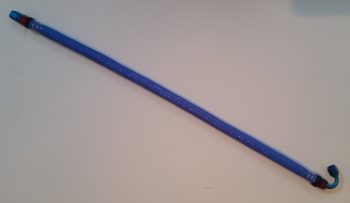
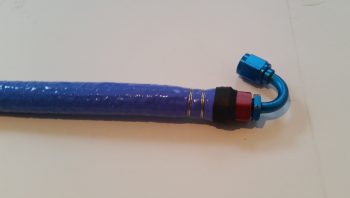
. . . I took separate pics of each end of the hose.
I have to say that the first couple of hoses I fire sleeved I used up the stainless steel wire that came in the package with the ClampTite tool. Little did I know at the time that they included 0.041″ stainless steel wire with the tool, because when I used 0.032″ wire on this hose . . . wow, it understandably went from quite the struggle to a fairly EZ endeavor wiring up the fire sleeve on this hose. Yes, the ClampTite tool is infinitely more enjoyable to work with when using smaller gage wire!
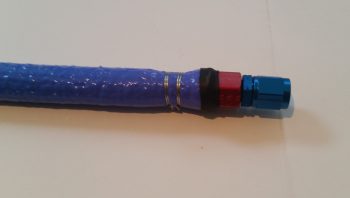
After sealing the bare hose end edges with gray 3M fire barrier Silicone RTV and covering that application with a strip of black heat shrink, I then reinstalled the hose on the engine. So here we have the freshly fire sleeved -4 hose connected to the fuel distribution spider atop the engine.
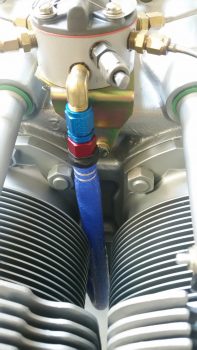
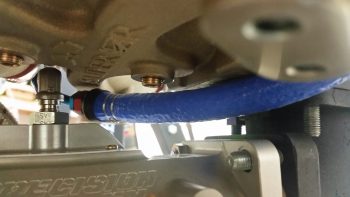
And here is the lower side of the fire sleeved -4 hose connected to the 90° outlet fitting on the top of the fuel injection servo. Since I marred the Adel Clamp drilling its mounting hole out to 5/16″ diameter the last time, I’ll make up a fresh one it comes time to do the final install of the hose.
And one more shot of the newly fire sleeved fuel distribution outlet hose coming from the top of the fuel injection servo.
Tomorrow I’ll perform my welding tasks on the mounting brackets for the engine stand, get the engine off the fuselage and onto the stand, then appropriately pickle the engine. After that I’ll roll solely into move mode to start packing up more of the house to get my stuff moved down to NC.