
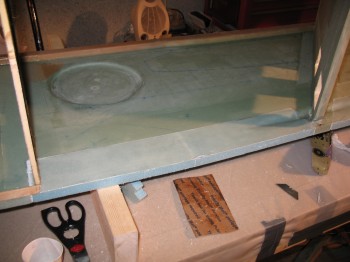
Today I trimmed and prepped the damage area at the lower left side of the fuselage. Note the line straight down from the middle of the foam insert piece: this is where the fuselage was cracked and was the first thing that I repaired. Now you can see why, since the fuselage side had to serve as a support element to keep the new insert aligned and true.
I micro’d the foam repair insert into place at the foam-to-foam junctions, but where the fuselage bulkheads are located that abut the new foam inserts, I actually used flox for more structural oomph. I actually did that on the right side as well. I just failed to mention it before.
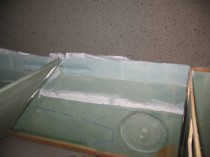

Below is the finished product as far as the foam and glass repair go for the right side. For structural integrity for an overlapping glass bond, the general rule is at least an inch of glass overlap onto existing glass will give you plenty of strength. You can see the entrance ramp channels I made at the end of the foam pieces to continue the continuity of the channel.
A couple of things that might pop out here. First of all with MGS epoxy systems it’s sometimes difficult to see in pictures that there are actually layers of fiberglass on top of the foam. Other epoxies get very opaque very quickly, and after around 2-plies the markings that may have been drawn on the foam start disappearing fast. Not so with MGS… you can see fine lines through 9-plies and often even after 15-plies! It’s just a very clear epoxy. Also of note: you may have noticed a distinct color difference between the new inserted foam repair pieces and the ‘older’ fuselage, but Aahh, it’s not the age that makes up the difference in color, it’s the switch between the MGS 335 system (greenish in color) and the new-for-me system, MGS 285 (blue in color). These colors are driven by the color of their hardeners: MGS 335 has a green hardener, whereas MGS 285 has a cobalt blue color hardener.
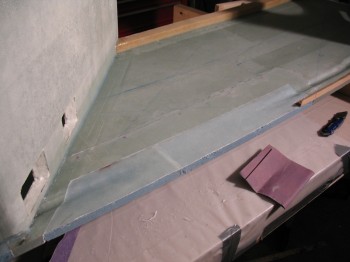
Finally, once the peel ply was removed it left a very nice surface for both the lower triangular longerons to get floxed to; any subsequent glassing that needs to be done; and a nice, barely noticeable transition between the old and new glass surfaces.
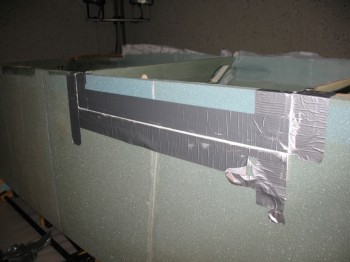
Late in the evening after the micro cured on the foam insert repair piece for the lower left fuselage, I removed the tape, and any “dead” micro and prepped the micro joint for glassing.