
Today, before I headed off to my neighbor’s Labor Day cookout, I 5-min glued the next forward section –about 5 inches– of the Matco parking brake valve control cable conduit to the bottom corner edge and side of the left NG30 plate.
I made up some micro and applied it around the Nylaflow cable conduit, and then laid up a prepregged 1.5″ x 4.5″ ply of BID over the top of that segment of Nylafow cable conduit. As with the previous layup, I peel plied both the top and bottom edges of the layup (sorry for the slightly blurry pic…)
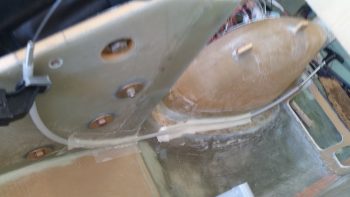
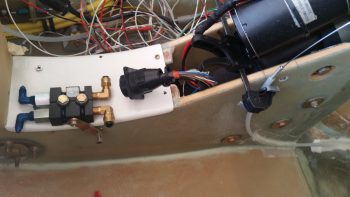
Here’s a shot showing the proximity of the conduit layup that I just did to the Matco parking brake valve. Also note that the position of the cable conduit that I just attached to the NG30 plate is the first half of what will essentially be an “S” curve in the conduit.
About 10 hours later, after the cookout, I got back in the shop to remove the peel ply off the layup, and clean it up a bit. I then confirmed where the parking brake control cable (the actual cable, not the cable conduit) Adel clamp location was required. I then attached a Clickbond hard point for the Adel clamp with 5-min glue, by using the whole assembly mocked up on the cable (not shown).
I then added a scant bit of flox around the edges of the Clickbond for transition, and then laid up 2 plies of BID over the Clickbond. I then peel plied the layup.

I needed to get the Adel clamp mounting Clickbond mounted and glassed since the next attaching of the cable conduit will overlap the 2-ply BID layup securing the Clickbond in place. Attaching the Clickbond last, after the cable conduit was attached, would have been much more difficult.
Tomorrow I’ll finalize this phase of the Parking Brake control cable conduit install. I also plan on starting back on the oil heat ductwork and GIB area.