
I started out today doing some electrical system housekeeping. I keep a listing of all my electrical system components and their 2-digit identifier code used in my wiring label scheme. Well, over the past 9 months I’ve had some major changes to some of the electrical subsystems and while I’ve kept up with the actual wiring design, the code tracking has room for improvement.
I updated my database and printed off a bunch of 2-digit ID labels and tracked down the stuff that needed labeling. I’ve also rewickered a lot of lighting circuits and some switches, so I updated those and my switch tracking diagram as well.
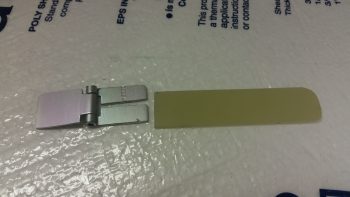
I then got on to the task at hand, finalizing the components for the PIC/GIB air distribution valve, fondly known as Valve #3. Since its construction involved mechanically putting it together, with no epoxy or stuff requiring drying times, I kicked the actual construction of it down the road until I got a gap, while stuff was curing, to do it (see end of post).
I then got into stuff that needed time to cure. As I was drifting off to sleep last night I was thinking about the wiring traversing under the pilot seat thigh support and decided to mount a couple of the smallest RivNuts I have on hand into the face of the pilot seat thigh support wedge for Adel clamp hard points. Much, much easier to do them now than later on. And these things weigh like a microgram, so any added weight would be the scant few grams of flox to hold them in place.
Along with the 2 RivNuts, I figured out the required shape of the right side end piece to cap the thigh support wedge and contain the flowing air, which, once reaching the end of the road inside the thigh support wedge duct, will make a hard left turn going forward again through SCAT tubing until reaching the glass vent assembly for my right foot.
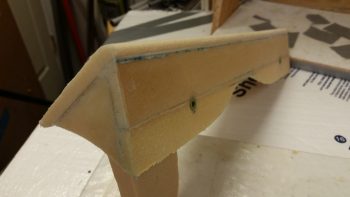
So I got to work and micro’d & glassed the small end cap foam piece in place with a ply of BID both inside and out.
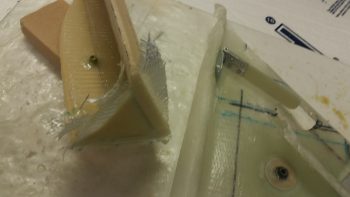
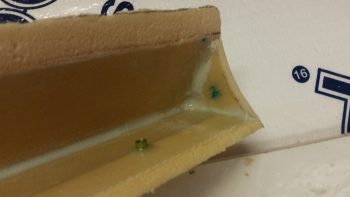
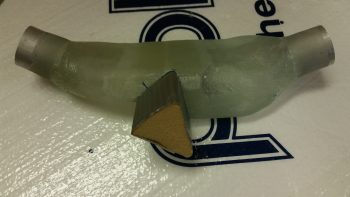
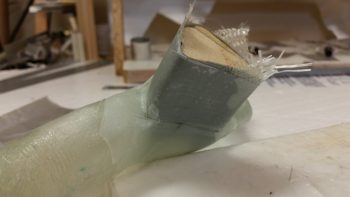
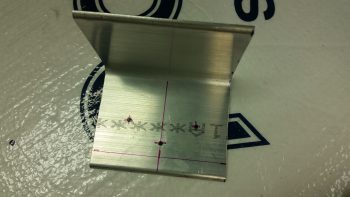
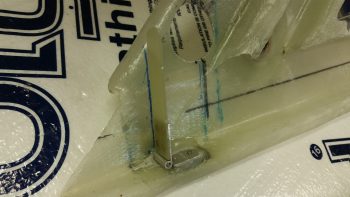
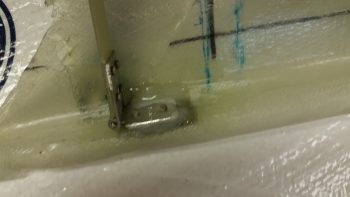
Here you can see the pilot seat thigh support wedge right end cap piece glassed in place with 1 ply of BID. You can also see the right floxed-in-place RivNut Adel clamp hardpoint and the floxed in place (only floxed at this point) Valve #3, which I drilled & riveted after I laid the wedge duct end cap piece.
Not too much longer after I finished messing about with installing valve #3 with flox into the ductwork, the wedge duct end cap piece layup was ready for razor trimming.
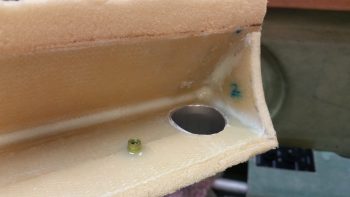
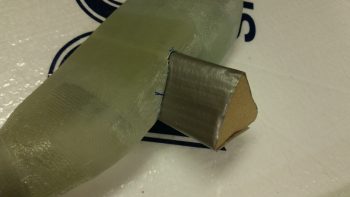
Here’s a shot of the thigh support wedge duct end cap piece on the inside.
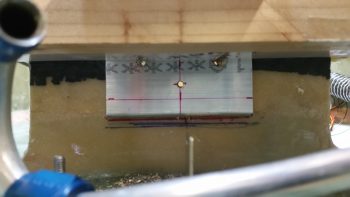
In my attempt to make things much easier in the build process I try to anticipate what next steps will have their difficulty amplified if not done sooner rather than later. Again, I really strive to get the proper sequencing down to make the build flow much smoother. Of course that’s the goal I aim at, but obviously don’t always hit my mark. However, I think I did alright in determining that with the available room afforded to me once the thigh support wedge duct was floxed/micro’d in place, drilling the 1-1/4″ diameter hole for the SCAT tubing connector was going to be tough.
That being the case, I grabbed my trusty hole saw kit and drilled this baby out.
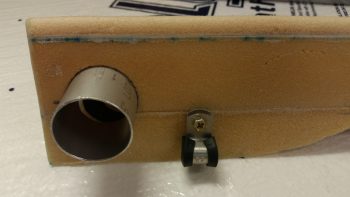
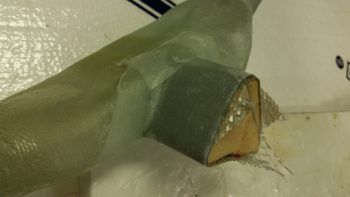
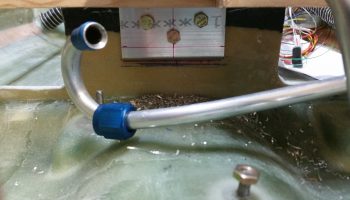
I want the connecting SCAT tubing to run as close to the fuselage floor as possible, so I angled the aluminum tubing piece downward a bit. This required that I trim it down a bit on the inside of the wedge duct if I wanted to obtain the most optimized airflow as possible.
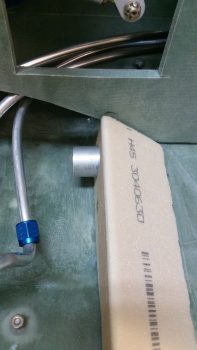
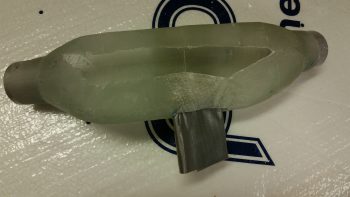
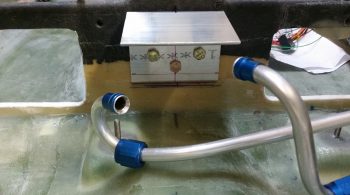
Here’s a shot from the front. I threw the Adel clamp in there to show the spacing and that the wires being secured by the Adel clamp will simply travel right underneath the duct SCAT tubing connection.
Before I mounted the pilot thigh support wedge duct I had to do 2 things: First, I needed get air flowing out of the under-armrest duct “plenum” into the cockpit-crossing wedge duct. I outlined the wedge duct’s right side end cap with tracing paper, cut it out and then transferred that to a piece of urethane foam block, and then cut out the duct shape. This was just a hair more undersized than the inside of the wedge duct to allow for general fitting and glass thickness.
I then transferred the shape onto the intersecting side of the sidewall duct plenum and cut the same-shaped hole into the duct plenum. I worked with the foam wedge & the hole cutout to the point where the foam wedge could be mounted –unmarred– into the duct plenum side hole. I then duct taped the urethane triangular foam piece.
I then tested it out by temporarily mounting both the sidewall duct plenum and the thigh support wedge duct in place. I then realized the aft side foam wedge fit fine in the wedge duct, but there was a considerably gap at the front. So I cut another piece of foam and taped it to the face of the existing protruding foam wedge form. One slight mod later and I then taped up the foam form addition and was ready for glassing.
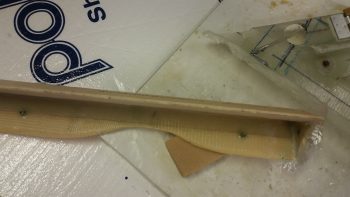
Here’s the foam form piece in place right before I glassed it with scrap BID pieces. I made the triangular form a bit longer than it needs to be to allow for trimming. This will allow it to traverse through the 3/8″ left armrest sidewall and still mate nicely into the left side wedge duct entrance.
I whipped up some MGS285 epoxy with fast hardener (FYI, my 285 fast hardener doesn’t seem to cure quite as fast my 335 hardener… maybe a hardener age issue?) and glassed the new triangular “T” section of my sidewall duct plenum.
And peel plied the layup.
For better topic flow I’m showing the below pics now, although it came after I drilled the fuel valve bracket bolt holes.
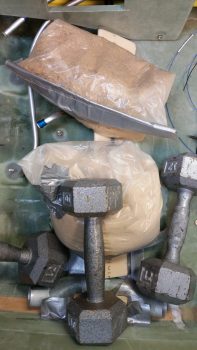
I took the “green” state cured layup assembly above and mounted it into the fuselage in the duct plenum’s final position, which in large measure was determined by the interface of the duct plenum’s triangular air duct feed into the thigh support wedge duct, which I then set in place over the glassed (and peel plied) triangular foam form. After getting the final locations dialed in, I then weighed it all down in place to replicate the final installation positioning.
I had previously taped up both the fuselage floor and the inside of the thigh support wedge duct with duct tape so that no epoxied bits would attempt to stick permanently to anything.
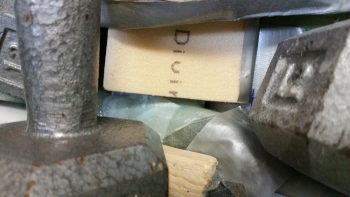
Here’s a closeup of the target intersection in my attempt to get the intersection as clean and leak free as possible, although the actual physical interface is more important at this point than possible leaks.
In reality, I let the layup above cure for a bit before doing the whole mock install thing while I drilled the fuel valve bracket bolt holes through both the fuel valve bracket and the Finnish Birch plywood hardpoint that I embedded into the base of the instrument panel –as per plans– back in 2011. BTW, this was precursor #2 that needed to be completed before I mounted the thigh support wedge duct for good, since I wouldn’t have the right drilling angle, or space to do so, with the wedge duct mounted & in the way.
After a bit of wrangling and trying out some gymnastics moves… nearly standing on my head inside the cockpit… I was able to determine the location and spacing of the 3 AN3 bolt holes that I would drill through the fuel valve bracket into the instrument panel’s wood hardpoint.
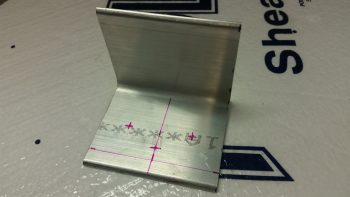
I drilled 3 small pilot holes into the fuel bracket as guides for the bigger holes. I’m using 3 bolts vs the plan’s 2 bolts since the fuel selector valve will actually sit just aft and above this bracket. Thus, technically this is the fuel selector valve bracket’s bracket. Clearly, with the type of cantilever action going on here I need as much strength as I can get.
I then spent some time dialing in the exact fuel selector valve bracket location, then took the plunge. Using my long drill bits I first started with a 1/8″ bit and drilled the holes.
I then stepped up to a 10″ long x #10 drill bit and drilled the final bolt holes through both the bracket and the panel wood hardpoint, with the resulting mess shown below.

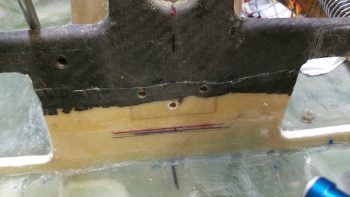
Here you can see both the 3 bolts installed and the aftermath of the drilling operation.
And just another shot of the temporarily installed AN3 bolts, with the area cleaned up.
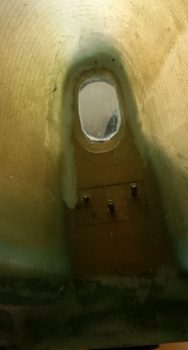
Finally, here’s a shot of the 3 fuel selector valve bracket’s AN3 bolts poking through into the nose wheel well. The bolt on the left looks like it’s angled down a bit, but that’s just an optical illusion since it’s shorter than the other bolts.
I then removed the 3 bolts and took a small bit of leftover epoxy I had on hand, mixed it with some alcohol, and treated these wood holes and most of the other ones I could find on the fuselage. Treating the wood holes with alcohol-thinned epoxy allows the wood to absorb the epoxy and coats it so that any moisture is minimized and your bolts don’t rust inside the wood holes (this action kept me from finalizing the riveting of K1000-3 nutplates to the fuel valve bracket since one hole had been pushed slightly out of round by the wood piece I had clamped in place to secure the fuel valve bracket . . . since these holes were still wet).
With my valve #3 having sat on the sidelines for quite a number of hours, allowing for the flox to cure, I then drilled 2 holes up through the duct reinforcement plate & extra plies of reinforcement glass, into the floxed valve attach plate.
As a point of note, valve #3’s position below would have ALL the air flowing forward to the pilot.
I then riveted –in not so pretty fashion– 2 round head rivets to secure valve #3 in place.
Again, below I placed valve #3 in the position showing its configuration with all the air flowing back to the GIB vents.
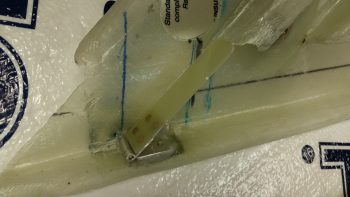
Here’s a closer shot of the rivets & flox securing valve #3, the PIC/GIB air distribution valve, in place.
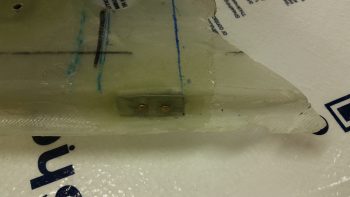
And a shot of the 2 rivets from the underside and external duct view.
Tomorrow I plan on pressing forward . . . so stay tuned folks!