
My goal today was to get the GIB low air eyeball vent base glassed up, which I’m happy to report I was able to accomplish.
I started out today by marking the aft end of the horizontal duct (which is upside down in the pic below, and subsequent pics . . . just think of it as how you would you view it when looking into the GIB area from the left side of the plane down) with a 1-3/4″ diameter circle to drill it out with the same diameter hole saw.
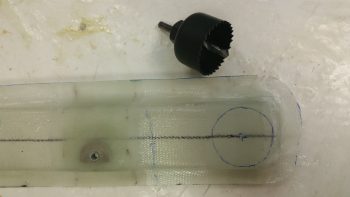
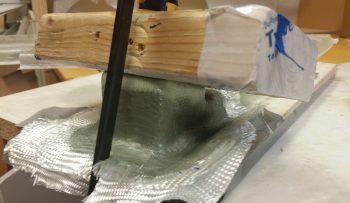
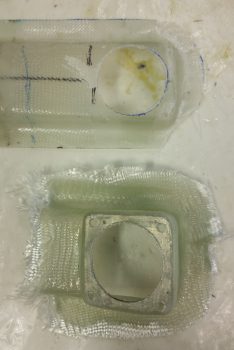
I forgot to take a pic of the hole after I drilled it out, but it came out fine. I then measured out, cut and shaped a piece of urethane foam for the base of the eyeball vent. I then taped up the foam and surrounding duct to create a form for the lower GIB eyeball vent base. As you can see, the base is angled towards the front of the plane in order to warm up the feet area of the GIB.
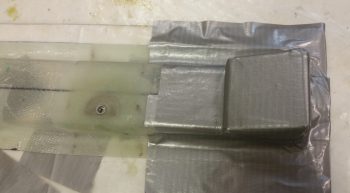

I then drilled a 1-3/4″ hole in my German 0.5mm aluminum sheet and then cut out a 2.1″ x 2.1″ piece centered on the hole. This aluminum piece will serve as reinforcement for the eyeball vent assembly. I then sanded the aluminum reinforcement piece to texture it for a better grip with the epoxy & flox.
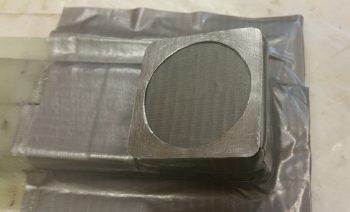
I then laid up 1 ply of BID over the taped form before wet-floxing on the aluminum reinforcement piece. I then laid up 2 more plies of BID over the aluminum reinforcement piece and the first ply of BID.
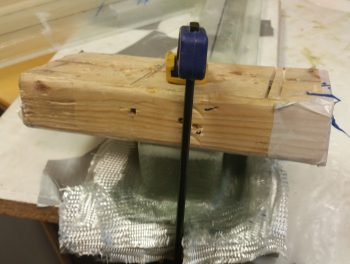
This was a bit of a complex layup with all the angles, so to keep the top flat I weighed it down with a taped 2×4, and then lightly clamped that in place as well.
I worked on the heat exchanger top duct butterfly valve plate that I cut out of 2024 aluminum (sorry, no pics) and after a bit of filing it down I finally got it to fit in both the upper inlet duct & the notched flat on the 1/4″ butterfly valve rod. However, when I went to drill the holes through both the butterfly valve plate and the rod, I realized after about a half hour of drilling into the rod that my stainless steel bit was not, in fact, working well.
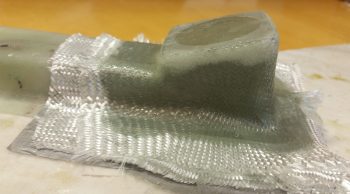
By the time I got done unsuccessfully messing around with drilling the butterfly valve rod, the glassed eyeball vent base was cured. I pulled the weighted board off the top.

And then redrilled the 1-3/4″ hole for the eyeball vent.
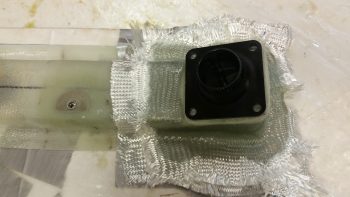
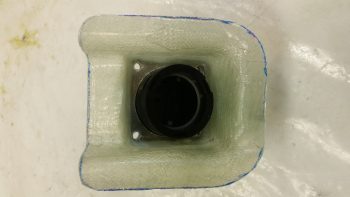
I then set the eyeball vent in place in the freshly glassed base.
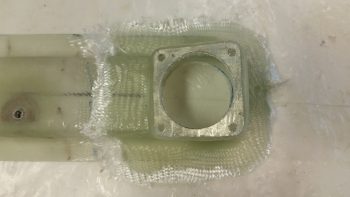
As you can see below, I used the eyeball vent assembly as a guide to drill out the 4 corner mounting holes into the glass and reinforcement layer of aluminum on the vent base. I then cleaned out the foam inside that made up the form and gave the cured layup a quick trim.
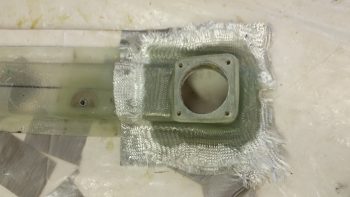
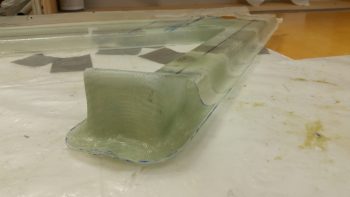
And then pulled the eyeball vent base off of the end of the horizontal duct.
I then quickly checked the fit by placing it back on the duct without the tape. It fit fine.
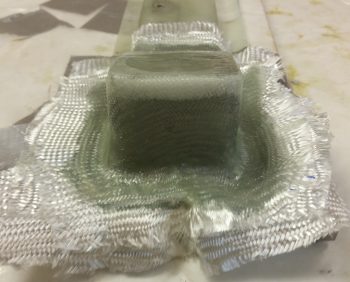
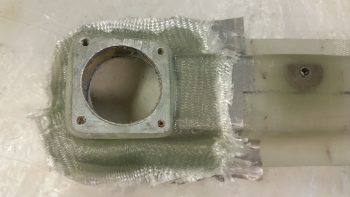
I also marked the raw eyeball vent base for trimming.
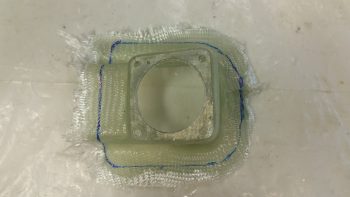
And trimmed ‘er up with the Fein saw. I then set the vent base back on the duct.
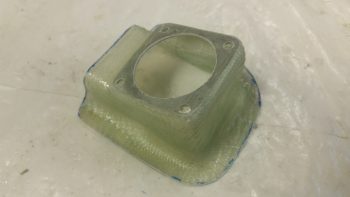

Here’s another shot of the vent base placed onto the duct.
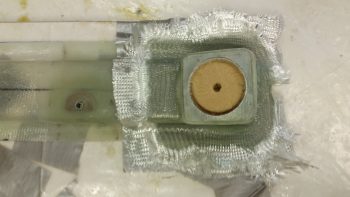
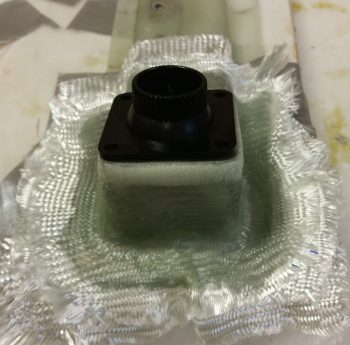
I then mocked up the eyeball vent.

Here’s a shot showing the interior clearance with the eyeball vent in place.
I mounted the eyeball vent into place in the vent base using 4 screws & nuts.
I then mocked up the eyeball vent & base along with the heat exchanger mounted to the duct network. As you can see, I also terminated the fittings for the oil line hoses that run from the left front wall thigh support fuel sump bulkhead to the heat exchanger.
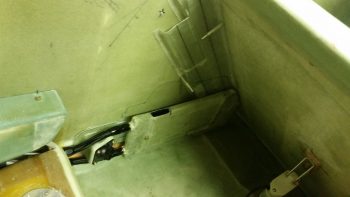
Here’s a closer shot of the GIB lower vent that I just glassed & configured tonight with the heat exchanger and oil lines in place. I will assess, and most likely move, the eyeball vent (and base) about 1/4″ to 1/2″ forward towards the heat exchanger for better clearance with the oil lines.
In addition, the actual lengths of oil line hose used was about 4″ and 4.5″ for the respective hoses. In other words, not much as far as the thinner 3/8″ lines go.

Tomorrow I’ll continue working on the oil heat system and fresh air ductworks, as well as my push to get the GIB area tasks completed before moving forward in prep for finishing the nose.