
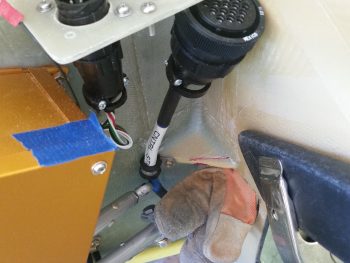
I started off today checking the clearance for both sides of the pitch trim actuator and realized that in extreme forward and aft stick situations, the elevator control tube had its motion limited by the corner panel reinforcement plate that I added. I marked the corner plate and then Dremeled out the offending area (camera side of the magenta line).
As you can see, before actually starting I wedged a leather glove in place above the control tube to keep from inadvertently nicking it with the Dremel. Before I did any cutting, I also taped a spare piece of small angled aluminum to the blue control stick cable to protect it as well. Of course, I forgot to get an after pic, but it’s pretty much a shot of everything from the magenta line out simple not being there.
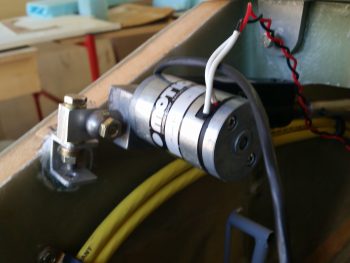
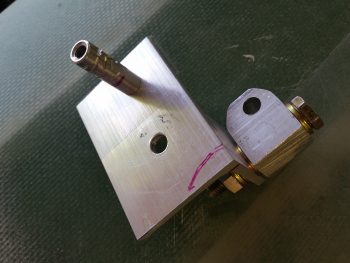
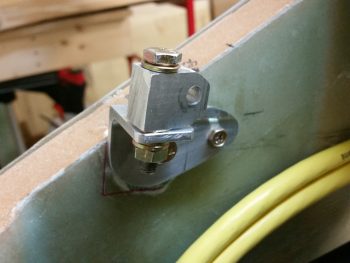
So here’s a shot of the first significant mod of the pitch trim actuator bracket, which I’m calling “Mod 2”. Note that I pulled the swivel bracket from between the sides of the U-channel bracket and mounted it up top. This really got the pitch trim arm up where I wanted it, at a line above the big yellow power cables. Also, I did play around some with the bolt hole positions before moving on to “Mod 3”.
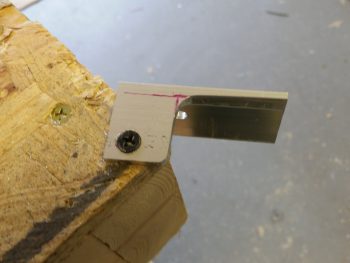
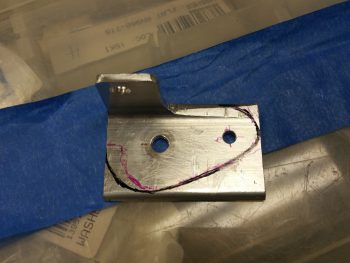
For Mod 3, I redesigned a whole new 1/8″ 2024 aluminum bracket.
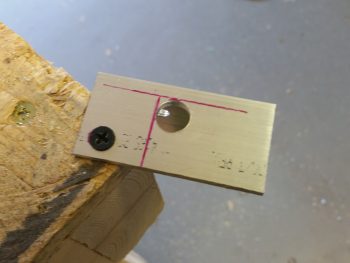
I drilled the mounting holes and then removed the area on the top plate where the actuator will fit into.
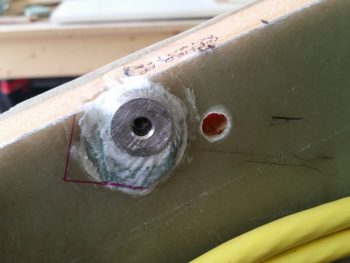
I then mocked it up and marked where a second hardpoint will go into the sidewall. This will help alleviate the stress on the front bolt from the forward and aft pushing & pulling action (which places either forward or aft twisting action on the mounting plate).
I then located and drilled the hole for the second pitch trim actuator mounting hardpoint.
After the second pitch trim mounting hardpoint was cured, I then pulled the plate and marked it up for cutting to reduce its footprint and shave off a little weight.
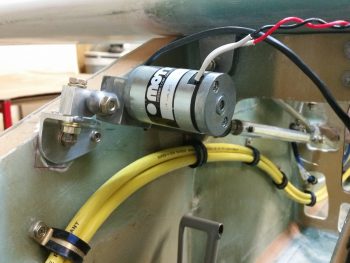
Here’s the pitch trim actuator mounting bracket reinstalled. Note the second, smaller, bolt holding the aft side of the bracket securely.
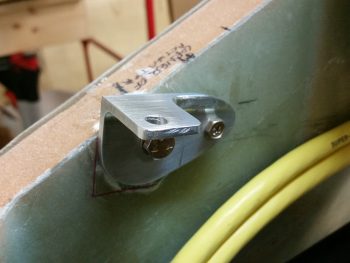
I then reattached the swivel bracket atop the sidewall mounting bracket.
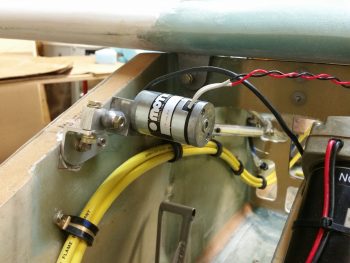
And finally, here are a couple of shots showing the installed pitch trim actuator unit.
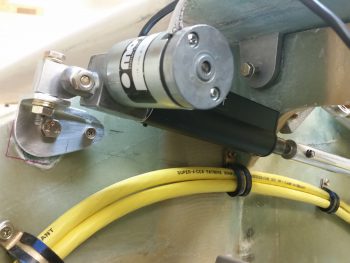
And one more shot that provides a good view of the mounting bracket assembly.
I thought this post would contain overwhelmingly good news on my pitch trim actuator installation, but it looks like more mods will be required. As you can see in the video, since the nose sides curve inward at a fairly decent rate from the instrument panel forward, then aligning the pitch trim actuator in line with the elevator control tube is simple impossible to do in a Long-EZ (it may be doable in a Cozy, I don’t know) . . . at least this Long-EZ.
So, as you’ll see in the video, after trying different ways to mount the aft end of the pitch trim actuator arm to the elevator control tube, I eventually had to settle on mounting the rod end onto the inboard side of the control tube clamp bracket that Marco made for me. Unfortunately, that created another issue:
Obviously I still have some more work to do to dial in the pitch trim unit so that it will be fully functional as designed . . . thus, the slog continues!