Chapter 25 – Primer initial sanding

I actually wet sanded the wheel pant halves and nose hatch door with 240 grit last night… here’s the pic of that work today.

This morning, before Jess and I left out for our west coast trip, I wet sanded the top of the canard 240 grit with it mounted on the bird.

And then removed the canard to wet sand the bottom side also with 240 grit.

Finally, I wet sanded the bottom cowling with 180 grit.  It will need a bit more fill here and there, thus the courser sandpaper.

I ran out of time to sand the belly RAM air scoop, so it will be my test piece to see how a multi-day cure of epoxy primer sands out on a surface.

I’ll be back at it in less than a week.

Chapter 25 – Canard in primer

I started off today by using raw West epoxy to fill the decent amount of pin holes I had in all the components I shot with epoxy primer yesterday.  My method was to fill all the holes on one side of, say, the elevator, let that cure, and then flip it to do the other side.

I’ll note that I also had a number of things to finish up in prep for the trip out west that Jess and are leaving for tomorrow.

I then grabbed some pics of my canard mounting for shooting it with primer and the upcoming painting.  I bolted hinges to the canard mounting tabs and then screwed the other half of the hinges to the ends of scrap 2×4 boards.

I then mounted the 2x4s to the top of sawhorse with the canard out away from the sawhorse enough so that it wouldn’t hit the sawhorse legs when I flipped the canard inverted for painting the bottom side.

I attached the tie-down strap last night to keep the canard secured in the upright position during its overnight cure, just in case any wind gusts kicked up.

I then removed the canard from its paint mounting contraption and took it into the shop.  Here’s the cured bottom side of the canard.  Although I know I have to refine the surface of all these primed parts, it still is motivating to see them all in one color… looking good IMO!

I then mounted the canard, which required just a tad bit of sanding on the left sidewall opening to allow the canard to slide into place.

Here’s another shot of the primered canard mounted on the bird with the aft nose/ avionics cover in place.

I did some quick checks with my canard templates and both sides are looking very good!  Here’s the topside template.

And here is the interface on the right side canard root with the nose and the aft nose avionics cover (I will close up that gap between canard top surface and nose cover opening edge).

I also did a fair bit of the initial sanding on the parts I primered, but didn’t grab any pics of those tonight… I’ll add them to tomorrow’s blog post.

Pressing forward!

Chapter 25 – Combat painting

Today was the day to get to painting, or priming actually… but I digress.

I will note that the morning and early afternoon were great weather for painting outside. Not as crazy hot as it has been over the past few months and not a cloud in the sky.

But that all change by the time I got around to actually shooting primer.  After wiping down the parts and getting the primer mixed, I of course had that ONE small group of clouds come over and drop about 10 minutes worth of light rain.  I couldn’t chance my primed parts getting rained on after I shot them, so I quickly moved everything into and under my carport.

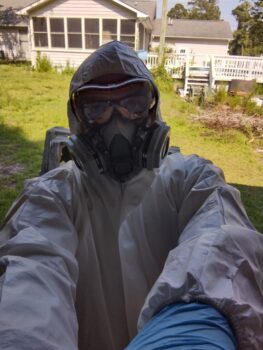
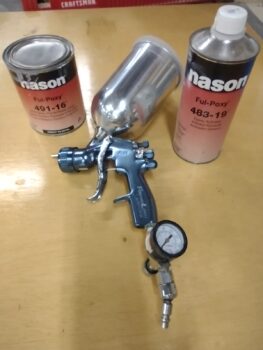
After getting into my PPE above, since I’ll be shooting nasty (for us humans) epoxy primer, I then dialed in my gun —my old DeVilbess FinishLine from my custom chopper painting project— which was the one gun I had with the largest tip for shooting this stuff (1.5mm).

I noted right off the bat that the gun pressure gauge wasn’t working as I was getting either close to 0 psi or above 60 with the slightest turn of the knob.  With my expensive epoxy primer already mixed and past its 30 minute induction period I pressed forward shooting this primer by the seat of my pants with regards to psi… and all came out quite acceptably, IMO.

By this point in the afternoon it was warmer, but I was committed and pressed forward.  Although in the mid-80s, with my painting suit on it was getting hot, and as I have had to deal with sweating all over my layups, micro and epoxy wipes these past few months, I found out quickly that I had to be careful lest I was bombing my just-primered parts with drops of sweat.  A royal PITA!

Part of this was due to the fact that shooting primer/paint on a horizontal surface is reportedly much better for avoiding the dreaded orange peel vs shooting a vertical surface.  However, moving one’s arm with sweat dripping out the sleeve over said horizontal surface is not optimal, and difficult to avoid at times given the required distance between gun and part for proper primer application.

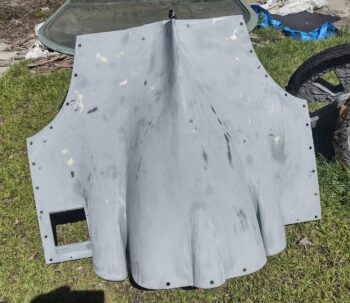
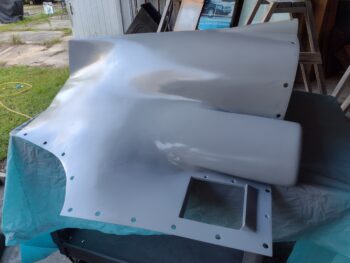
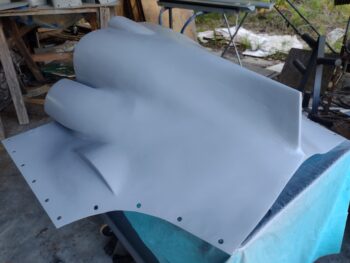
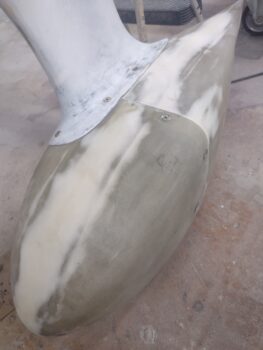
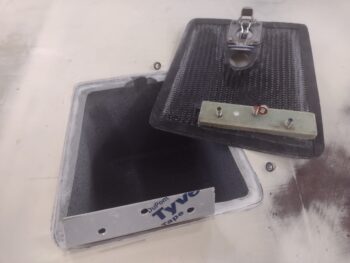
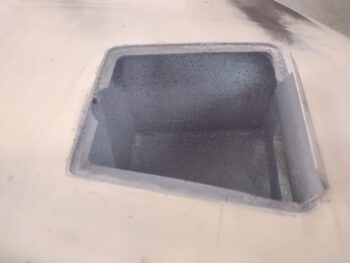
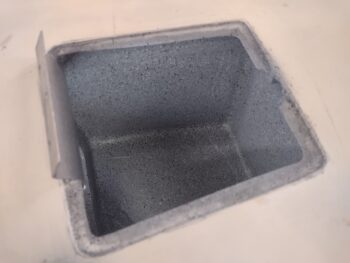
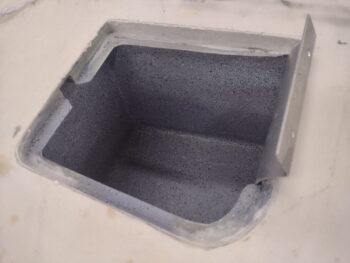
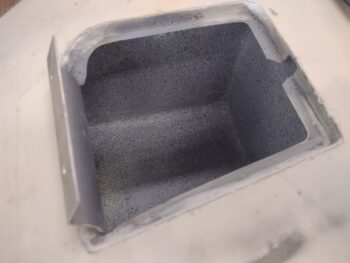
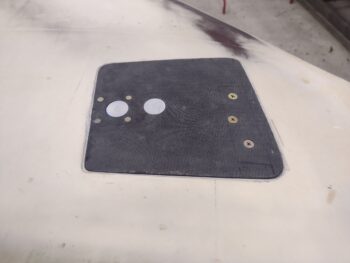
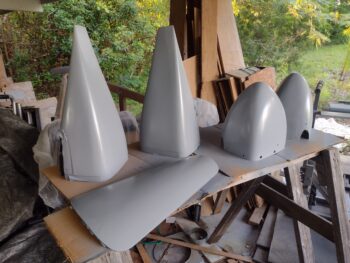
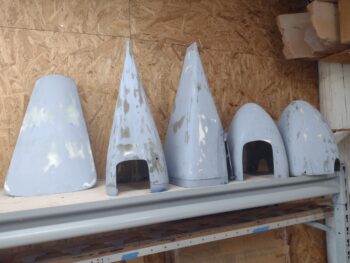
I dialed in my paint gun on a piece of cardboard and then pressed forward with my first “sacrificial” test subjects: the wheel pants.  These are smaller and can be stripped fairly quickly if the primer job is/was too egregious.  Plus, there’s rounded curves on the front wheel pants, so good test/practice on those.

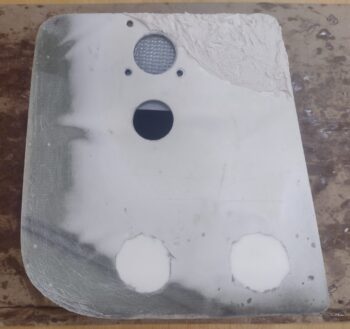
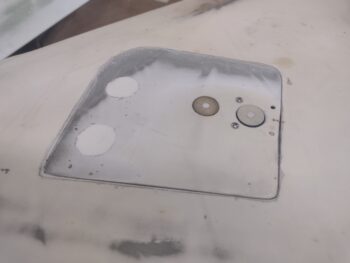
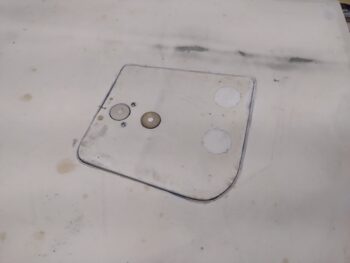
They came out pretty darn decently, if I say so myself (the nose cover hatch door shown is the LAST part I shot in this group).

However, that being said, I quickly learned that my new paint shooting goggles that I had recently ordered off Amazon were not fitting over my reading glasses as many folks in the reviews had said they did.  My glasses were fogging up quite quickly making it almost impossible to see my paint lay down, which definitely resulted in a few nasty runs on the wheel pants… so off came the goggles.

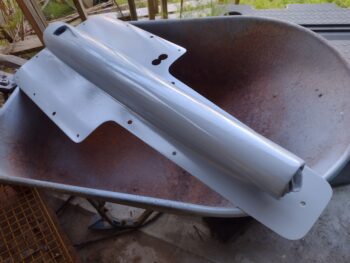
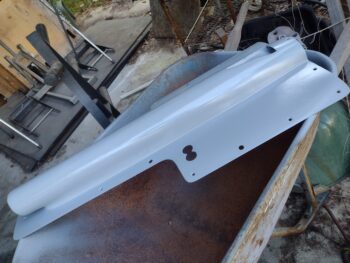
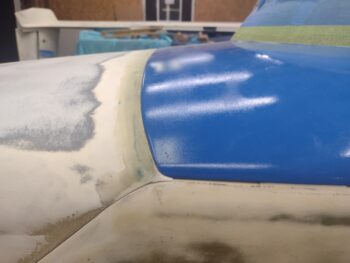
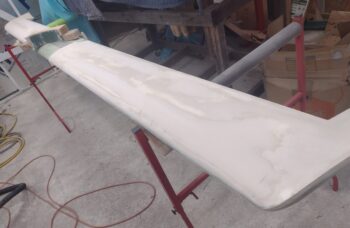
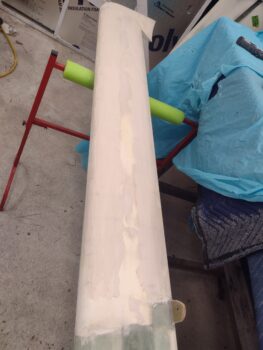
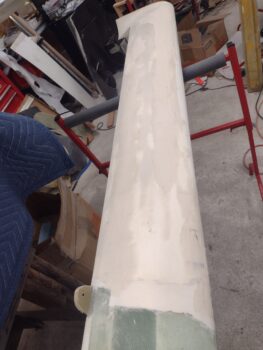
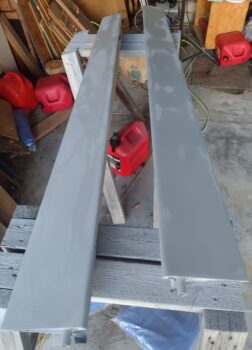
After the wheel pants, and some minor dialing in of the gun I got some pretty darn good epoxy primer flow-out on the elevators and the left rudder (right rudder still mounted on the wing).

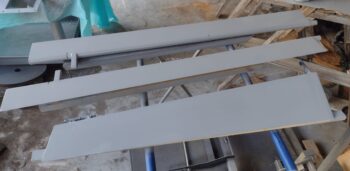
On the control surfaces: I had planned on mounting them in a fashion to allow me to flip them cleanly and as needed to primer/paint both sides.  However, due to time constraints and needing to get ‘er done (thus my “combat painting” title) I simply put them on 2x4s to keep the edges off the racks/sawhorses.  After priming one side with 2-2.5 coats of primer, I waited about an hour and a half for the primer to cure enough that I could flip them over to do the other side of the control surface.

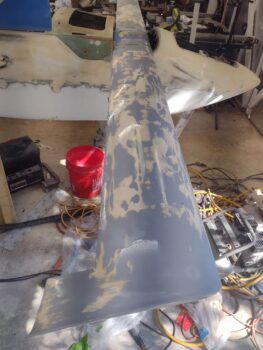
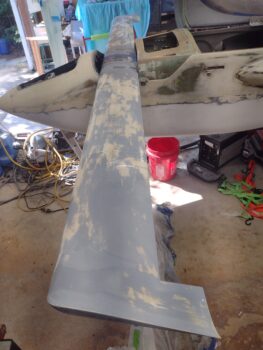
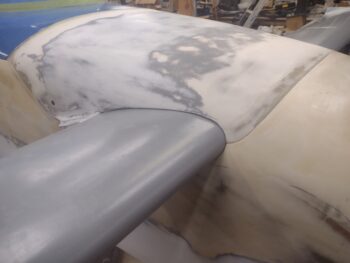
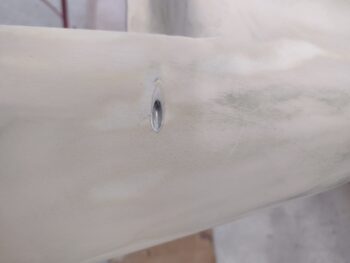
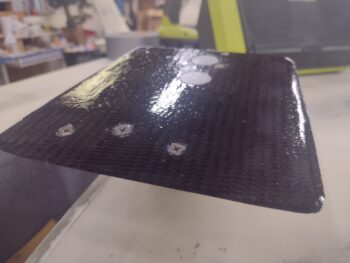
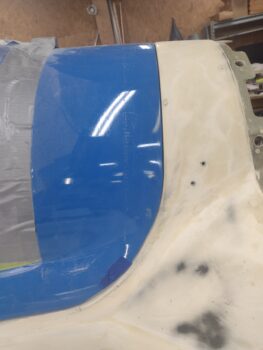
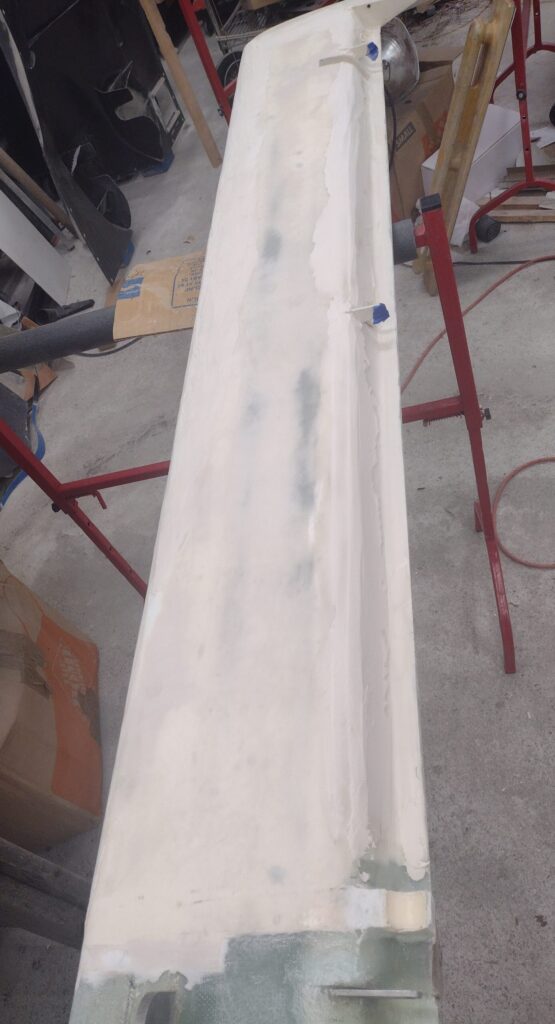
I did this method on the ailerons as well, with the bottoms showing here (top sides in primer).  Interestingly enough, the light spots are the areas that I broke through the epoxy wiped surface when final contour sanding.  I usually hit these sanded spots with another coat or two of epoxy, but there is clearly a difference.  ESPECIALLY with pinholes, where these “dryer” areas had a number of them popping up.

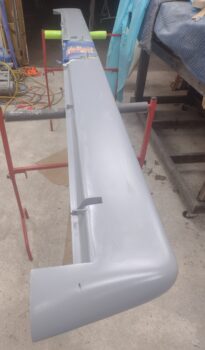
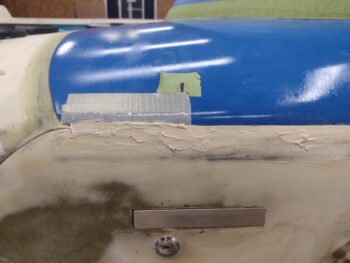
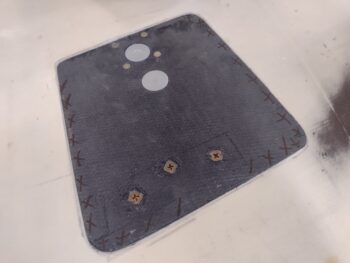
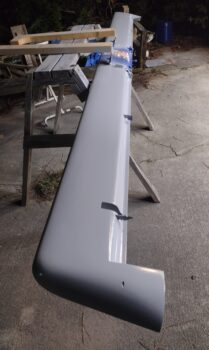
Here we have the bottom cowling, which with some extra primer in the can I shot an extra coat for 3 coats total.  As with many of my parts I decided it was it time to stop chasing my tail in the pursuit of perfection and simply get everything slathered up with primer and paint.  I’m following Nate Mullins’ technique and will “cheat” a bit by using some high build 2K primer to fill in a number of divots and low spots on these parts… the bottom cowling being a prime (pardon the pun!) candidate for such devious, surreptitious painting activities!

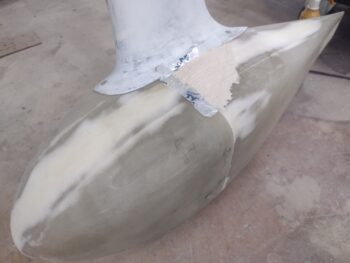
And another such part that falls into the “fix it by painting it” method: the belly RAM air scoop.  Although an argument can be said that these parts’ appearance are vastly improved by simply being a single color!

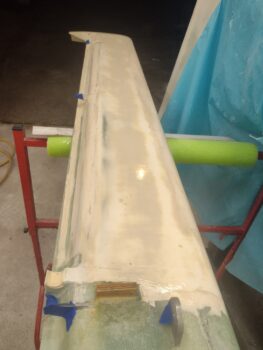
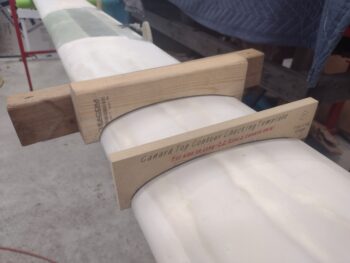
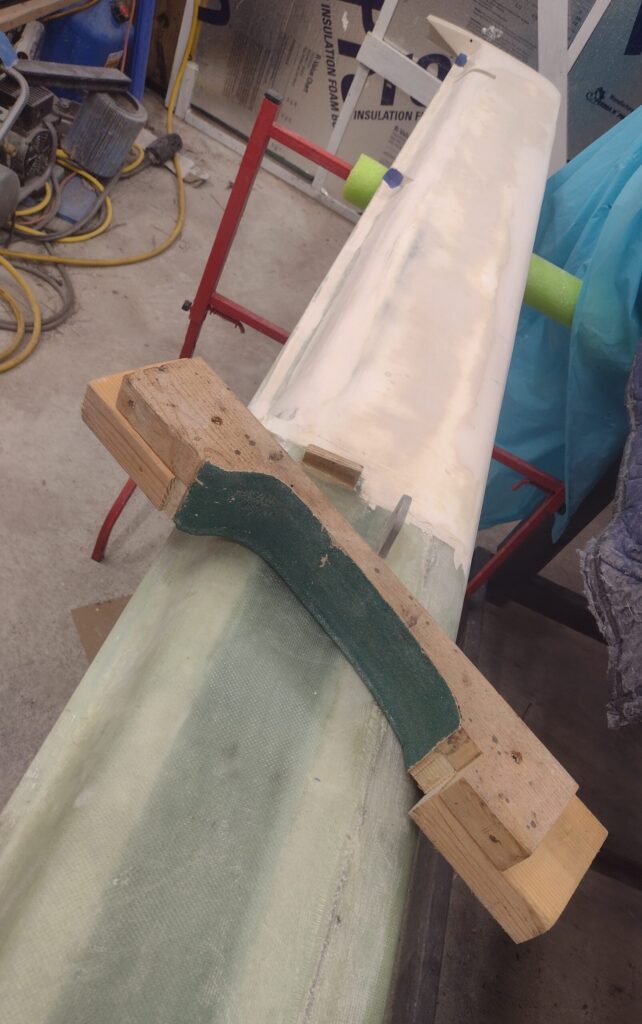
With the other parts curing after getting shot in primer (24 hours before sanding), I then spent a couple of hours doing the final sanding on the canard.

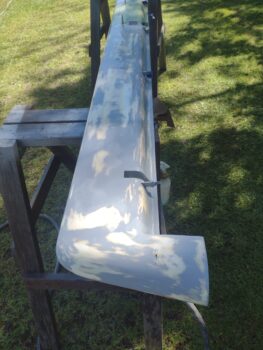
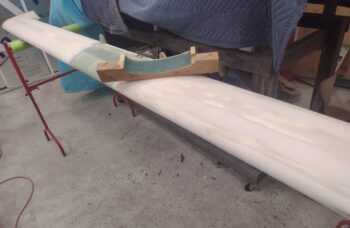
To avoid the “dry spots” that I was getting on the ailerons (and other components) I did a single coat epoxy rub on the entire top of the canard (who cares about the bottom, right?! ha).  After that cured and a quick sanding, I then mounted the canard just outside the shop on a sawhorse that allowed me to flip the canard upright and inverted to shoot both sides with primer.

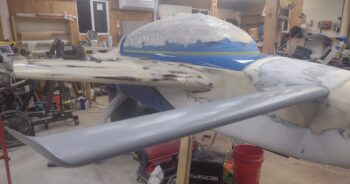
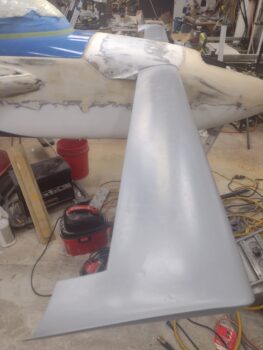
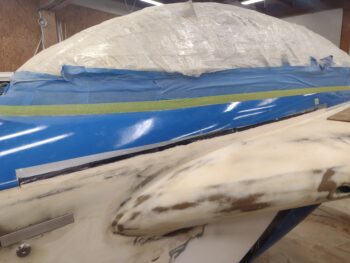
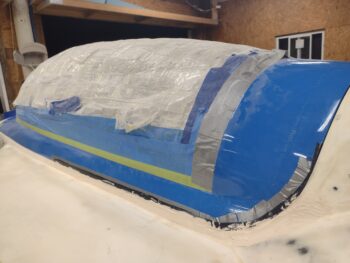
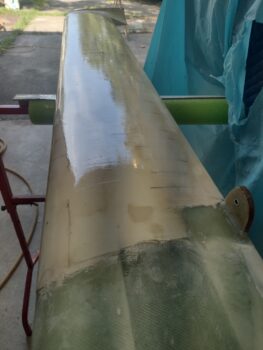
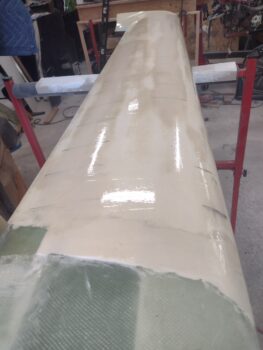
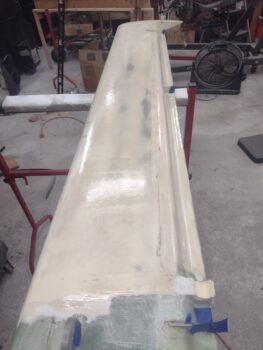
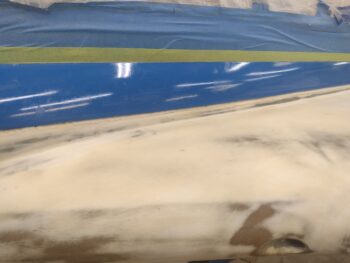
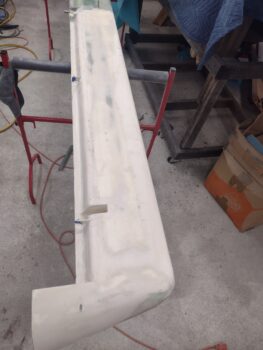
Here we have the canard shot with 2 coats of epoxy primer.

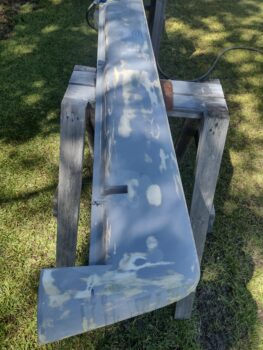
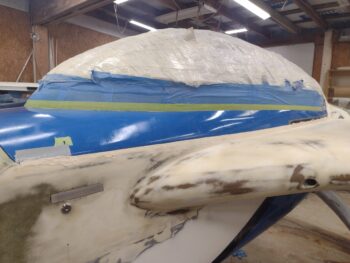
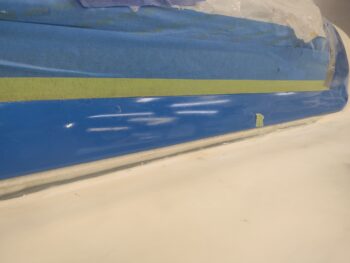
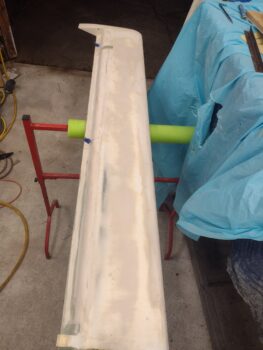
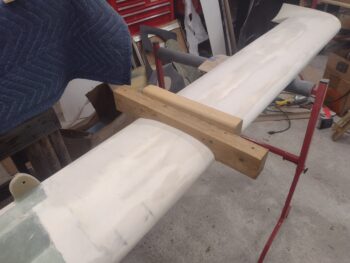
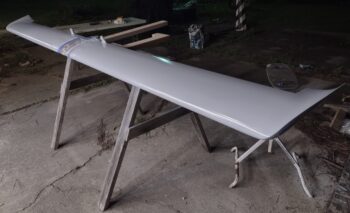
And here we have the canard flipped inverted, with the bottom also shot with 2 coats of epoxy primer. With no more rain due and the primer being dry to the touch an hour after shot, I left the canard outside to cure overnight.

And with that, it was very late, so I called it a night.
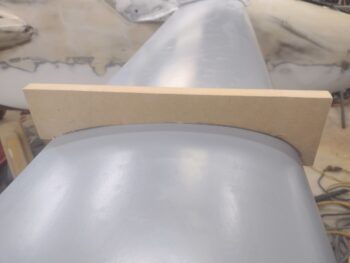
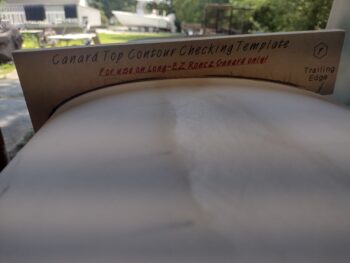
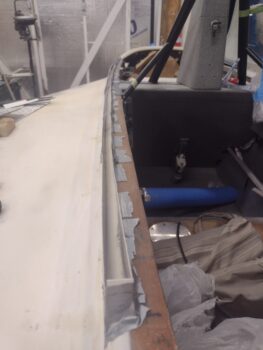
Chapter 25 – Pushing for Liftoff

This post covers the past few days . . .

Out of the blue I got a call from a local EAA chapter member, Rich, asking me if I wanted to go flying this AM (Friday).  We had discussed it earlier as I wanted to get some stick time in a low wing airplane, especially one that Burt had suggested as a good transition trainer to slide into the Long-EZ.

As a CFI, Rich put me through the ringer with a good bunch of stalls and tight 360° turns to help knock the rust off.  Moreover, his entire panel is glass so that helped as well flying behind a PFD and MFD.  Great training and I hope to get a few more flights in with Rich here soon!

Now, I’ll state for the record that I have had my ears pinned back and hair on fire to get this bird done.  I have been talking to the DAR in prep for the Airworthiness inspection and also to get my stuff in order.  I’ve also sent off my registration paperwork to a title agent to help massage it through the FAA system as quick as possible.

On the bird I have done way more than I have pics of on this blog to denote my build tasks, as I’ve been working 12-14 hours days on this thing.

Here’s a sideline task that I knocked out as it involved a layup, which as I’ve stated before, are getting very much less and less common on this build.  It’s the 3-ply carbon fiber layup on the right winglet/rudder that I’ll install with a spring loaded pin for my rudder gust lock.  When I install the left rudder I’ll knock that one out as well.

My main task over the past few days has been getting my canopy fit with the fuselage dialed in.  Last post I showed where I laid up the CF glare shield to ensure my spacing was a known quantity on the canopy closure, and since then I’ve worked the left longeron edge just below the canopy frame lip a good bit more.

To connect the added foam and micro (hard-shelled) edge to the longeron, I went ahead and laid up 2 plies of BID all the way down the top of the longeron overlapping outboard over this new added edge.  Here’s the front side of that layup after I pulled peel ply, trimmed, sanded and cleaned it up (yeah, I know… it looks the same as before).

And here’s the aft side.  My canopy B-seal isn’t compressing as much as I’d prefer, so a couple of plies of BID definitely doesn’t hurt space-wise.  And I wanted this edge strong enough to not worry about chipping it when getting in & out of the bird, or sitting on the longeron.

Again, I’ve been doing a myriad of sanding, micro fills/refills, epoxying wiping and generally getting all the components ready for primer and paint.

Pressing forward!

Chapter 13/25 – Glare shield “glassed”

To get the canopy settled and fit into its “no-kidding” final position in its relationship to the longerons, turtledeck and frontside glare shield, I felt I needed to do the final finish on the glare shield… which long ago I had settled on duller sheen carbon fiber (because, well, it IS a glare shield after all).

I have a roll of carbon fiber vinyl that after sanding and cleaning up the glare shield, I attempted first, in essence, to “wrap” the glare shield with this stuff.

It looks great, and I love the pattern as you can see here.

The issues appeared as I got to each outboard side where uncompliant bubbles showed up.  I’m sure there’s probably some expert way to vinyl wrap this thing, and I could have watched a video or two on YouTube and maybe figured it out.

But instead, I simply punted on the vinyl idea and went “old skool” by laying up a ply of carbon fiber and then peel plying it.  Done.

Here it is a bit later.  And since I got really good coverage on the peel ply (no bubbles or missed spots) I am going to simply leave it as is, since it is dull and will keep any sun glare in check.  Plus, if you look closely the weave mimics the approximately 45° angle as the vinyl (I cut the carbon fiber first before telling myself I should give the vinyl a crack at the glare shield).

While the peel plied carbon fiber glare shield layup cured, I took the opportunity to shoot some matte clear coat on the strip of rock granite paint on the very aft underside edge of the glare shield.

Which you can see here after I reinstalled the aft nose/avionics cover.

I guess I didn’t grab a shot of me again laying up a narrow strip of BID over the shaped foam along the longeron.  This was of course after I dialed in the closed position and fit of the canopy in regard to the foam.

Here I’m applying micro along the longeron —with canopy frame bottom edge taped— to both fill the gap between longeron and canopy frame AND get the longeron aligned vertically so it’s level with the canopy frame.  This is the first round of micro . . .

After the first round of micro cured, I popped the canopy open and pulled the tape and then taped the remaining canopy bottom edge to then apply micro along those seams. I say those because I added micro on the aft end . . .

And at the very front end of the canopy frame-longeron seam.

Here’s a wide angle shot of the phase II micro ops to get the final canopy frame to longeron gap and seam dialed in (yes, this too I did many, many months ago but apparently it needed another round of tweaking).

And with that, I called it a night.

Chapter 25 – Canard epoxy wipe

I spent quite a few hours today dialing in the top profile of the canard to match the “Eureka CNC” Roncz canard template.  It’s looking very good, and I’m not sure if I’ve mentioned this but my tolerance for any gap or daylight is 0.5 mm or less (less than 0.02″).  With the upcoming epoxy wipe and primer, any irregularities should be greatly mitigated to significantly less than that.

Quite a while ago I added an aluminum sleeve to the hinge pin hole on the end of the left canard (pic 1).  On the right side I had a Nylo-flo sleeve, but nothing on the left and it was getting dinged up.  Well, after this latest round of sanding I had both a chip and a crack that developed on the right side, as the Nylo-flo was not full length inside the access hole.

I spent a good half hour removing the Nyla-flow, trying to minimize any damage to the external surface… and did a decent job, IMO (pic 2).

I then test fit my cut length of thin-walled brass tubing with the hinge pin installed.

Then slathered up the in the inside of the right canard end hinge pin hole with micro, reinserted the brass tubing hinge pin sleeve and the greased up hinge pin.  I left it to cure.

While the right side hinge pin insert sleeve micro was curing, I flipped the canard right side up, did a final clean up and then epoxy wiped it with 3 coats of West.

I used some of the epoxy from above to epoxy wipe the right strake hatch door (pic 1) and even lay up a single ply of BID on the inside of the left strake hatch door where the Hartwell latch will get installed to add a hair depth to the door thickness so the external buttons will be level with the external door surface (pic 2).

I took about 10 minutes to remove the aft left wheel pant and do the initial sanding of the added micro.  I then reinstalled the aft left wheel pant and did the final sanding to get the front and aft wheel pants surface levels matched across the top seam.  Soon I will epoxy wipe the sanded micro area.

With the micro I used for the wheel pant above, I also micro’d the inboard aft corner on the left strake hatch door exterior surface.  This corner is just a tad low in comparison to the left strake surface, so I’m evening it all out with this micro fill.

A few hours later, back on the canard, I did the initial trim of the micro’d in place brass hinge pin sleeve (pic 1), and then cleaned it up in prep for the bottom canard epoxy wipe (pic 2).

Of course did an ops test of the newly installed hinge pin sleeve first… ALL GOOD!

I then epoxy wiped the bottom of the canard, each side, with 3 rounds of raw West epoxy.

Another gremlin that reared its ugly head once again was my canopy fit up with the left longeron.  I thought I had it figured out when I worked it a few months ago, but apparently not.  I don’t know if something subtly shifted as things tend to do on these birds when left unattended(?), but the gap was too much for me to allow and simply leave (not sure if there are any past pics since I dove right into the fix).

I cut up some scrap cardboard and made pour dams only above the previous added edge I had worked earlier (not over exposed wood segment of longeron).

Here’s another shot of my pour foam dam.

I then ATTEMPTED to add just a little line of pour foam in the dam, but we all know how that goes… so, a bunch of foam for only an actual required little bit.

I then cleaned up the foam overflows and cut the excess foam off at the height of the dam (pic 1).  I then started trimming the foam down, but left the inboard dam wall in place (pic 2).

Some more knocking the height of the foam down with the inboard dam wall still in place.

I then got the foam down to level with the longeron on the inboard side, with all the pour foam dams removed.

After a bit more trimming and sanding, and some trial and error test fits, I got the foam knocked down while allowing the canopy to close fully.

I still had a couple gaps both all the way forward and all the way aft that I need to work, but I’m happy with how things are coming along.

It may hard to tell, but again I will need to work the top elevation and match up at the seam betwixt the aft canopy frame and the Turtledeck… the never ending match up game.  I wonder if this will persist after this next round??

And with that, I called it a night.  Much more work to come.


Chapter 25 – Canard bottom & hatches

Another 2-day post here.

While I was able to get a good build on the aft bottom corner of the canard (I would say it was 1/16″-5/32″ low), it took a couple good slatherings of micro to get there.

And while the majority of the underside canard was good, I still had some decent sized divots and still a few low areas that need a third round of micro fill.  Here is the 3rd and final micro fill on the bottom of the canard… after nearly 6 hours of minutely checking the bottom canard surface against the template, about every inch down the canard.

I also did a significant amount of work in finalizing the strake storage compartments, with most of my completed tasks on the right side.

After getting the hatch door level with the surrounding strake surface, I then swapped out the bolts I’d been using for shorter CS screws.  I then notched the edge of the screws, countersunk the 3 holes and floxed the screws not only to the carbon fiber hatch door, but also to the hinge spacer as well (itself floxed to the underside of the door).

So although I’m using screws, this allowed me to mimic the left strake hatch door by making it removable… via some “Poor man’s Clickbonds.”

I then did 3 iterations of marking the edges of the right strake hatch door where it was higher than the strake surface, then removing the door and sanding down the edges.

Again, after 3 rounds I was able to get the door even on all sides, level with the surrounding right strake surface.

I then did the same thing on the left strake hatch door, with it now level with the surrounding strake surface (except for the inboard aft corner, which is low and will need some minor micro filling).

Here we have the bottom of the canard with the last cured micro fill sanded and ready for epoxy wipes.  It’s a great feeling knowing that my canard is finally up to Roncz specs with its contour matching the template.

Tomorrow I plan to press forward in getting the top side of the canard squared away.

Chapter 25 – Canard finish 2.0

With my Eureka CNC (or whatever the new company name is) canard templates in hand, it is now time to dial in the canard to get it as close to Roncz specs as possible. That being said, I’ll note for the record that this is a bit more challenging on my canard versus all my Long-EZ building compadres who ordered their wing cores from Eureka CNC.

Since Stephen James was unavailable when I ordered my wing cores, and I was shortly heading off to Germany, I had to order mine from Feather Light.  And while they did a good job, my cores —still hot wire cut— certainly were not as bang-on dimension-wise as if I had bought the CNC cores.

I note this because dimension “challenges” have reared their ugly head in a few spots on my canard cores (and probably wing too).  Primarily the top trailing edge and the bottom aft curve, which is not as pronounced as it should be… as highlighted when I use the bottom template.

Thus it is that I’ve had to add a decent bit of micro to fill in this bottom aft corner of the canard, with some touch ups in a few other areas as well.

While the first round of micro cured on the bottom of the canard, I got busy making up a sanding block based on the Eureka CNC template, with 0.045″ extra added to allow for the thickness of the sandpaper.

Here’s the top canard sanding block after I finished it.

Here are a couple more shots of the canard top surface sanding block.

I then spent a good hour sanding both top sides of the top canard with 36 grit sandpaper loaded inside the sanding block.

I then swapped the sandpaper out for 120 grit and did another good half hour of sanding.

I then flipped the canard over and did the same thing on the bottom, with the canard bottom sanding block that I cut and assembled.  I then re-micro’d the bottom of the canard since that bottom aft corner needed a little bit more thickness to it.

With some of the leftover micro from the canard, I quickly taped up the left aft wheel pant and applied some micro to it aft of the seam with the forward wheel pant… since clearly the aft wheel pant is a bit low in comparison.

Yes… many machinations going on with this finishing, but still pressing forward!

Chapter 21/25 – Eye on canard…

This post covers the past few days…

I was able to get the inside of the strake storage compartments painted with the gray granite/rock paint.  Here’s the right side.

And here is the left side.  I should note that painting also includes 2-3 coats of matte clear coat.

And as a further note (in case I need to research this years from now): I actually taped up the 3 forward & inboard vertical corners and the 2 intersecting lower horizontal corners with green painters tape to allow me to remove that tape in the future if I have any evidence of fuel leaks that I need to investigate.  Again, only the corners that are fuel tank adjacent were taped.

I let the paint and clear coat cure for over 36 hours before I sanded the overspray and excess micro from the flanges and perimeter edges on both right and left strake hatches.

I then drilled the countersinks and riveted the right double-button Hartwell latch to the right strake hatch door.  Yes, I did use aluminum rivets, but I A) hit them all with a coat of primer (cured for multiple days), and B) slathered them up with very wet flox when I installed them.

I also countersunk the 3 screws (replacing the bolts) and temp installed those.  I then spent nearly 1.5 hours getting the angle and elevation of the internal ~0.4″ hinge spacer dialed in so that the door would sit as optimized on the hatch perimeter flanges as flush as possible.  This of course means that the door is as flush as possible with the surrounding surface of the right strake as well.

I have NOT yet permanently installed the Hartwell latch on the left strake hatch door, as the deeper countersunk cherry pop rivets are currently on order from Aircraft Spruce.  I did mount the door back into place and spent about 45 minutes sanding both the door edges and the internal perimeter edges just above the flanges, just to get the darn thing to close.

More work is required to obtain better edge clearance.

Now… to get the no-kidding finalized aft nose/avionics cover configuration complete and ready for primer/paint, I have to get the canard completely finished and ready for paint as well.

I used the Eureka-CNC templates to mark any low spots on both the top (shown here) and bottom of the canard, then filled those low spots with micro.

I figure I’ll have at least one more round of micro refills, but plan on working the canard until it’s near perfect in regards to the Eureka-CNC profile templates… since it’s arguably the most critical flight surface on this bird.


Chapter 21/25 – Finish fiddlings

I’ll reiterate that although my primary task currently is finishing up the strake storage compartments, I’ve also been doing a number of other tasks to get the various aircraft surfaces ready for primer and paint.

Here are a couple of examples on the right wing.  There was a distinct low spot at the junction of the bottom right winglet and wing, so that required a micro refill. Tomorrow I’ll sand it smooth and re-epoxy wipe it.

Speaking of epoxy wipes… I had a couple of small divots that I filled with micro and after sanding decided I needed to epoxy wipe a decent swath around those holes to help even out the surface of the lower right wing.  I’ll sand this down then wet sand with 150 grit in the next day or so.

On the strake storage hatch flanges I did a final fill on all the perimeter edges, both right and left sides, which I’ll sand down tomorrow.

On the left strake hatch door, since I used the original skin piece that I cut out for the door, I removed about 0.1″ of foam on both the forward (pic 1) and aft (pic 2) edges of the door and filled those with micro.  Tomorrow I plan on sanding and epoxy wiping those edges.

I then spent a good little bit of time prepping and taping up both the right and left strake storage compartments in prep for primer and paint.

I had planned on painting these tonight as well, but the Rust-oleum gray granite paint needs at least 2 good coats, with 15 minutes in between each coat.  It was getting late, so I decided to do the actual painting tomorrow.

Here is the right strake storage compartment shot in primer.

And the left strake storage compartment primed for paint.

As I mentioned in the last post or two, as I finish up the final tasks for these strake storage compartments and hatch doors I’ll have more time to focus on other important pre-primer/paint finishing tasks in my attempt to get this bird done.