One last project move

after this one!

After having just drove back from Marco’s airport yesterday, after our return from RR19, today I have to pay the piper and get ALL my stuff moved out of my hangar at the airport.

Due to damage to the hangars and the ensuing tear down and rebuild, the airport is cancelling all of our leases and essentially evicting us.

For me, the moving out process was a lot more entailed than any other hangar occupant since I had a myriad of assorted project boxes, pieces and tools. Let alone all the household stuff I had stored in the hangar temporarily… using it as a transitional storage unit as part of my final move to NC.

Below is one of the first loads of 6 full loads to empty my hangar.

I then started to get to the nitty gritty (read: important) stuff in the late afternoon/early evening.

Packing up and securing a load takes time of course, and to minimize time with the wings –and since I had 2 feet of extra space on this new trailer I bought (and boy did it come in handy!)– I loaded the entire wing dolly onto the trailer with the wings secured to the dolly. Much, much easier than loading and securing all these components separately.

Clearly unloading back at the house is faster than loading at the hangar, but it still takes time and I wanted stuff at least somewhat organized. Again, I paid a price for going to Rough River with the rush job I had to do on clearing out the hangar… but it was definitely worth it!

Here I am very late at night finally getting to loading up the fuselage. Again, with the extra 2 foot length on this trailer I was able to put the fuselage in and put it in the grazing position without worrying about the nose (or firewall) hitting anything.

I also loaded up a considerable amount of stuff around the fuselage after I got it secured, which added another hour before I departed the airport.

Back at the house here’s the fuselage on the trailer, ready to come off after I unloaded the considerable amount of stuff around it.

I raised the nose (gear down) and prepped ‘er to roll down the ramp.

The tape on the bottom side of the nose securing the taxi light keeps reminding me of the smile that PSA Airlines always painted on their airplanes in the 1970s… I saw one btw at National Airport a while back.

I just chalk it up to the plane being happy to finally be home at the workshop that will finally see its completion!

On a final, bit more philosophically note, I post these blogs of my build-related moves not as much for build info –obviously– but as an account of my time. Life has a way of derailing airplane building projects (quite often permanently) and I want to hold myself accountable for the time I spend not actually building. This blog helps me go back and see what I was up to… and documents the crazy machinations that I will have had to go through to get me from the beginning to the finish line of a flying Long-EZ.

Rough River 2019

I wasn’t sure if I was going to have the time to make it to this year’s Rough River, Kentucky fly-in — or to be quite honest, the transportation there since I wasn’t sure of Marco’s plans until a few weeks out. I did know that I was definitely not going to drive there!

I got into my home area from my west coast trip but stayed the night at a hotel in New Bern since it was too late for my friend to come pick me up. The next morning I got a ride back to my house, picked up the few things I could scavenge (Delta lost my luggage) and then got on the road to Chesapeake Regional airport to rendezvous with Marco and Chris Cleaver.

Since Chris was flying solo in his Mike Toomey-built Long-EZ (Mike being a good friend and at the same airport as Terry Lamp, the guy who built Marco’s Long-EZ) he was nice enough to let Marco and I load some bags in his back seat.

We then took off in a flight of two for our Rough River adventure!

Here we are just a few miles north of the North Carolina border in western Virginia. About 15 min later we crossed over into West Virginia (sorry for the pic quality, the curved canopy sometimes tricks the focus).

Below is about 10 min before arriving Rough River, Kentucky. Marco grabbed a nice selfie with Chris off our wing in the background.

This shot is just minutes after we landed, with Terry Lamp –again, the builder of this phenomenal Long-EZ– in the background. Here Marco is getting ready to fire ‘er back up to taxi to the other side of the tarmac.

While Chris Cleaver quickly met up with Mike Toomey, the builder of his stunning Long-EZ.

Within the next hour we of course had to take a group selfie of the gang: From L to R is me, Marco, Terry Lamp, Dennis, Chris Cleaver and Mike Toomey.

That night we hooked up with Terry Schubert and Jim Price [holder of the experimental airplane altitude record: FL340+ (IIRC) in a Long-EZ!] for dinner.

This was a unique RR in regards to acquiring any building tips & tricks. I guess since I’m nearing the end of my build (yeah, yeah . . . it doesn’t SEEM like it!!) I have most things figured out.

I did pick up a few ideas though. Below is a good idea on how to create the antenna backplane for the ELT. Mike Beasley stumbled across this and shared it with the gang.

I also got some great intel from James Redmon both on heat resistant dark paint and refilling the small Oxygen bottles at home (vs spending a fortune doing it by other means).

Next morning —the official start of Rough River— we all had a great breakfast cooked by the venerable Mike Beasley (call sign “BizMan”)!!

Here’s a shot of the Ohio gang’s (Mike Toomey and Terry Lamp) offspring: Mike Toomey’s yellow Cozy (ironically he didn’t build it but got it for A STEAL!!), Marco’s Terry Lamp-built Long-EZ, and Chris’s Mike Toomey-built Long-EZ.

After walking around in the heat looking at airplanes for a few hours, we all took a bit of a respite mid-day to hang out.

Again, this RR was more of a social one for me since I didn’t have much in the way of build tips that I was looking for… although I did decide after the first day that rather than flying sans Hershey Kiss spinner for a while after I got the plane flying, that I want to install a spinner as soon as practicable. I noted that the canards without a spinner just seemed to be lacking something and that the spinner really finished off the aft side of the plane… IMO. I then had quite a good discussion with Mike Toomey on the whole spinner deal.

Sunday morning we took off rather early. I had found out while on the west coast that my airport was going to have the old hangars demolished and were going to build new ones due to the tornado damage. The rebuild being primarily the decision by the insurance company. Regardless, it meant that the leases on the hangars were being cancelled as of 30 Sep and I had to get all my crap out… thus I needed to return ASAP to get back to what I love doing: moving stuff!

Here Marco and I are over the middle of Virginia, about an hour out from landing back at Chesapeake.

Marco borrowed my phone to take these shots of his panel… a lot of info for such a small panel, eh?!

Here we’re at 11,500 ft. to get over some clouds that were hanging out over the mountains. It was a gorgeous day and a beautiful flight back (the guys heading north and west out of RR didn’t get the same nice treatment from mother nature as we did . . .)

Back at the ranch! Another successful RR in the bag… thanks a million to my good friend and brother in arms, Marco!!!

Until next year … where I’m really hoping to be showing you selfies of me flying in my own bird!

Pre-trip Hangar “Inventory”

I’m leaving for the west coast tomorrow and before I depart I thought it might be a good idea to get pics of all the major Long-EZ airframe components in the hangar. God forbid something should go awry like a hangar door falling over or what have you, but I figured better prudent and have some pre-trip pics to the show the insurance company worse case. Moreover, with part of the doors ripped off I’m relying on the airport fence/gate to protect all my stuff. Again, figured good to have pics if anything goes missing.

These are all pics I’ve posted before, and nothing overwhelmingly different or new in regards to the build. I just have them so thought I’d post ’em!

You may note that I replaced the plastic canopy cover after it dried out. These pics are the current state of my hangar as I head out for the next few weeks.

The canard is to the left, still with its protective cardboard sleeves in place from the move.

On top of the canard are the strake leading edges that are the main part of the Feather Light kit I bought from Nate Mullins.

In recent prior posts you could see the upper and lower cowling halves up on top of the small shed just behind the fuselage. I took those back to the house since they were a bit too pricey and easily removed to be left unattended at the hangar. Same goes for the wheel pants and the baggage pods.

Here’s the last shot of the fuselage . . . just cause.

And here are a couple shot of the wings.

Again, I’m just very grateful that there was no damage.

Ok, I’m outta here on my west coast visit… hopefully I’ll have more to report soon!

Tooling Up: Air Compressor

Well, the hurricane/tornado did more than just get things wet and cause a fair amount of remediation work . . . It really messed up delivery schedules for a bunch of equipment I ordered weeks ago. Thankfully my 80-gal air compressor –which was supposed to be delivered a week ago– finally arrived!

I’m seriously trying to get out the door for a nearly 3-week trip out to the west coast to visit friends and family, capped off by a trip to this year’s Rough River Fly-in. I’ve had to wait until the very last minute to book my tickets until I was able to confirm delivery of this air compressor since I don’t know anybody capable of dealing with this delivery… and it was a good thing too since I needed to do some heavy lifting (or rather tilting) to get this thing stored into the garage. More on that in a bit.

The big truck arrived mid-morning.

Although I paid for the liftgate service, the air compressor vendor stated that the truck driver would only drop it off curbside. Even more reason for me to hold off my trip out west to ensure I could get this very top heavy (and just plain heavy) compressor rolled up to and into the garage for storage.

Well, the air compressor bubbas were wrong and the delivery service guy was as helpful as could be and rolled it right up to my garage door.

Unfortunately though, the container was just too tall to get into the garage. Thus, this is where his journey ended and my mini-drama began.

The problem as you can see a hint to above and definitely revealed below is that the air compressor manufacturer mounted the compressor on a smaller pallet, that was then breaking apart, so they merely cobbled that onto a larger pallet. There’s a term for all this, but I’ll attempt to keep this post PG-rated!

After getting the big outer box removed, I went to work carefully removing all the large lag bolts that held the top pallet to the bottom pallet. If you look at the front right corner in the pic above, the top pallet actually had no support on that corner. So, when I went to remove the top pallet and compressor off the bottom pallet by tilting and walking it off (it was a tad bit heavy!) … it kept snagging on this corner.

I had to both intentionally break parts of the bottom pallet off and get my leg around the compressor to kick the bottom pallet away while leaning this mammoth compressor significantly to the side.

[Note all the Long-EZ boxes piled up at the front of the garage. This was the pile of “dry” boxes that I removed from the hangar.]

Needless to say, with a lot of grunting and a stream of colorful expletives I got the top pallet/compressor extracted from the lower pallet.

Since I expected to have to move this bohemoth from the curb to the garage, and will eventually have to get if from the garage to the workshop (about 50 yards), I used a 20% off coupon at Harbor Freight to buy a pallet jack. Keep in mind, the milling machine will eventually make the same trek from garage to workshop as well.

Even with all the drama and machinations to get this thing off the bottom pallet, it still only had a couple of inches of clearance to get it into the garage.

Another shot (below) of this beast being stored away for a while in the garage. Again, note the bare minimum clearance at the top.

Here we have a closer view of the control panel and specs on the air compressor. Note that it is rated at 17.9 CFM at 100 PSI, so it will have enough output and volume to do pretty much anything I’ll need ‘er to do!

Ok, mark this task off the list and now I’m cleared hot to fly out to the west coast!

Tornado Cleanup – All hands on deck!

I guess the actual cleanup will come later, right now everything is in the drying out phase.

And when I say “All hands” I actually mean: Any available space!

Below you can see receipts and invoices, all from a box that I had labeled “to be posted” drying out on every available flat surface in the garage.

The one house mod I’ve done so far is to rip out a built in cabinet that was in the kitchen, a sort of pantry I guess, to then knock out a space in the wall to place my new fridge. The fridge box is what’s being used for a table in the foreground in the pic above, and the cabinet is lying in the middle of what will be my pool hall/rec room on the back of the house…. a rather large room that came in handy for this task!

Above you can see old CSA newsletters drying out, while engine info docs are on the floor in the foreground.

Pertinent Canard Pusher newsletter pages are on top of the old cabinet (above) and on the steps coming into the pool hall/rec room.

I guess my actual “first” mod was to rip down some odd (to me) framed wallpaper segments down the main hall. That’s the pile of stuff in the foreground with some papers drying out on the cabinet doors.

Mainly in this pic –on the very left and upper right– I’m showing where I took the wet boxes with parts, components and hardware and literally just dumped them out quickly to spread everything out to dry. If something was of particular importance or overly soaked, I made sure it was dried off completely.

Not shown is my #3 bedroom which I’ll be using as an office and where I dried out the bigger A-pages and plans. Luckily the box that my ancillary plans (engine, A-pages, High Speed Rudders, Landing Brake, Roncz Canard, etc.) were in was on the top side of the VANs engine baffling kit. The baffling was soaked on the bottom few inches of the box, but luckily all the paper plans sat about 6″ higher off the bottom and were almost completely dry. Whew!

My new (to me) 3-bay workshop was pressed into service as the receipt and invoice drying facility. Again, every available flat surface was used to dry documents.

Along the back wall was the final bunch of receipt and invoices that I got to, dating back to the very beginning from 2011!

Even my new utility trailer was pressed into service as an invoice drying rack

[Note: I did a cost-benefit analysis and figured it would be cheaper to buy a trailer versus continually renting one… Boy was I right! Fast forward a month and I honestly think it has pretty much paid for itself with the shear number of times I’ve used it!]

All told, I spent 2-3 hours a day for about 4 days drying all these papers and docs out. I had one binder with ink-jet printed docs detailing Wayne Hicks’ strake build notes which were rendered unreadable. But that is maybe 80 pages of reprinting I’ll have to do… not bad for how wet everything was.

A PITA? Yes.

A disaster? No.

When hurricanes strike…

Or rather . . . when tornadoes strike!

I have to say as relatively easy as it was selling (the actual process… not moving) my house up in the DC area, my finally buying/closing/moving-in process down in the North Carolina was just the opposite. Murphy had definitely arrived on scene.

So in the seemingly comedy of errors that marked my arrival to NC, it definitely wasn’t a surprise that a week after closing on my NC house, along comes Hurricane Dorian!

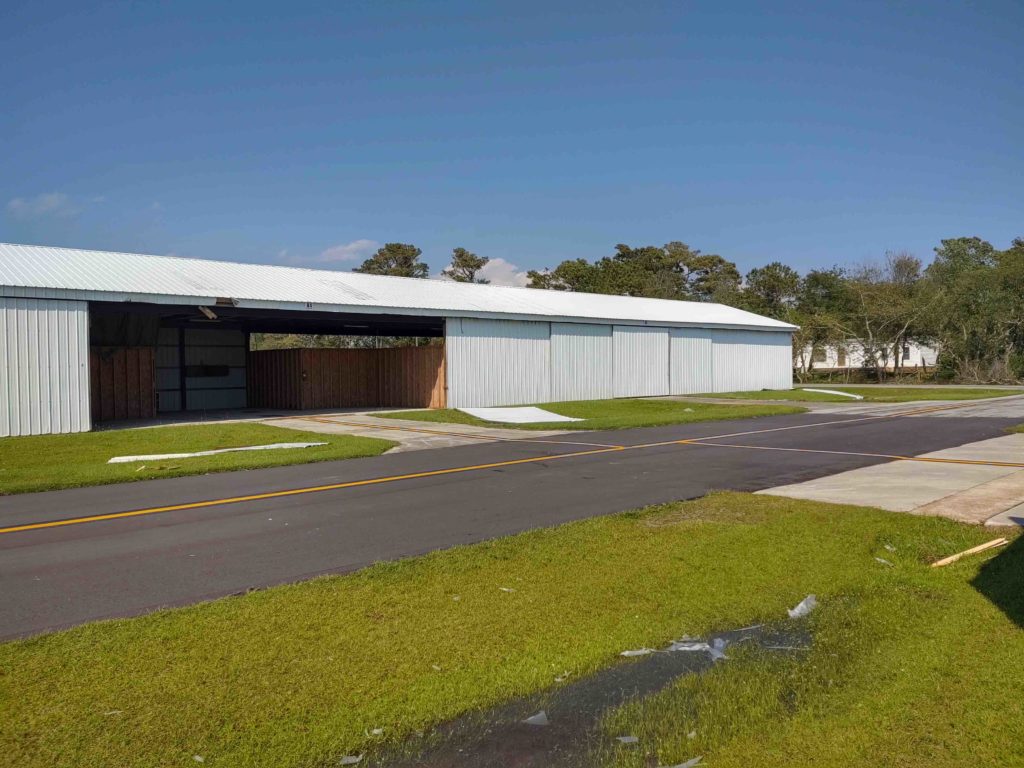
Yes, call me crazy for moving to this area, but I had done a decent deal of research on this and even discussed hurricanes with the former airport manager. At 84 years young, he’s been around the airport for over 40 years and is still flying! He commented that the airport always came through without issue as he showed me how to batten down the hatches (aka hangar doors).

Well, since I had no Internet or TV at my place yet (which didn’t happen until after I arrived back from RR), I went up to Greensboro and stayed at Stacey’s house –who was in Italy doing a photoshoot. I still had a few things in her basement from Hurricane Florence, so decided since I had my new house in hand to finally pick up those things and get them back home.

When I arrived home the following day after Dorian had blown through, I found that there was little damage beyond the various tree limbs and debris in the yard.

However, early evening I got a call from Renee the airport manager saying that the airport got hit by a tornado generated by Dorian. All the new hangars with the “hurricane-proof” doors were fine, although in the path as well, but the old hangars were damaged significantly since the hanging/sliding barn-style doors just couldn’t withstand the force of the storm.

Worse still, she said mine was one of the hangars hit. She didn’t believe my airplane (fuselage) was damaged, but that my hangar was on her list of getting hit. In fact, over half of the 28 old-style hangars had been significantly damaged.

She asked that I and all the other owners stay away from our hangars, since the doors were in various precarious positions. She then, however, sent me a pic of the wrong hangar (not mine) and never got back to me with a shot of what was going on with my hangar.

I waited for a few hours for an update but then zipped over to the airport to take a look, despite her request not to…. Obviously I needed to know the state of my Long-EZ.

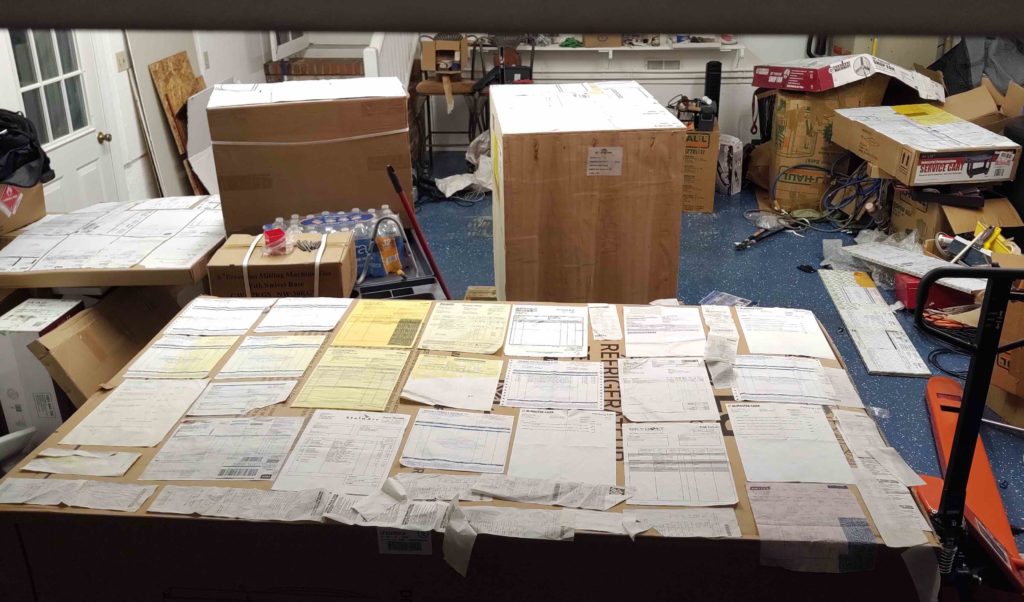
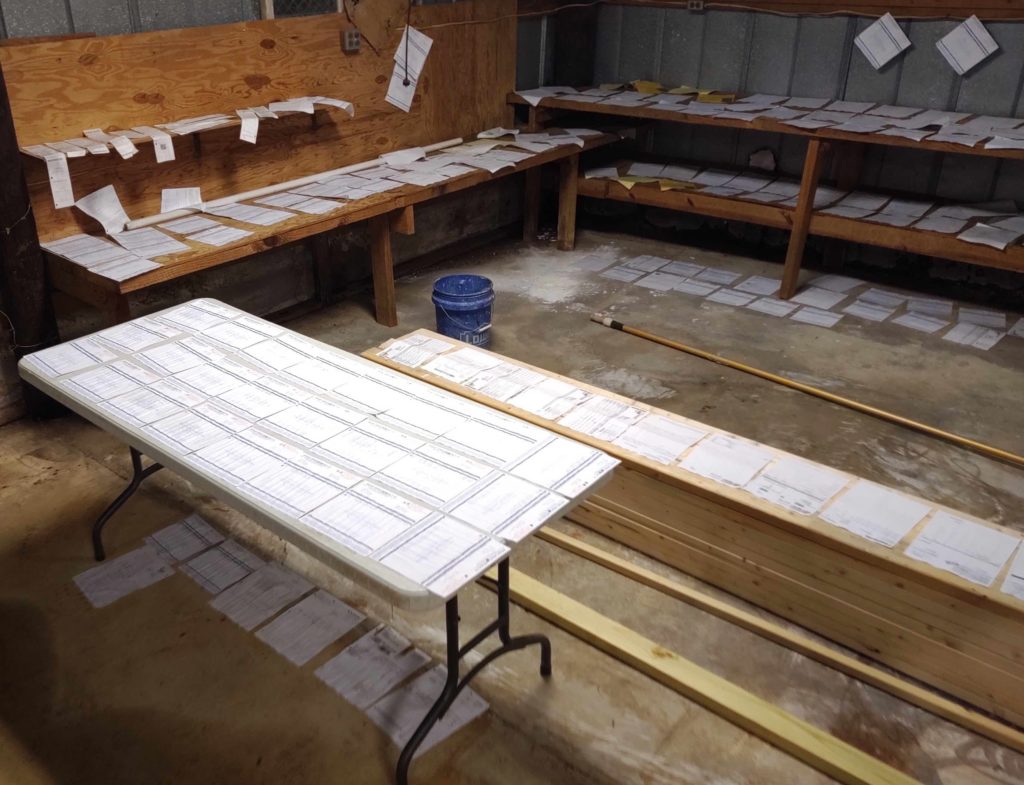
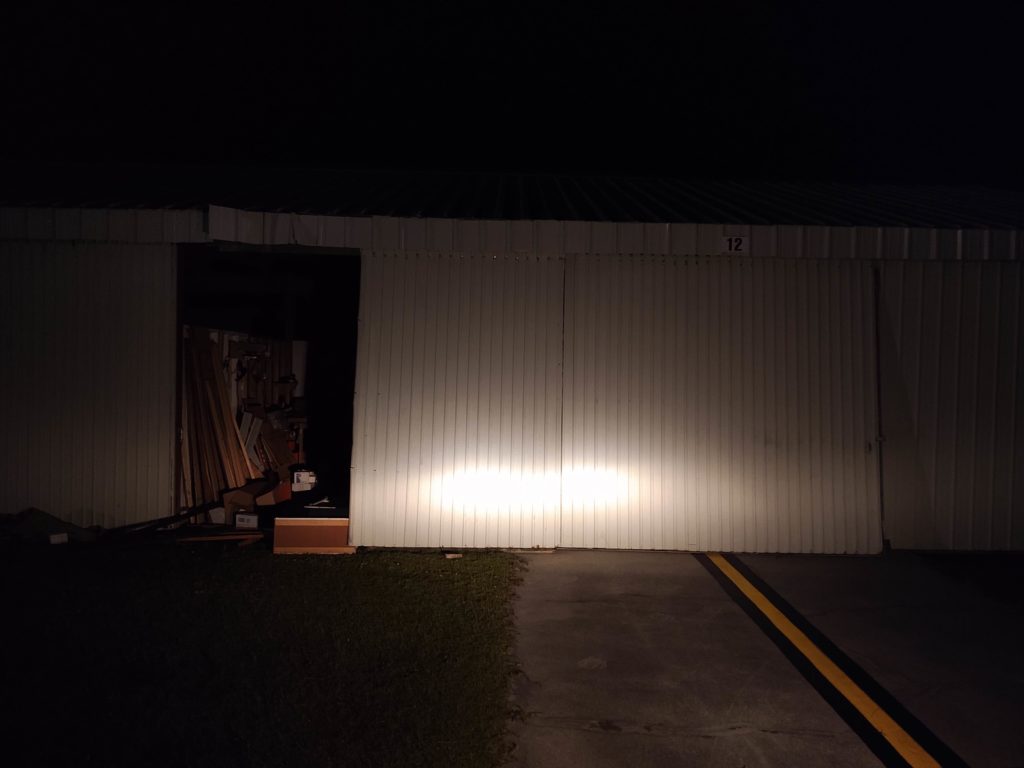
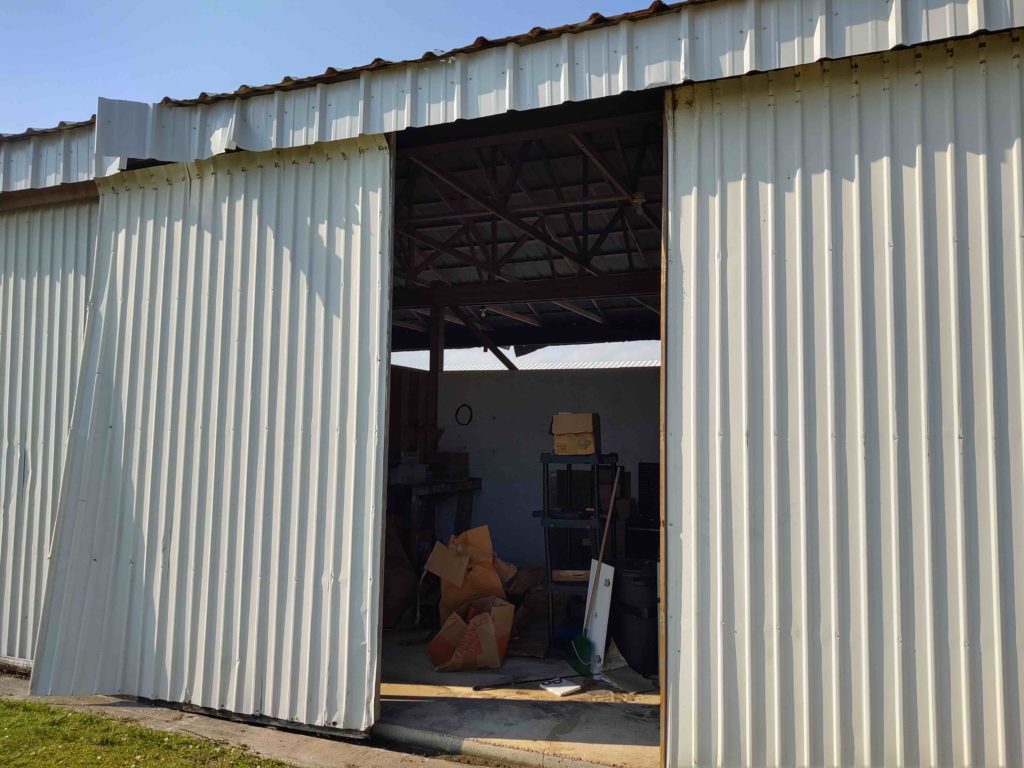
Below is a photo of what I found: the left side door –one of three– had been halfway ripped off. The ensuing gapping hole had allowed water to soak just about everything on that side of the hangar, which is where most of my project boxes were stored. [NOTE: I had grabbed my avionics and panel mock-up to secure them before the storm hit, and boy am I glad I did!]

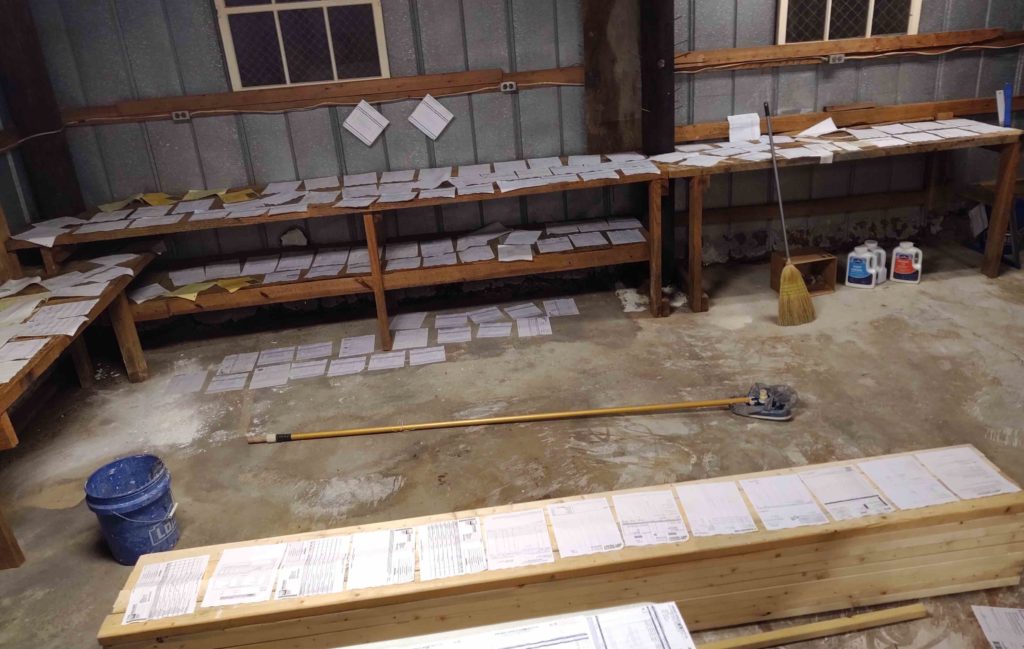
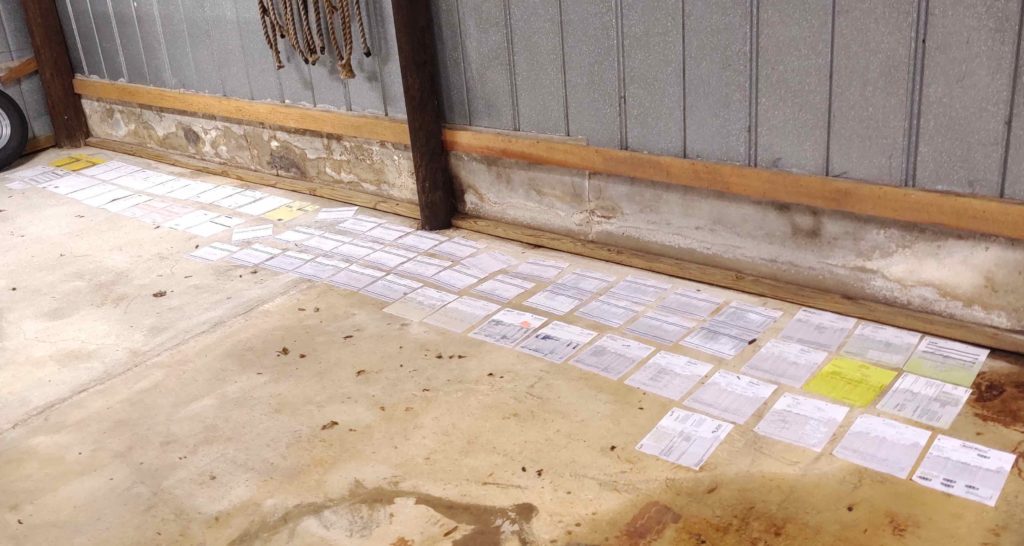
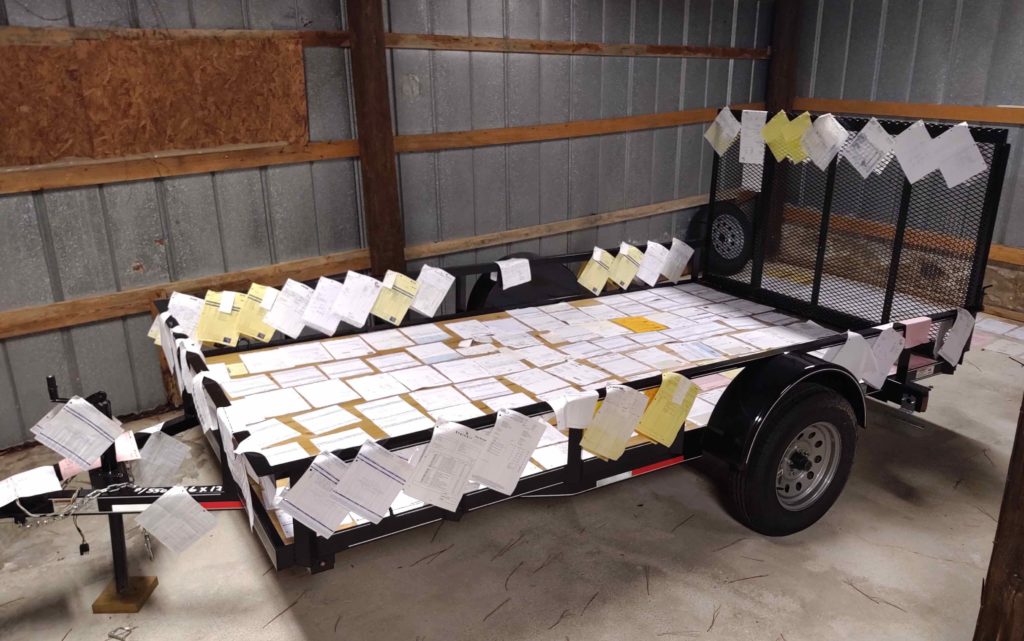
I also took a look inside to ensure everything was ok, which it all appeared to be. I then tried to pick up some of the wet boxes but they were simply too wet to try to pick up without the bottom ripping through. I decided to let them dry out another 12 hours before salvaging the wet stuff.

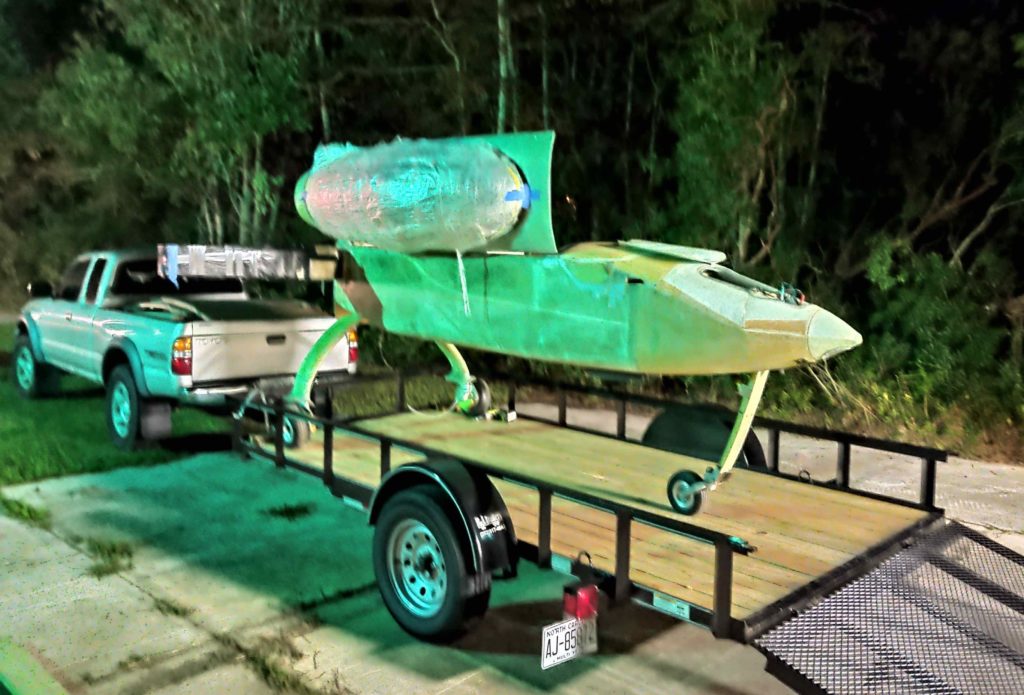
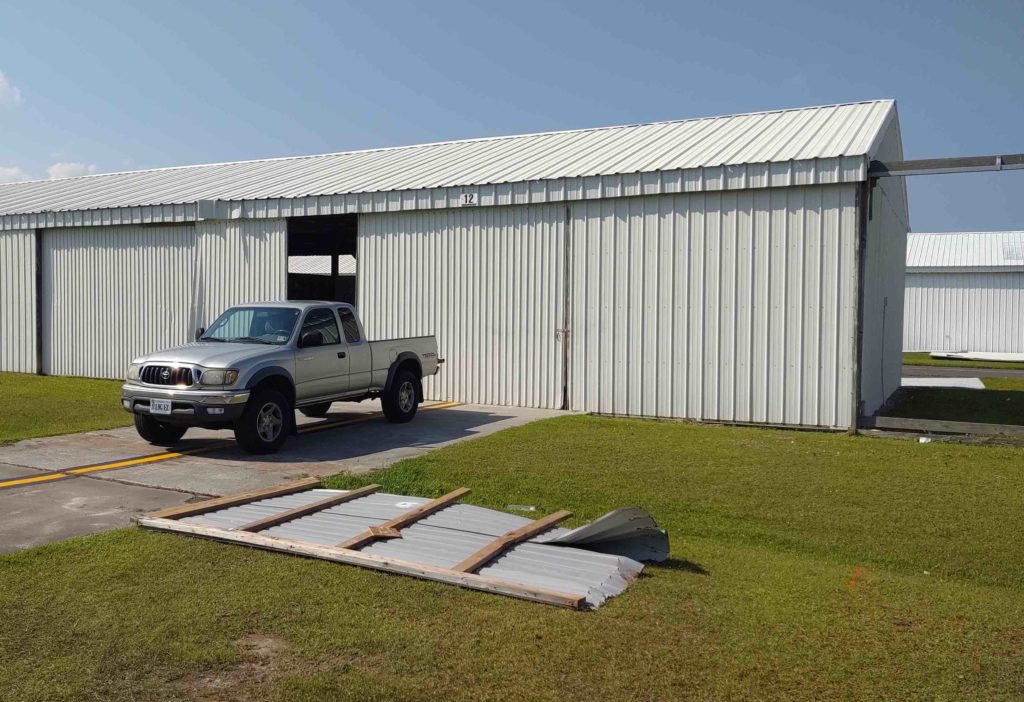
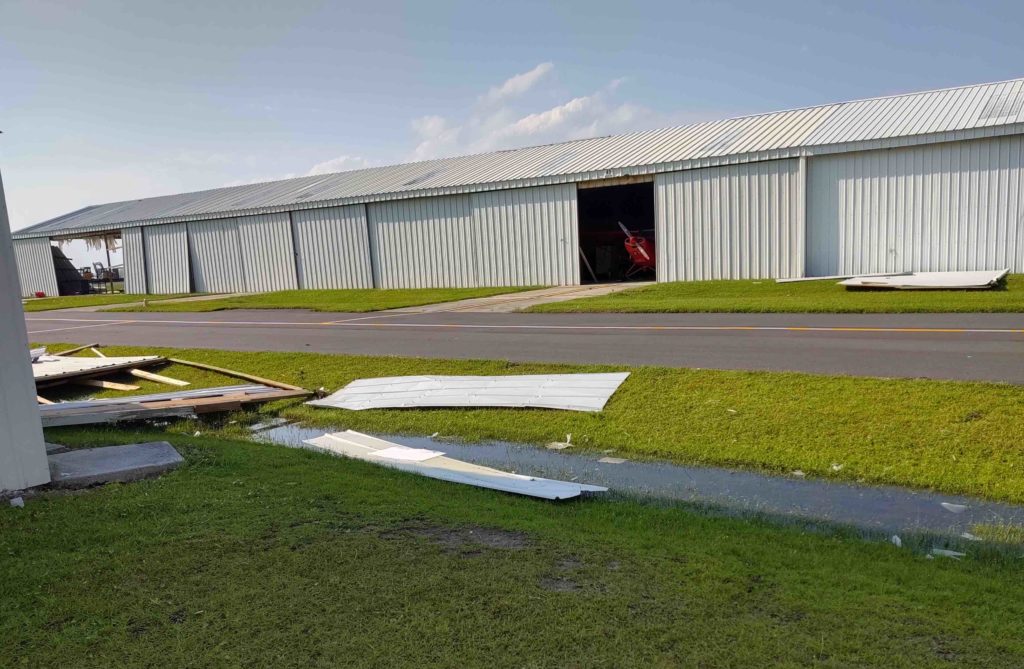
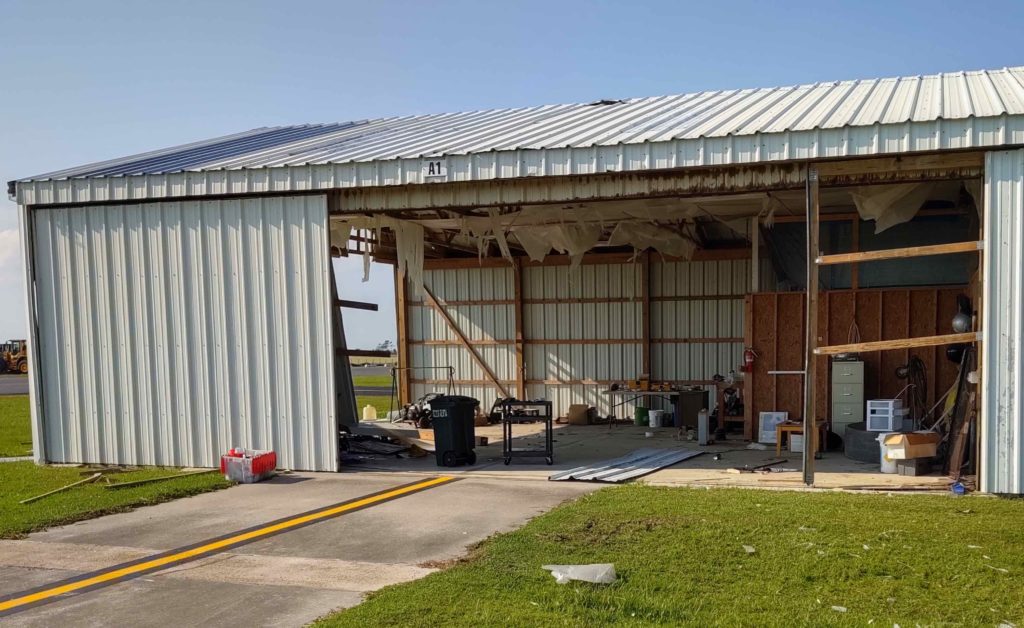
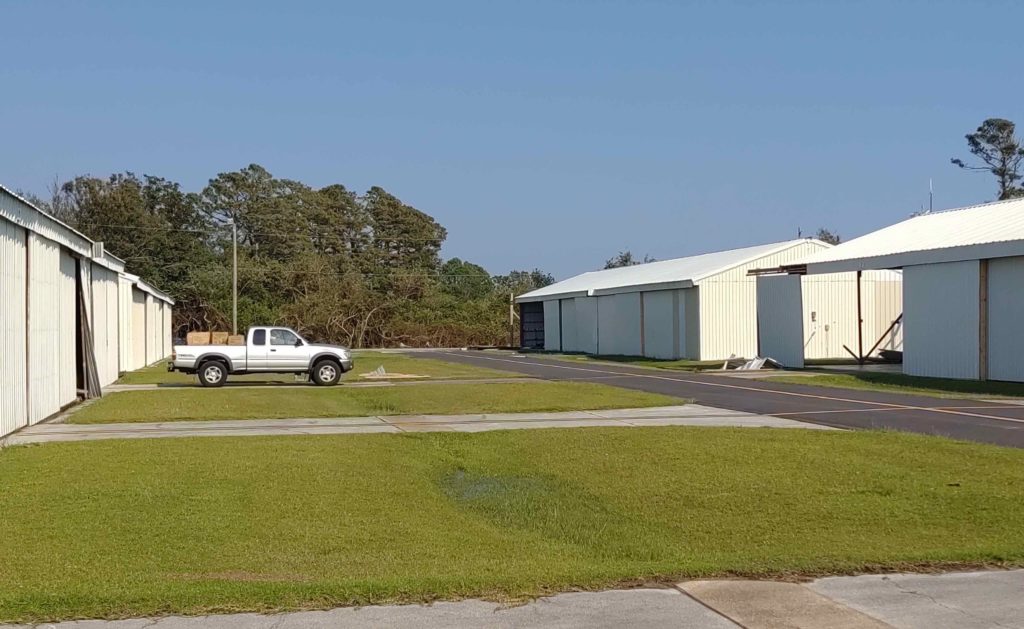
The next day I arrived back mid-morning to get a much better look, after the crews had assessed and secured the doors. The following is what I found.

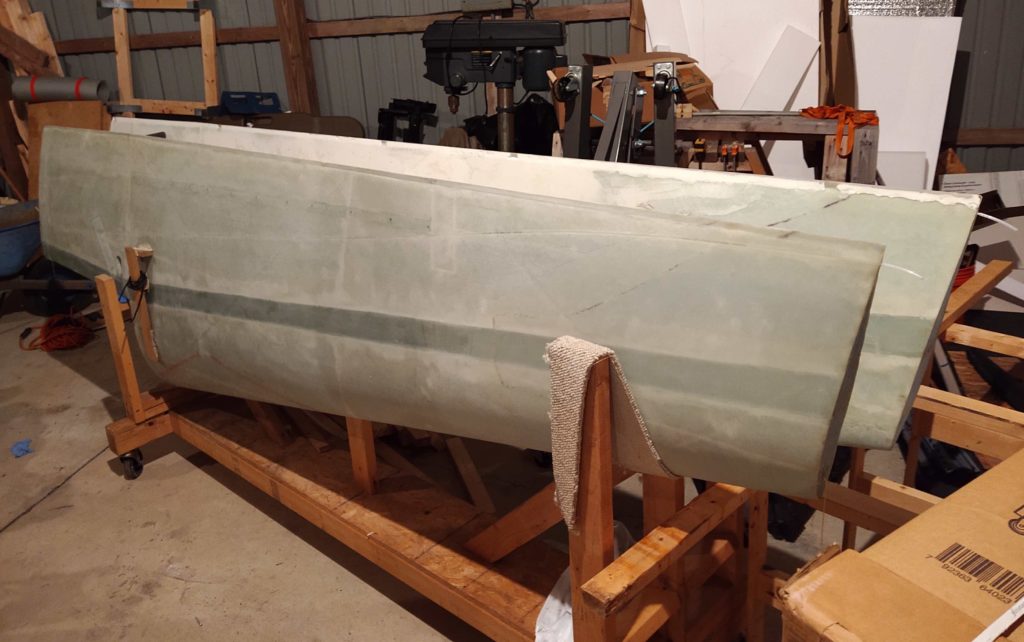
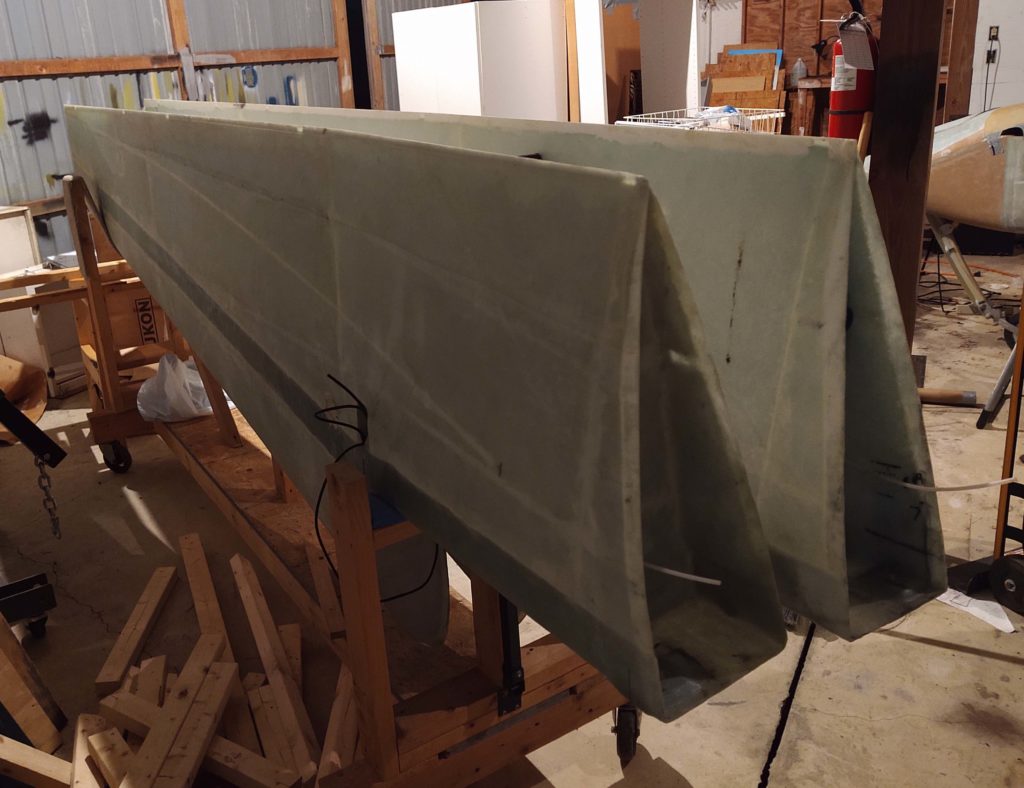
The panel in the foreground is the half of my left hangar door that was ripped off. Since the walls between our hangars are only 8 feet high, you can actually see daylight above my truck showing the doors off the hangar next to and behind mine.

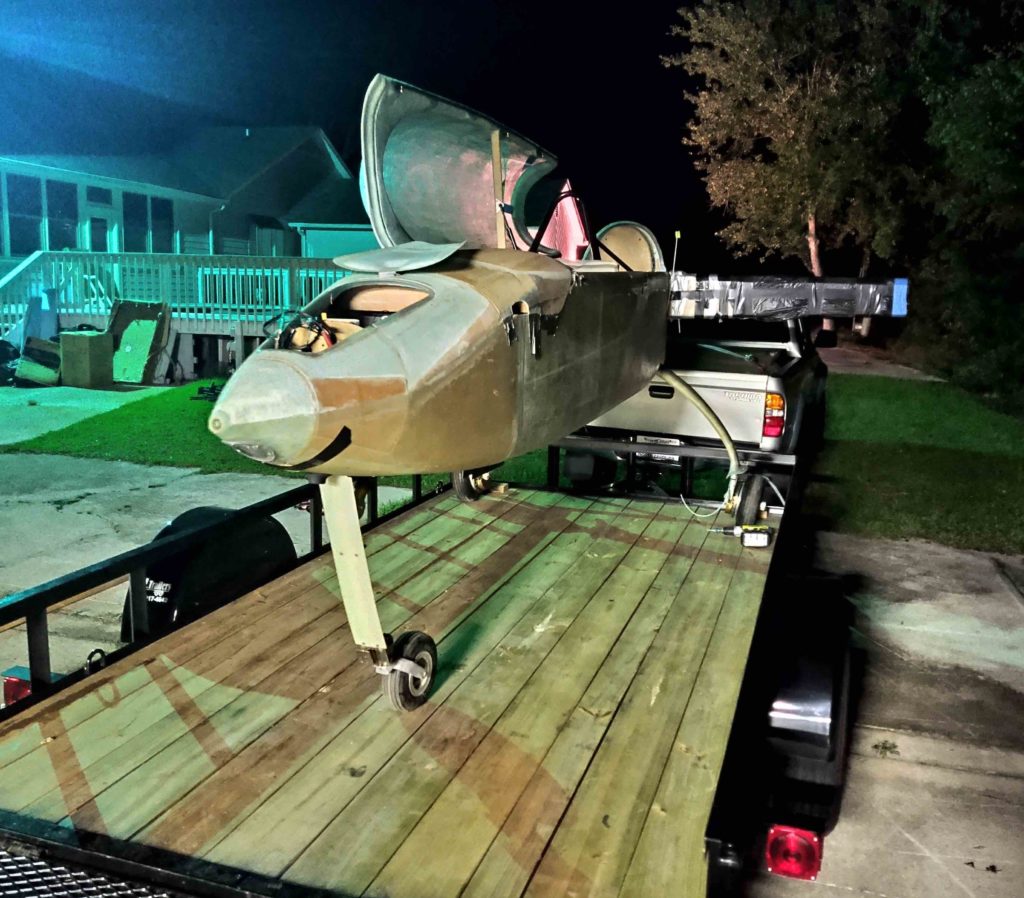
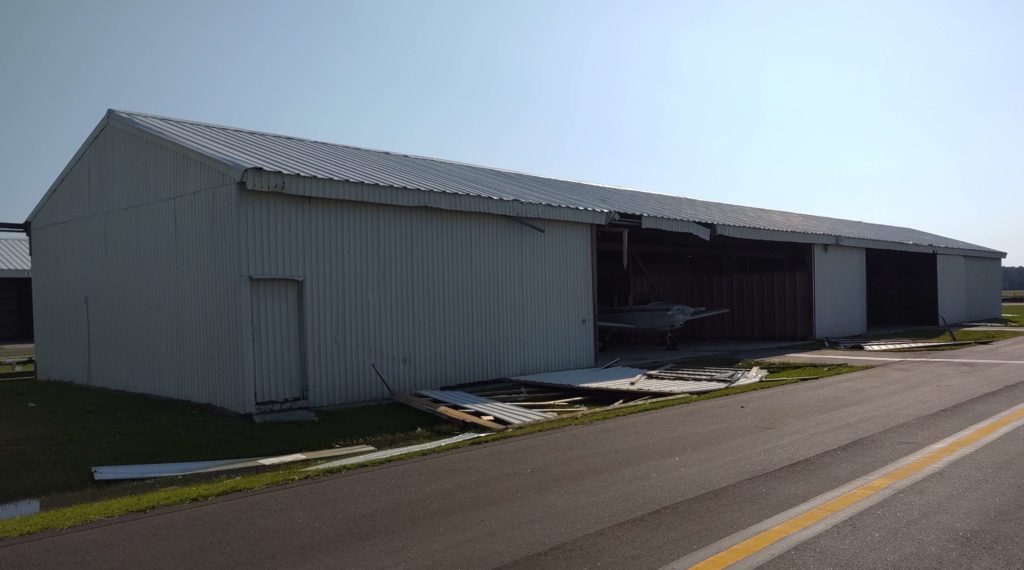
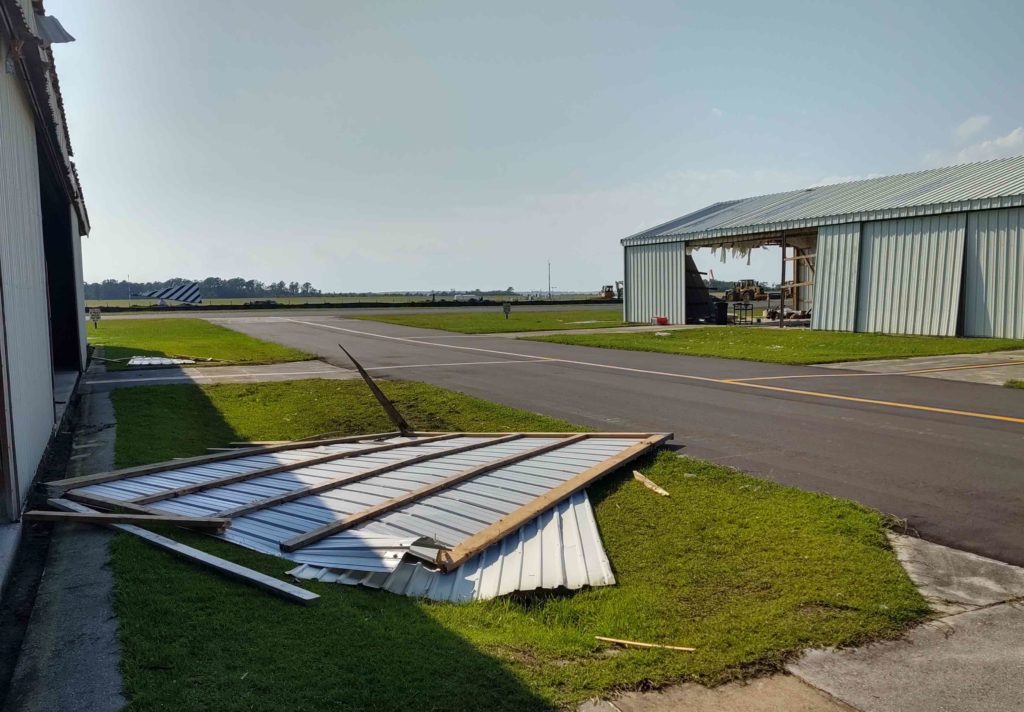
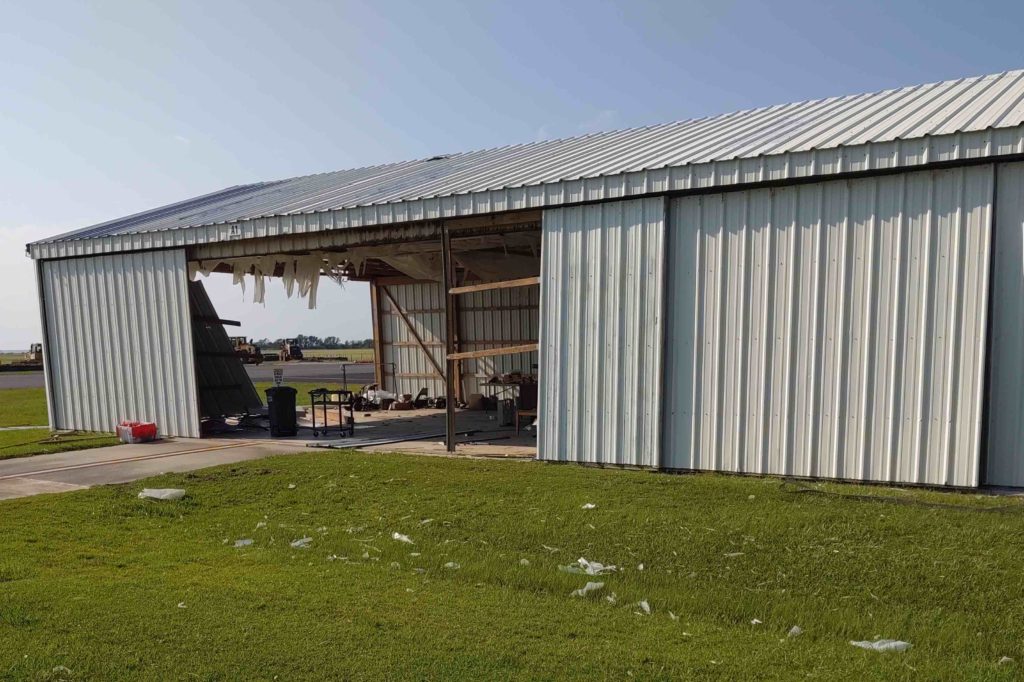
Here is the back and side of my hangar, and next to it you can see the adjoining hangar with the doors completely ripped off and the airplane just sitting inside. Amazingly, this was a common site as primarily only the doors were ripped off and only one of dozens of airplanes were damaged.

Tracing the tornado’s track, it hit this side of the building and then continued on over my hangar building and hit the one across from with much more force than mine got hit. In fact, it appears my doors were blown out from the inside while many hangar doors were ripped completely off.

Note the black strip where the flashing is missing above this hangar door on the left side… this plays into this story here in a moment.

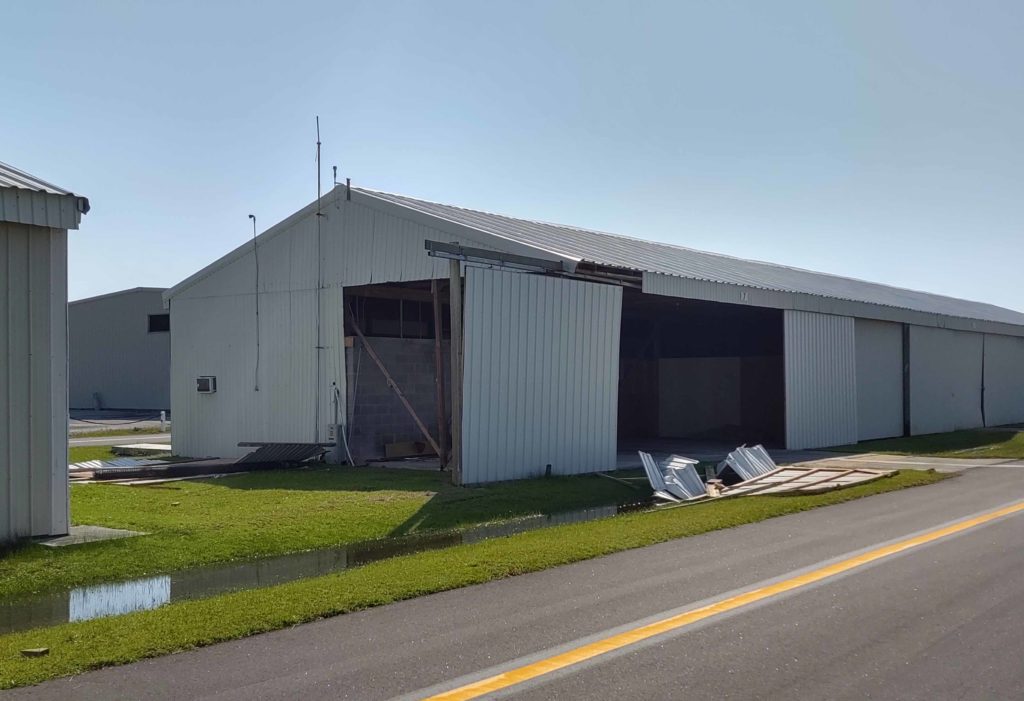
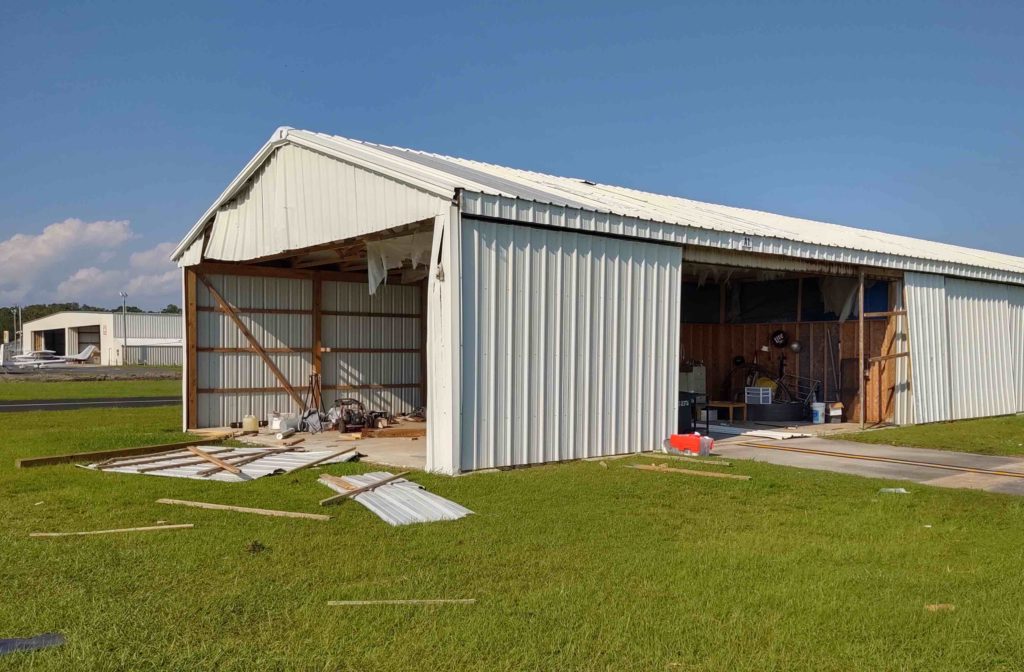
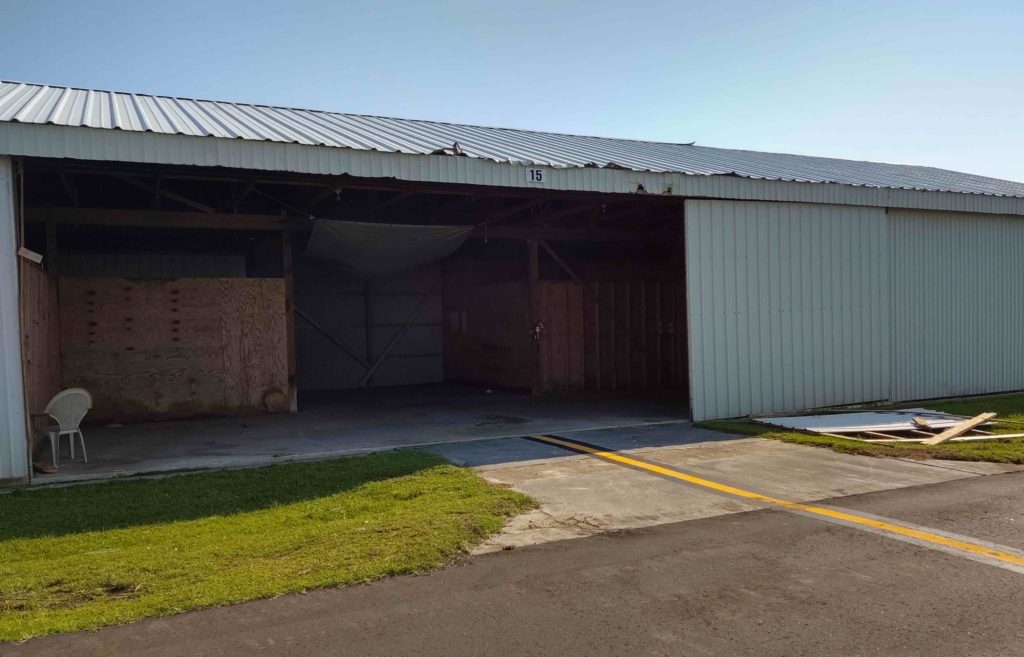
Here is the hangar across from mine. Not only did the doors received damage, but the side was blown out.

As you can see here.

Luckily this hangar did not have an airplane in it, but just an older car (aka 1970s “tank”) that appears to be undamaged.

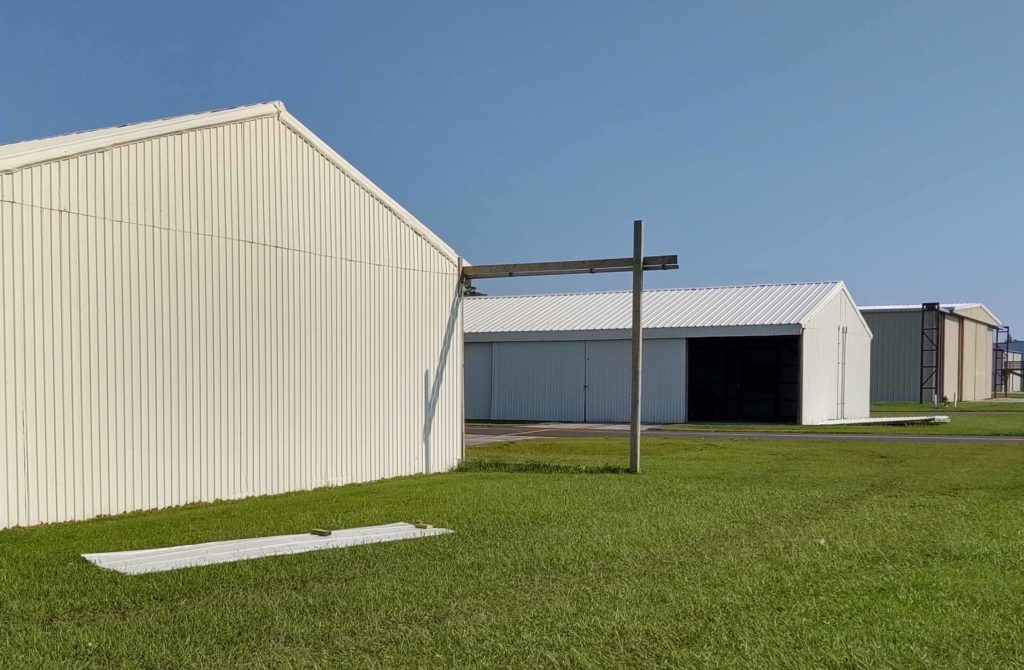
This shot was taken at the back corner of my hangar, right outside the man-sized door that is on the back of mine. This is looking away from the main taxiway and runways.

Same back corner of my hangar, but looking towards the taxiway and runways.

Again, looking toward the taxiway and runways. The hangar on the end and to the right was the most damaged, and we believe the first to bear the brunt of the tornado… which actually hit on the side of the hangar, ripped an older ragwing airplane out of the hangar, spun it around while shredding the cloth covering off of it.

Some closeups of the ill-fated “first hit” hangar . . .

Some more examples of hangar damage caused by the tornado.

And back around to my hangar row. Luckily, beyond doors getting ripped off, and one significantly damaged airplane (and a lot of wet stuff) there was no significant damage to speak of.

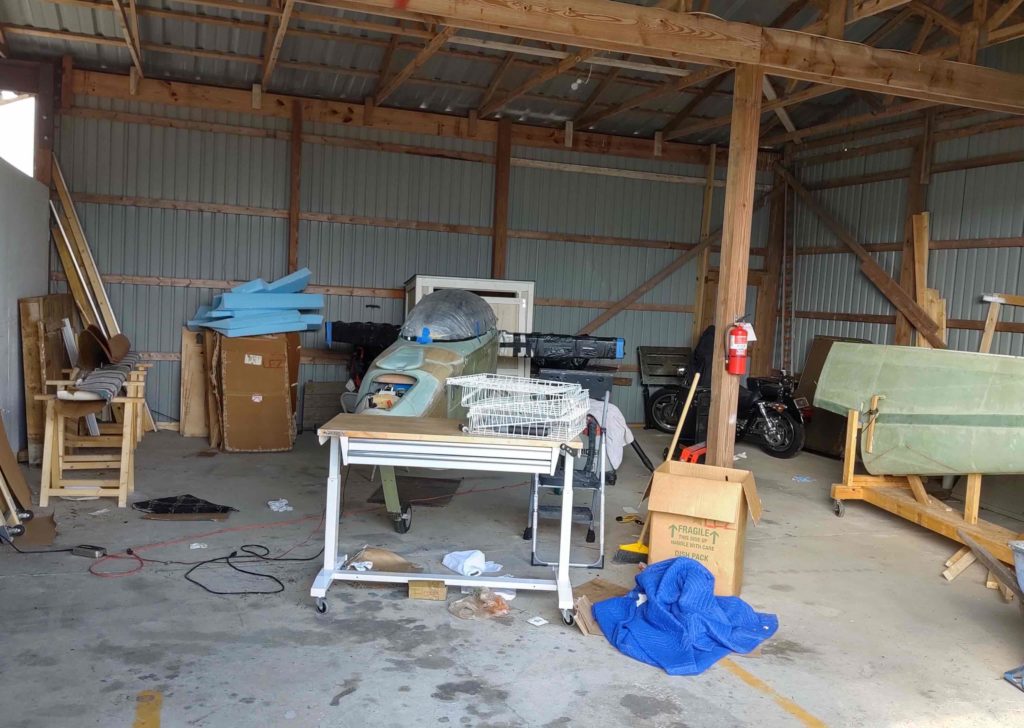
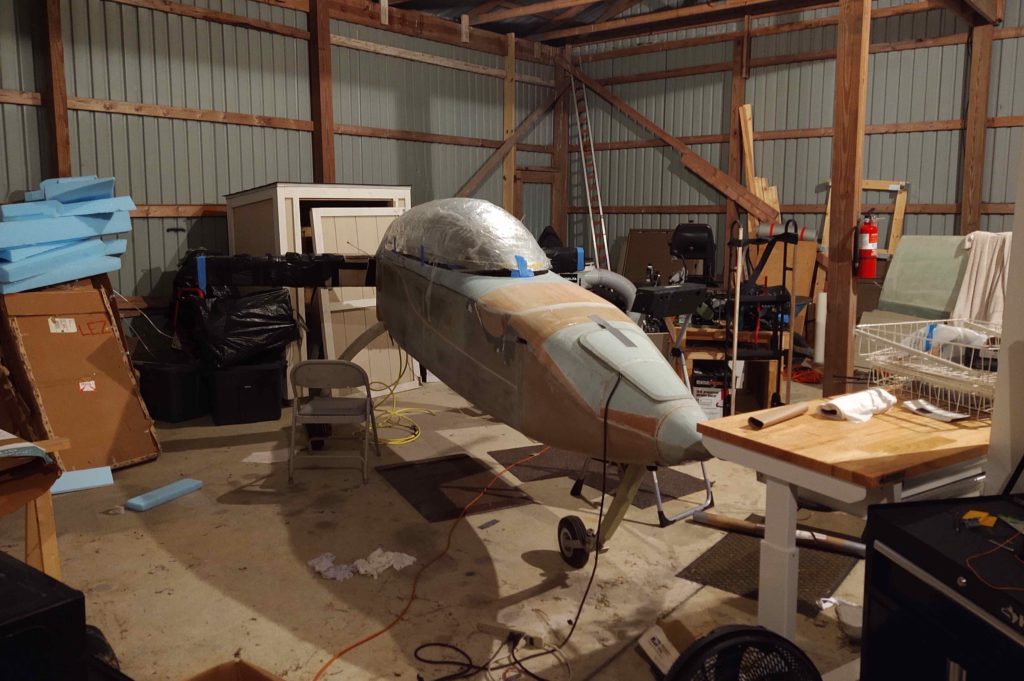
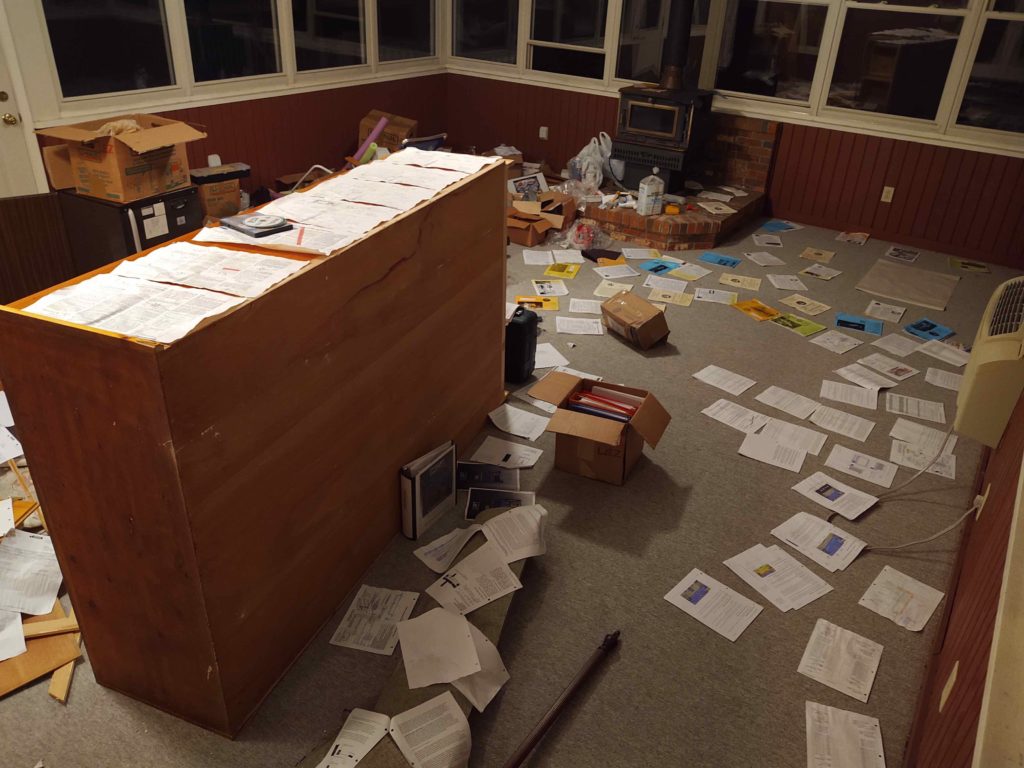
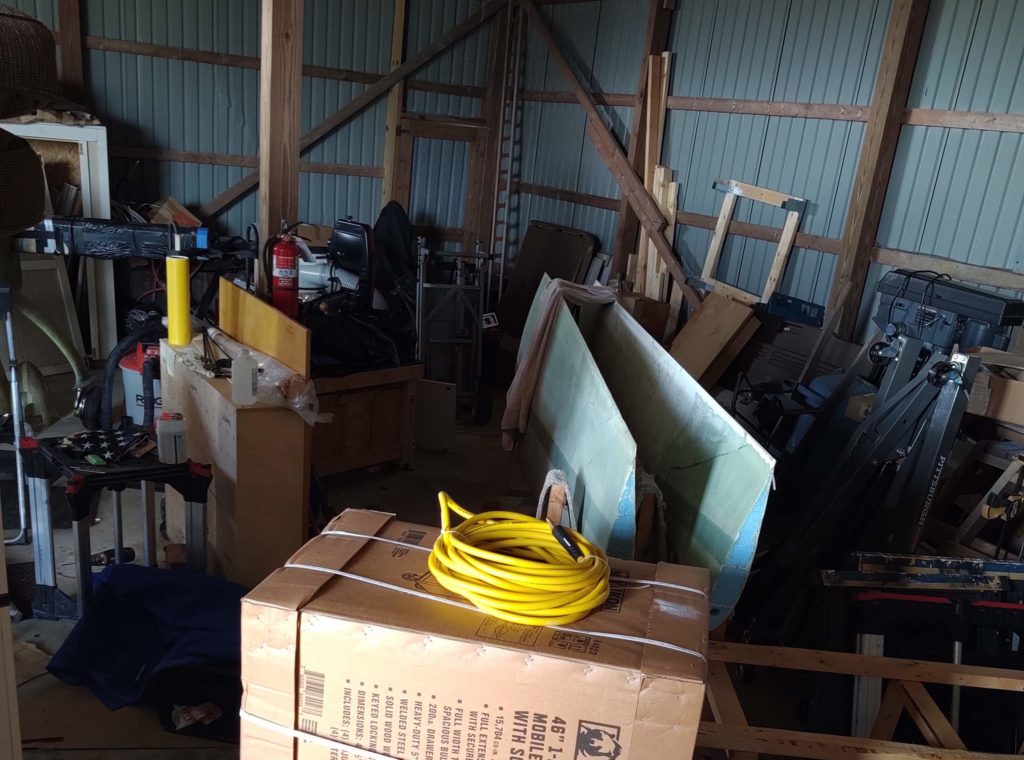
Here’s a peak into my hangar. The box sitting on top of the black plastic shelf remained there during the entire storm, as did other lighter weight items that you’d certainly think would have been blown miles away.

The right half of the hangar was virtually unscathed although a few odd things turned out to be soaked over in this area, while other stuff was bone dry.

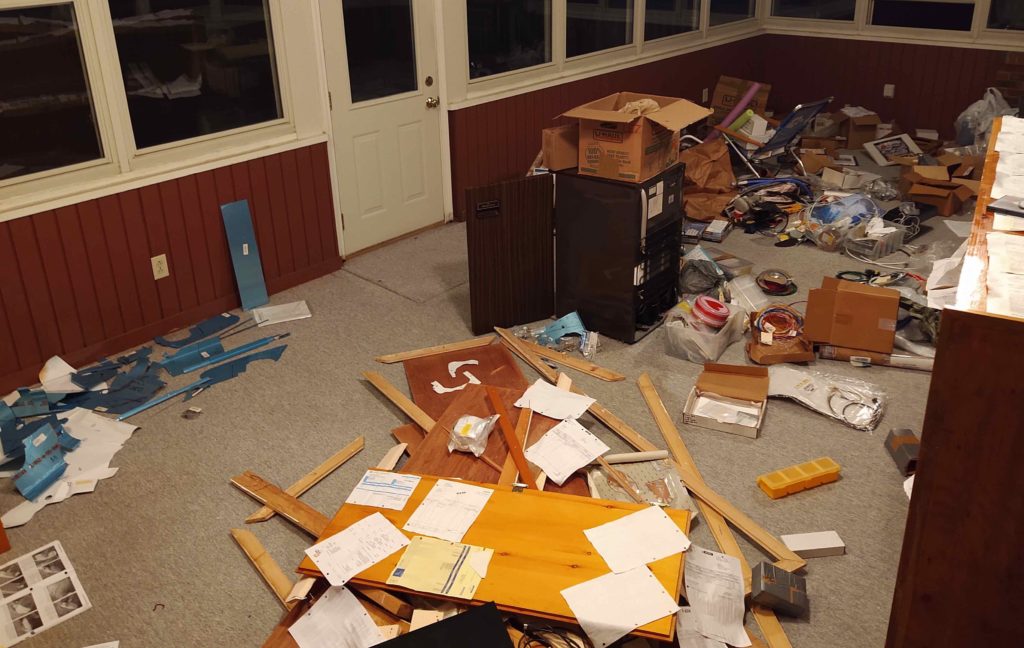
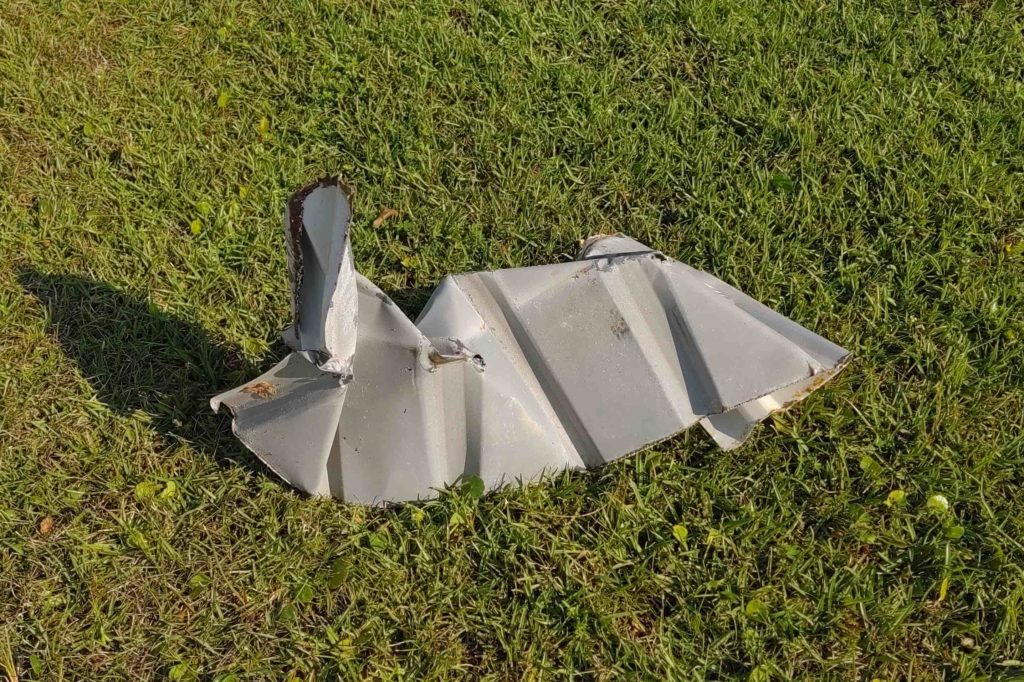
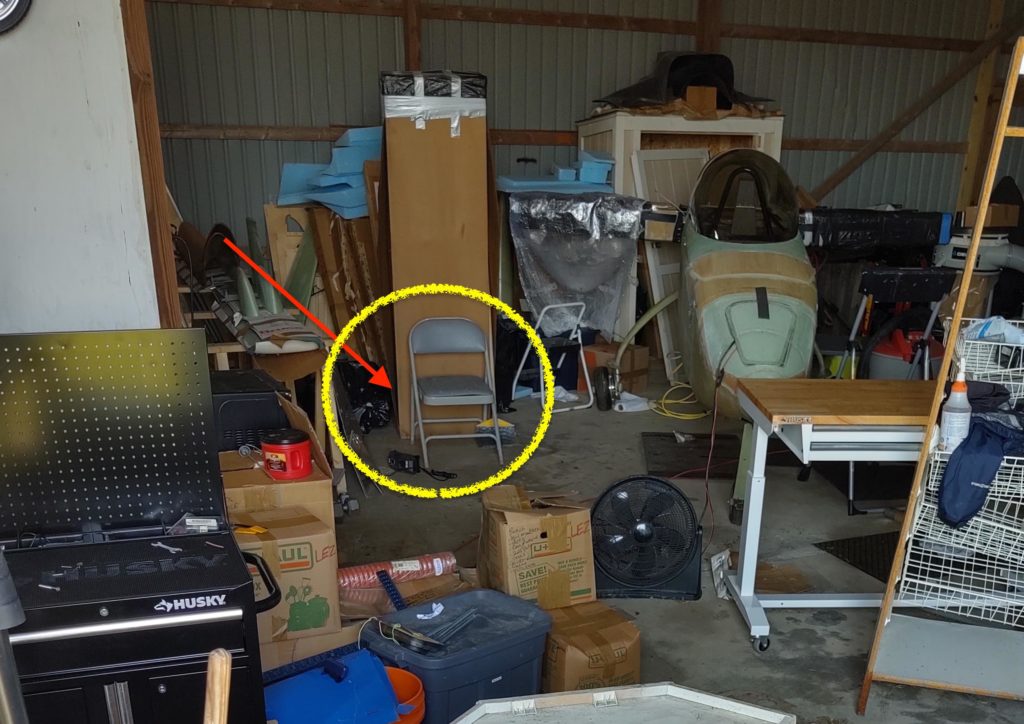
The one scary narrow-miss I had was this piece of 2 foot by 1 foot high piece of “frag”… which I think is that piece of flashing I mentioned above that was over the adjoining hangar door next to and on the aft-side of mine.

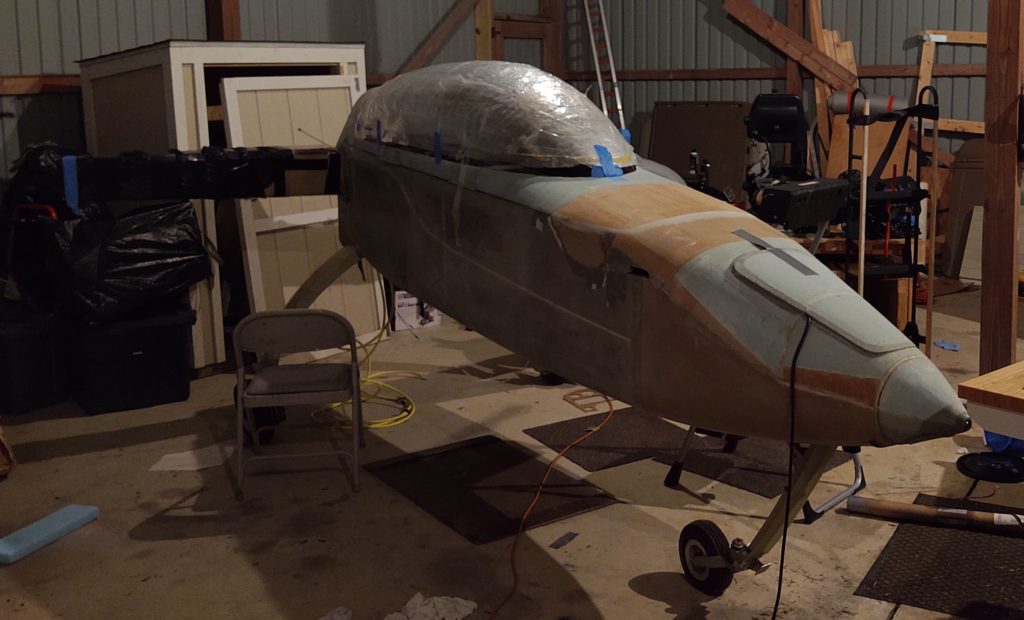
I found this big piece of metal flashing on the hangar floor sitting behind the big tall canopy shipping box that I have filled with blue wing foam (note red arrow). This spot is within 6 feet of my canopy and fuselage and it just makes me wonder what would have happened if I hadn’t had that tall box sitting were it was.

Also note that the thick plastic wrap on the canopy was ripped off and was on the floor drenched. I hung it over the left center spar to dry out.

Yes, this tornado (and hurricane) was a big PITA to deal with, especially a week after moving into my new house, but I am thankful that no real damage on either the house or airplane build occurred.

Bullet dodged.

Tooling Up: Milling Machine & CNC

Today has been a long time in the making. As most anyone who knows me will attest, I tend to be a planner. Grant it, not always the best but I do try to keep the wheels in motion so that I least have all the parts, pieces, components and/or systems at the ready when it comes time to implement the plan. Well, today has been the culmination of a year+ journey into the realm of both machining and CNC, and the first step in making that capability a reality.

The big truck arrived today with my Precision Matthews PM-30MV Milling Machine, Stand, Vise and accessories. As you can see, it’s one big bubba. Here it is sitting in my new garage in NC.

Here’s a couple shots of the actual mill in the crate, which I’m leaving it in until I’m actually ready to install it in the workshop with it up and running.

I was also able to coordinate my purchases with Dave of ArizonaVideo fame for his work in machining the CNC Ball Screw Kit required to convert this mill into a CNC machine. I pulled the trigger on the CNC Ball Screw Kit from Dave about a month prior and both the kit and the mill arrived within a week of each other.

As you can see Dave did a great job on making this kit, and specifically machined the motor mounts on this kit to accept my Nema 34 stepper motors.

I won’t get around to sinking my teeth into the machining portion of my build for most likely another few months, but having the components on hand allows me to ensure I configure the shop appropriately to allow for cramming all this equipment into it while still having room to build the plane!

Chapter 22 – COM 2 Radio

Today UPS delivered the last piece of the puzzle Avionics-wise for my Long-EZ from Aircraft Spruce: my COM 2 radio:

Specifically, the Trig TY91 VHF Radio.

As with nearly all decisions for this build, I had originally targeted the Trig TY91 as my COM1 radio, with the GPS radio as the COM2. Then the way the radio swap circuitry had to work, in conjunction of my going with the Garmin GNS-480 for my GPS unit… and due to the 480’s phenomenal COM radio functions, I decided to go with the GPS as my COM1 and the HXr controlled radio as my COM2.

With my COM1/COM2 radio selection made, for cost (and weight) reasons I then decided to go with the remote REM760M radio as my HXr-controlled backup COM2 radio. However, they apparently stopped producing them and GRT Avionics stopped selling them so I was driven back into the arms of the Trig TY91…. more expensive, and a few ounces heavier, but by all accounts definitely a superior radio.

Moreover, with the Trig radio I then required a serial adapter from GRT that allows the HXr EFIS to control the radio functions. Pretty cool in my opinion, as again it frees up panel space with the actual radio unit (above) being shoved into just about any available open spot in the plane (I plan to mount mine on the the top avionics shelf of the Triparagon).

One glaring oversight in my planning out the panel components with both HXr EFIS controlled Trig components –this radio and the TT22 transponder– is that I failed to take into account the considerable 2″ length of their respective serial adapters. Two inches may not seem a lot in the normal world, but behind my Long-EZ panel, where some clearances are just over 1/8 of an inch, it matters!

So much so that I have been considering a swap-out of the TruTrak 3-1/8″ ADI due to its depth and overall space it occupies. I’m more than happy with the functionality of the ADI, but it is a space hog in the tight quarters that is the reality of my avionics/instrument bay. More to follow on that later.