Shop cleanup continues

The shop cleanup continues…

Yes, as I noted before, the time had finally come to get the shop cleaned up and organized.

Since everything in the shop is covered in micro dust, I’m removing just about every item, cleaning it and either placing it back into the shop in an organized fashion, or relocating it to somewhere outside the shop.

One big task I was able to accomplish was to get my carts situated so that they are now finally in use for what I bought them for: the white work table for glass work and the black cart for machining items . . .

And I finally got all my sanding boards and sandpaper wrangled in one place in the red cart, with the gray cart used for tools.

You can see in the pic above that I still need to clean off the big worktable and organize the current items on top of it, as well as the far workbench as well. I’ll also populate my pegboards and get tools, etc. organized and hung up.

I’ve been working on this cleanup for a good 8 hours a day for the last few days and figure I have at least another good 8 hours left to finish up this cleanup.

This should be the last major shop cleanup and organizing before I finish this bird.

Chapter 24 – Massive shop cleanup

Before I got started on my massive shop cleanup for the day —again, to facilitate as clean as possible application of paint— I wanted to get at least one actual build related task knocked out.

The micro and glass inlay on the notch I created —to allow clearance for the bottom edge of the fire extinguisher— on the very aft end of the left pilot armrest was one of those small nagging tasks that has needed to be done for quite a while now… so I whipped up some micro and filled in the somewhat jagged foam edge, then applied a ply of BID into the notch on the top side and a small BID patch on the bottom side to lock the top BID ply in place and add just a skooch of strength.

I then set this layup aside as I got busy on cleaning the shop.

Although it may not seem like it if you were to be standing in the workshop, but I spent nearly 8 hours today cleaning and organizing the shop.  Just about anything that could be moved was taken outside and either wiped down or blown off with the air hose —usually both— to remove all the dust… most of it from sanding down the micro finish on the bird.

Not only did I sweep the floors to get all the dust, dirt and debris removed, but after the front 3/4 of bay 1 & 2 were swept, I then started at the back of the shop and blew out all the remaining dust with the high pressure air hose.

Of course after sanding the copious amounts of “micro” finish on the bottom of the fuselage, nose, strakes and wings, there was a LOT of micro dust on the shop floor around the plane.  I’m happy to report that it is all gone now.

That being said, I still have at least another full day of cleaning and organizing to both get the shop cleaned, organized and optimized for not only the upcoming painting, but also the remainder of the build.

I finished my cleaning and organizing tasks at 2230 and called it a night.  Tomorrow will be a lot more of the same… charging forward!

Chapter 24/25 – RAM scoop final steps

Today was about working on 2 things:
1) Trimming the belly RAM air scoop and “micro” finishing the scoop
2) Cleaning and organizing the shop

I started by temporarily installing the RAM air scoop/hell hole hatch cover onto the fuselage.  With the RAM air scoop in place I then marked and trimmed about an inch off the front lip/entry of the RAM air scoop.

I then whipped up some flocro and applied it thickly to the front section of the RAM air scoop and set it aside to cure.

I then spent well over 4 hours cleaning and organizing the shop, since not only does the shop really need a good cleaning in general, but I really need to get the micro dust eliminated as much as possible to proceed with my painting tasks.

Chapter 25 – Bottom cowl epoxy wipe

Today was all about getting the bottom cowling dialed in and tweaked to final configuration to allow me either do a final micro refill or press forward with epoxy wipes.

I spent about 3 hours (yes, hard to believe) getting the final position of the bottom cowling dialed in.  The main issue was the thicker sidewall fills both on the fuselage side and the front cowling edge that needed sanded and fine tuned.  I had the cowling on & off the plane about a dozen times in getting it back to its original installed position to allow the cowling’s outer CAMLOC holes to line up right in line with their associated mounting flange receptacle holes on the bird.

After getting the final sanding done, I then blew off all the micro-filled areas with compressed air, then did a general cleaning with Simple Green.  I then donned mask and gloves to wipe down and scrub the bare carbon fiber areas with PVA cleaner to remove any and all traces of mold release agent.

I then did another round of cleaning with acetone a while later right before hitting the bottom cowling with its first round of epoxy wipe, using West epoxy with 206 (slow) hardener.

Notice that I also epoxy wiped the belly-mounted video camera mount as well (sitting atop the cowling in the pic below).

I had planned on doing a full 5 epoxy wipes, but with my last wipe ending up being in the wee hours of the morning past midnight, I called 4 good and will press on from there.  I have noted at least 2 minor spots where I’ll probably need to do added refills after I sand down the cured epoxy wipes.

Again, note the epoxy wiped belly-mounted video camera housing on a paper towel in front of the cowling.

And after my many adventures on my bottom cowling, I called it a night.


Chapter 24 – Gear fairing final tweaks

Today was essentially a personal day as far as the build was concerned.  I did do some research and a bit of organizing, but as far as the build itself I only got a couple minor, yet important, tasks knocked out on the gear fairing.

I spent a good bit of time comparing the left vs right gear fairing shape and flow to get them as symmetrical and balanced as possible.  Personally I consider these gear fairings to be very nice and right in line with the style I’m looking for on this airplane… but they aren’t perfect.  And I don’t expect them to be.  If I did, or wanted them to be, I wouldn’t have simply free-handed the cut lines and pressed forward.  Again, I want to actually fly this bird … soon!

That being said, per my eye, I could tell the left fairing had a bit more of a raised curved on the top as compared to the right fairing. After a dozen round trips to each side of the plane, I finally made my executive design decision and marked a new cut/trim line on the top of the left gear fairing.

I then grabbed my Fein saw and trimmed away.  I then cleaned up the edge with a sanding board.

Left fairing final shape complete!

But wait, there’s more!

I also trimmed almost 1/8″ off the underside/inboard edge of the right gear fairing (light blue arrow) to add just a skooch more gap between the gear fairing edge and the edge of the hell hole cover seam.

Although this gap is still not as wide as its brother on the left side, it at least minimizes to a degree the obviousness of these gap widths between the 2 sides… it’s all about compromises, right?!

To be clear I should note that when I mention that the “final shape” is complete, that is the perimeter of the respective fairings that intersect the fuselage.  The aft swoosh configurations will not be complete until after the gear fairings are hard-mounted to the gear legs… again, just as a point of clarification.

Chapter 24/25 – Need more primer!

I started off today with a quick task to dial in the fit of the left gear fairing.  For some reason the top aft edge was raised just a hair, maybe 0.030″ off the surface of the fuselage as compared to the lower aft surface (remember, everything is reverse with the plane inverted).  I suspect as I added dry micro during the last glassing session that it must have pushed the top edge out just a hair and remained that way while it cured… unnoticed of course by me.

So I got to work on the very minor tweak of the left gear fairing by simply taping off the fuselage again and adding some micro up under the edge of the top aft gear fairing (after sanding and prepping it of course).  I then left it to cure.

Now, often in the course of my build days I take an opportunity to diverge from the main task at had to knock out a minor task, especially, say, if I have a bit of extra micro or West 410 fill that I can use.

Thus is the case where within the last couple of days I used some excess West 410 to fill in the TE of the wing at the aileron pocket, where it definitely needed some TLC… all for cosmetic reasons of course.

Back to my original point… until I come back around to the main task I’m doing the sideline prep for —in this case laying down primer into the aileron pockets— I forget about the sideline prep task: the West 410 application I did… to report on it until I come back around to completing the main task.

So I started off today sanding down the filler along the bottom edge of the aileron pocket, which with the wing inverted is the top edge. I also did a quick sand of the internal glass, then did a couple rounds of cleaning to ensure the surface was prepped for primer.

This resulted in nearly 2 hours of prep just on the aileron pockets alone.  Note that I also taped up edges of both inboard wing root flanges for primer to allow paint to be applied to cover the seam between cowling and wing.  I also removed and prepped the nose gear well door hinges for primer as well.

I then mixed up some primer and went to town on my list of components requiring it.  Here we have the wing aileron pockets in primer now.  I left the carbon fiber bare simply to minimize paint weight and just for a bit of variance (aka fun) whenever this area may be visible (which it’s not really once the ailerons are in).

Here’s a shot of the inboard side of the aileron pocket… I’ll be hitting just these inboard and outboard ends with a single coat of white paint since they are more visible when the ailerons are deflected up or down.

Here we have the pair of nose gear door hinges that I removed for priming.  Note that I’m not messing around with priming or painting the actual hinge interconnecting pivot points simply because it’s too much hassle for an area of low visibility.  A strip of aluminum-colored metal isn’t going to break the bank design-wise in the wheel well!

Of course these too will get a coat of white paint before being permanently re-installed.

Related to above, the aft ledge of the wheel well that the hinge doors press up against was bare, so I added a quick coat of primer to that as well.

Finally… although for a bit I wasn’t sure if I was going to have enough primer mixed up to complete all my tasks, I actually had just enough left over to allow me add a good bit of micro to thicken it up.  Then, with my home-brew high build primer, I slathered it onto the area of the aft inboard bottom left strake that has had some issues with an irregular surface… that I didn’t catch fully until I wet sanded the white primer.

Hopefully with this wide application of thick primer I can get this area dialed into a nice smooth surface for final paint.

I then left my various components/areas in fresh primer to cure.

Chapter 24/25 – Gear fairings ready!

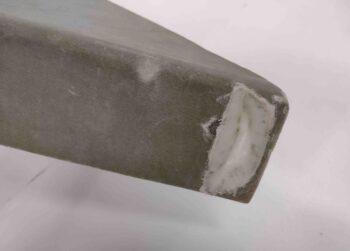
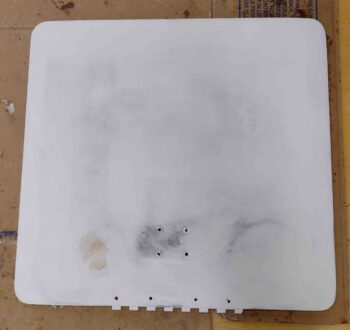
I’ll start today with a pic of the nose hatch door which I actually finished the 5x epoxy wipes on late last night.  I’ll give it a good 48 hours to cure before sanding it in prep of its first round of primer.

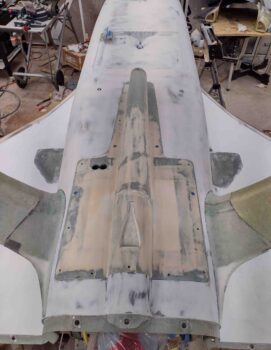
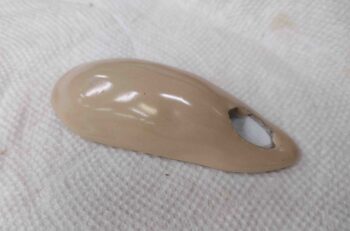
My first task of the day was dialing in the bottom cowling and doing some minor refills with straight West 410.

Grant it the very final shape —hopefully with no more required finish fills— will be dialed in with the cowling mounted onto the plane.

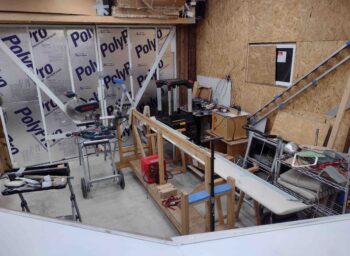
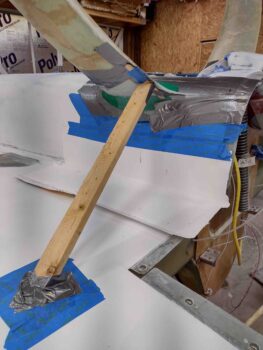
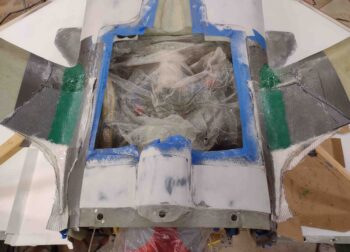
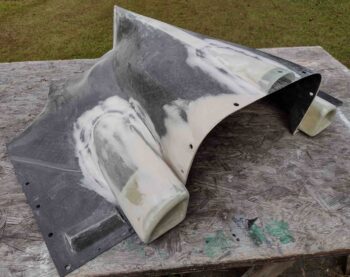
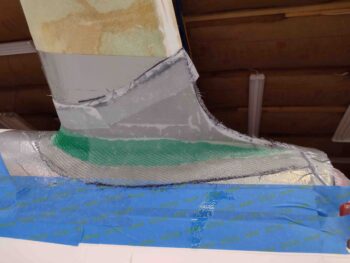
I then got to work to finish up the initial construction of the main gear fairings.

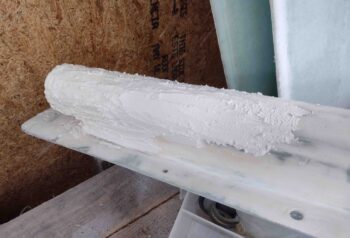
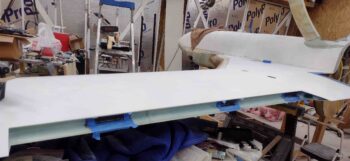
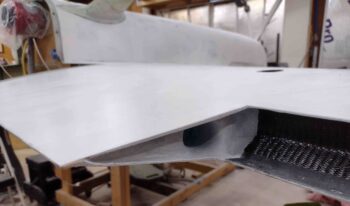
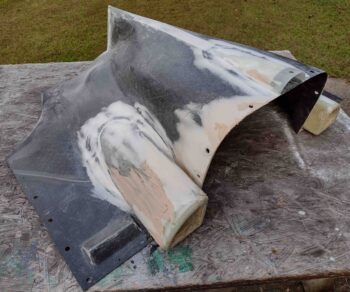
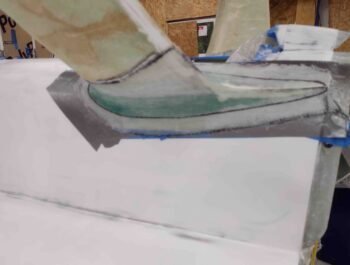
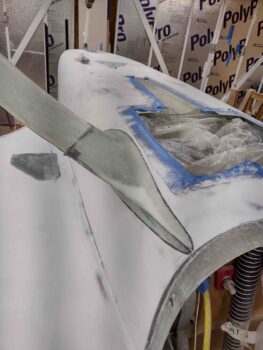
While the fairings were still secured in place with the death grip the cured glass had on the underlying tape and clay, I went ahead and gave the un-peel plied glass surface a thorough sanding for the upcoming micro finish.

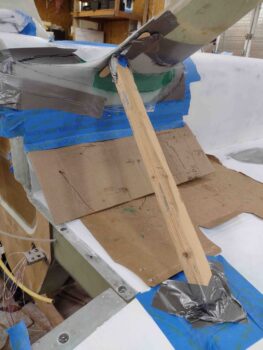
I then did the same thing on the other side.  Thus far, I am extremely pleased at the surface smoothness… with minimal egregious bumps and depressions that will in turn require minimal amounts of micro fill.

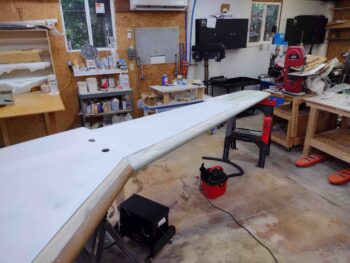
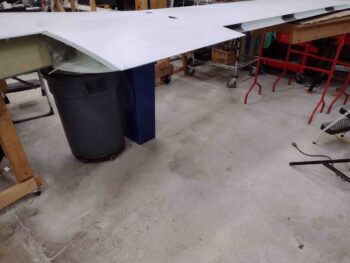
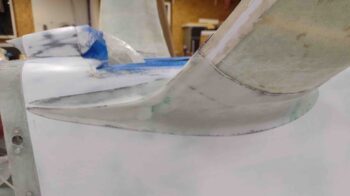
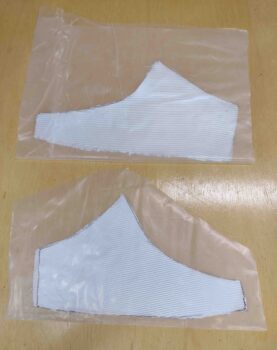
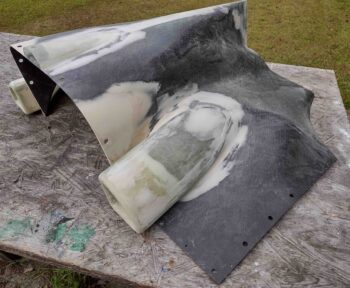
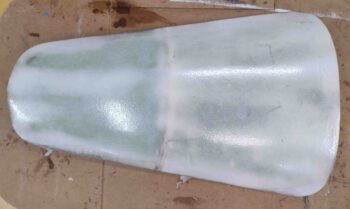
Here we have the thoroughly sanded gear fairings.

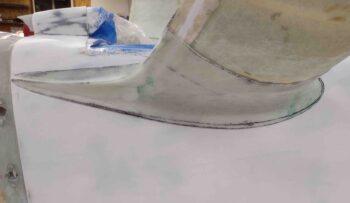
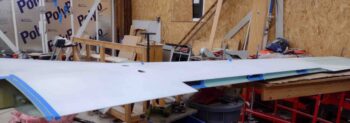
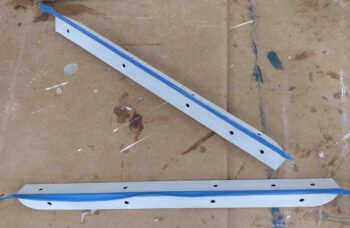
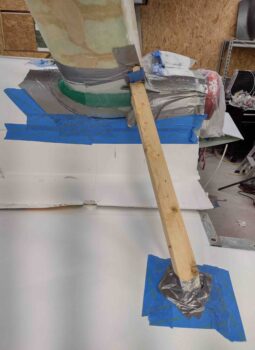
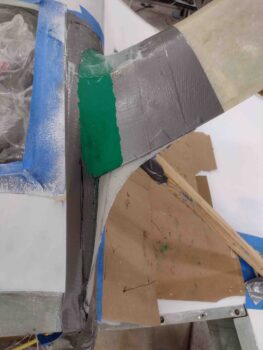
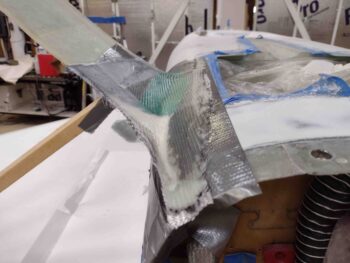
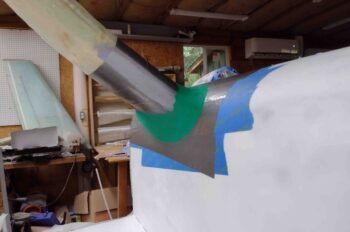
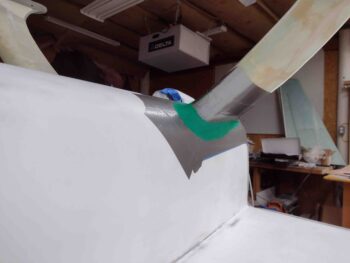
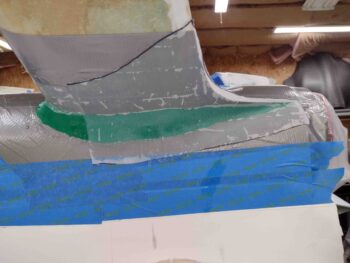
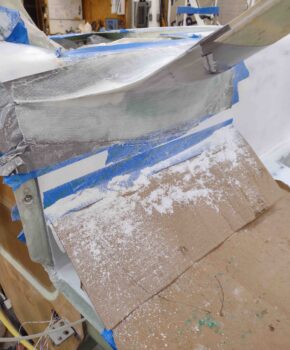
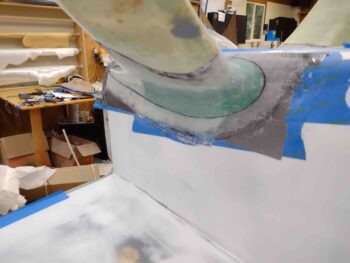
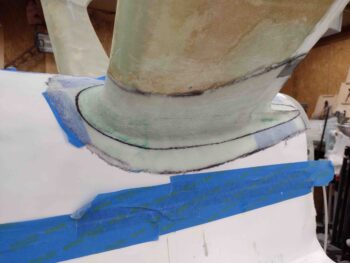
I then marked the initial cut line on the left gear fairing.

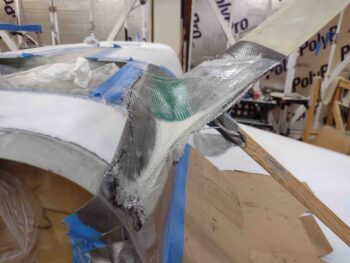
And then did the same on the right side.

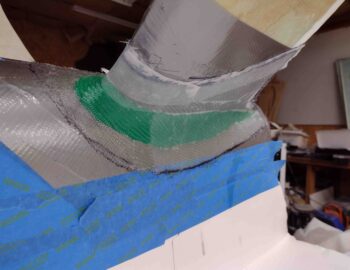
Again, here we have the marked initial cut lines for both gear fairings.

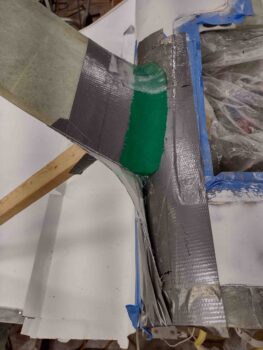
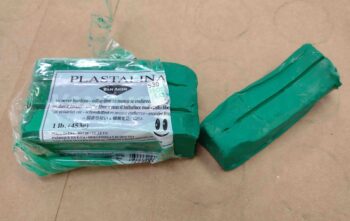
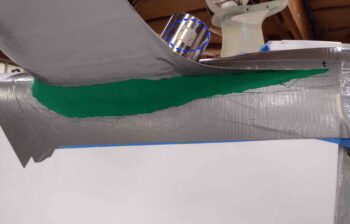
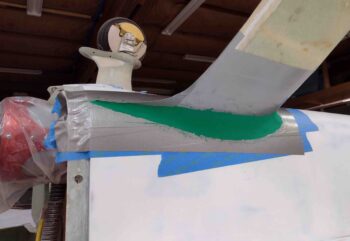
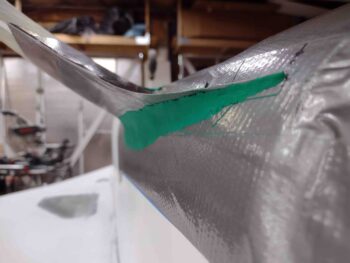
As you can see, the cut lines follow the perimeter of the green clay were it intersects the “surface” of the fuselage, currently covered by gray duct tape, since this is the first point of contact between fairing edge and fuselage.

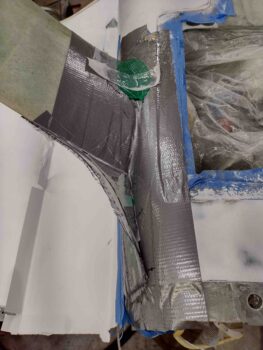
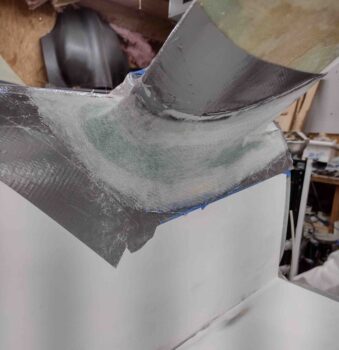
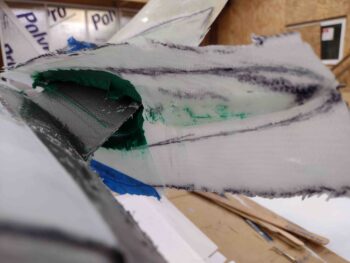
After the initial cut lines were marked, I then carefully worked and pried the right gear fairing to pop it free from the tape and clay.  Although technically it popped free from the tape with the clay still attached to the fairing underside.

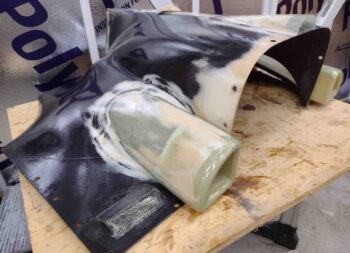
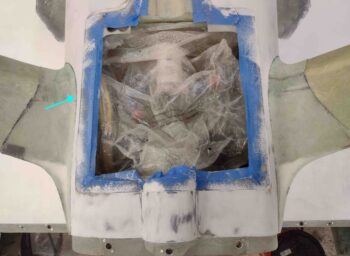
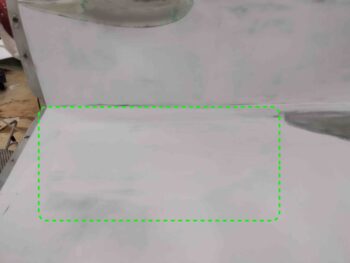
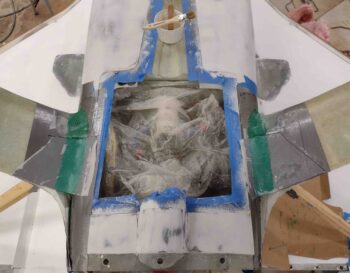
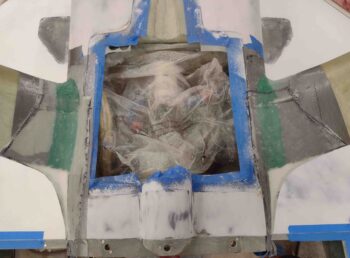
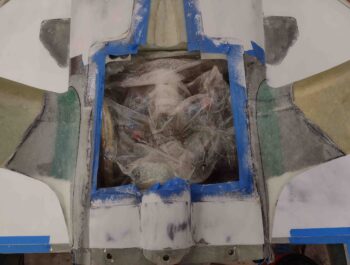
I then spent well over an hour cleaning out & off the clay, as well as pulling the peel ply from the internal surfaces of the right gear fairing. You can see for the most part that the underside/inside is fairly clay free in this shot.

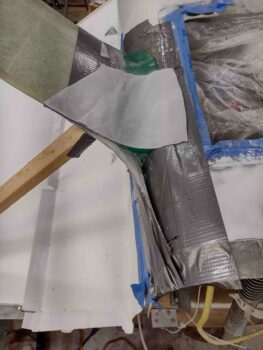
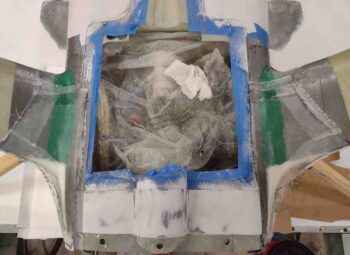
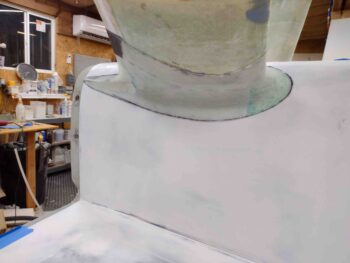
With the fairing secured near the wheel/bottom end of the gear strut, I then removed the tape from around gear leg and off the fuselage.

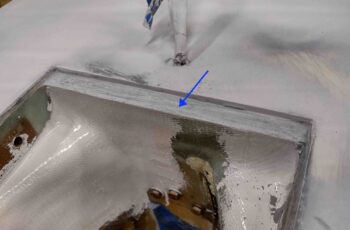
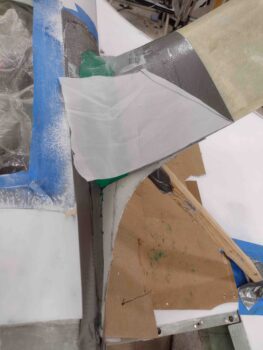
I then set the fairing back in place to check my initial cut line to ensure that the fairing would cover the gear thru-hole in the fuselage.  Which it did by at least 1/4″ all the way around.

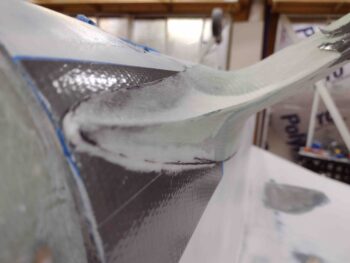
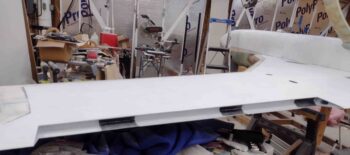
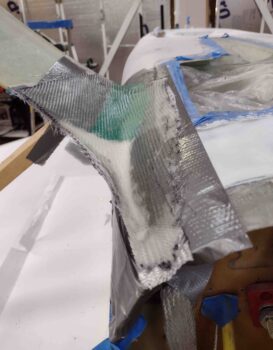
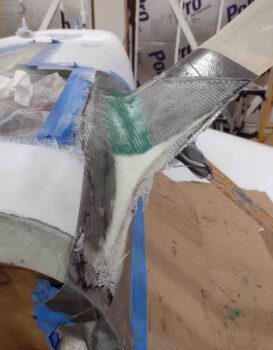
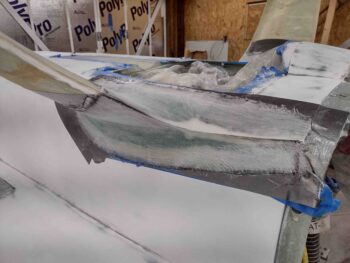
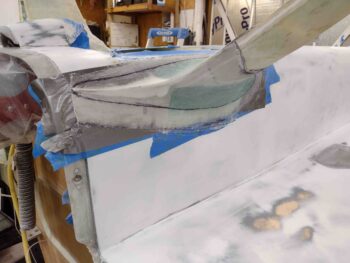
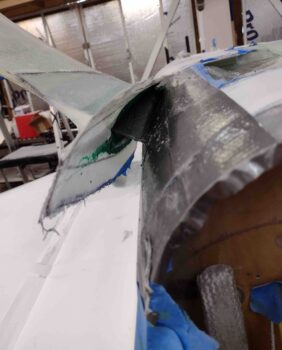
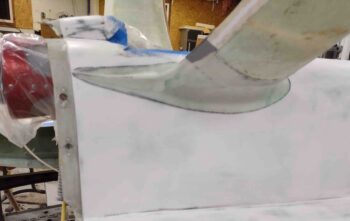
I then used my ever-trusty Fein saw to trim the excess glass off the right gear fairing just outside my initial marked cut line.  Here are a few shots . . .

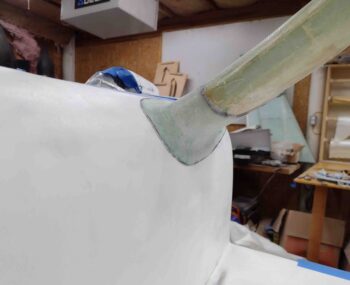
And one more pic from the aft side.

I then repeated the process on the left gear fairing.  Slowly, carefully prying up the gear fairing to gain access to the inside to remove all the green clay.

Again, this process took about an hour to remove all the clay and then pull the peel ply from the internal surfaces of the gear fairing.

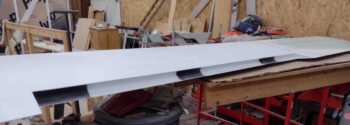
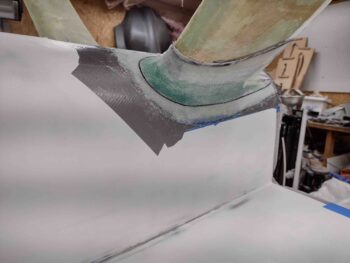
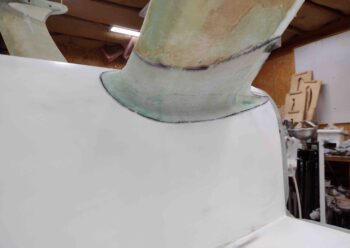
After removing the protective tape from the fuselage, I then trimmed off the excess glass with my Fein saw just outside the marked initial cut line.

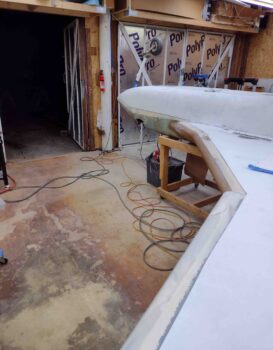
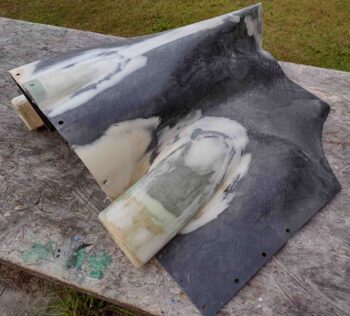
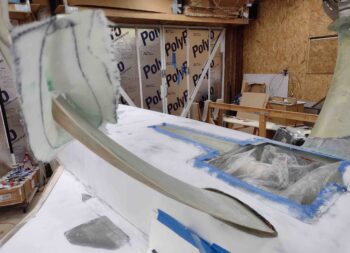
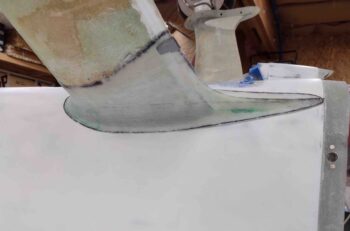
And Voila!  Gear fairings are glassed and ready for install.

Clearly I’ll have some minor/fine tweaks, sanding and shaping to do on these gear fairings, but overall I’m extremely happy with how they turned out and am ready to press forward with my remaining bottom-of-plane tasks to get this bird flipped back upright, finished, and in the air!

Chapter 24 – Gear fairing final glass

Today I got back to work on the main gear fairings.

First off, I needed to pin the somewhat thin 2-ply BID glass of the top fairing (on the bottom as situated here) firmly against the top of the gear leg.  To do this I simply used some wood pieces wedged against the strakes (protected by cardboard) with a fair bit of duct tape to secure it all.

Here’s a shot of one of the struts from the side.

I also created the radiused fairing transitions between the bottom inboard seams of the gear legs and fuselage with more green clay.

I then cut some peel ply for the majority of the new bottom glass layups on the interior side of the fairings where they’ll be floxed to the gear legs.

I then wetted out the peel ply pieces on both sides.

I then laid up the first ply of BID on each side bottom gear fairing.  At the aft-side swooshes I pushed the BID down into the “V” groove so that it had glass-to-glass contact on a good majority of the inside of the swoosh, as well as overlapping onto the tape-covered fuselage.

I then filled the swoosh “V” grooves —with a ply of BID underneath— with dry micro.

I used 3 plies of BID total here on the bottom gear fairing layups for a bit of added strength, since the first ply serves as a securing underlayment for the top 2 plies. For the top 2 plies I prepregged them for optimized wetting out and control during the layup process.

Here we have the top 2 plies laid up over the first ply (and peel ply) and over the dry micro embedded into the swoosh “V” grooves.

I then applied peel plied along the aft edge and top (as situated here) along the intersection of this BID with the gear leg.  Later on, when I permanently attach these fairings to the gear legs, I’ll of course lay up a 1-ply BID tape at these transitions to secure each fairing to the gear leg.

Finally we have a shot of the whole shebang from overhead.  You can see the newly glassed gear fairing bottom surfaces, peel plied and ready for action.

I then called it a night and left these layups to cure overnight.


Chapter 25 – Bottom cowl finish #2

Today I got a late start out in the shop, at least in part since I compiled and fired off an order for both white primer and white paint.  If all goes well, this should be the last of the paint and primer I need to finish painting this bird.

In addition, after another half hour search I finally found my 5/16″ Nord-lock washers for remounting my nose gear actuator back into the NG30 brackets.

Mid-afternoon, I pulled the bottom cowling outside to sand down the second application of “micro” fill.

The thickest application of West 410 was along the front bottom edge on the left side, to better align and match the cowling edge with the bottom of the aft fuselage.

After sanding down the bottom cowling, I mixed up some straight West 410 and applied it to a minor divot on the exterior surface of the landing brake… that I felt was a little too deep to be handled by one application of thick primer.

I also used the West 410 to slather up the belly video camera mount to prep it for finishing.

I also filled a couple pinholes on the bottom surface of the left wing with the West 410. Earlier, out of curiosity, I had used straight epoxy in an attempt to fill these pinholes, but that didn’t work.

Finally, I sanded the micro finish on the nose hatch door in prep for epoxy wipes.  I didn’t grab a pic of this, but will get one over the next day or two.

I had plans this evening so I wasn’t able to get back to work on the bottom gear fairing layups, but definitely plan to get back on it tomorrow.


Chapter 24 – Fairing arts & crafts

Thankfully I don’t have a lot of one-off arts and crafts projects left where I have to both design and create a part specific to this bird.  However, the main gear fairings at the intersection of the gear bow with the fuselage falls squarely into this category.

After taping up the intersection of the main gear and the fuselage last night, today I pulled out the clay I bought a month or two back just for this purpose.

I then spent a good 45 minutes working the clay into the intersection between gear and fuselage to create a fairing “with a pleasing shape.”  That shape to me consisted of about a 1.5″ radius as exampled by the socket I used to create it. I got the idea from Mike Beasley when he created his fairings, which I should note I’m doing the same style: where the fairing is attached to the gear leg and then “floats” above the fuselage surface with a 1/32″ gap.  I’ll note further that Mike appeared to have used a socket smaller than an inch for his radius, but since my gaps around the gear leg are significantly greater than he has on his bird, I clearly need a larger radius to create a slightly wider fairing.

Here’s my artwork on the left side gear to fuselage intersection.

A front angled shot of the same,

And as close to a head on shot as I could get to show the top and bottom radius of the added clay that creates the fairing’s shape.

And a couple last shots of the front and aft side of the right gear fairing.

I then created a newspaper template for the top side (bottom side as presently situated inverted) BID and then transferred that to cardboard.

I then cut out 2 plies of BID per side, 4 plies total.

And then cut some plastic to allow me to prepreg the BID plies.

I also used the glass template to cut a sizable piece of peel ply which I wetted out in place on the aft 2/3rds of the fairing.  On the front I added a straight piece of peel ply around the gear strut (gray tape) where I’ll be floxing the fairing to the gear strut.

I did this peel ply on both sides but only grabbed a shot of the right side.

I then laid up the prepregged 2 plies of BID, and then added more peel ply along the top (as situated here) where I’ll lay up a 1-ply BID tape to secure the fairing to the gear strut.

A shot of the initial 2-ply BID layup for the gear fairing, with peel ply.  Again, I did the same thing on the other side as well.

Since I want a good glass-to-glass edge on the aft swoosh part of the fairing coming off the main gear trailing edge, I decided to lay up the fairing in 2 parts.  Thus you can see where the glass ends a few inches aft of the gear strut leading edge (top of pic) and covers the entire swoosh were it terminates/converges into the aft fuselage.

Note that I also peel plied the aft edge on the front side of the layup, where layup #2 will overlap onto.  Moreover, pretty much the entire interior surface of the swoosh is peel plied as well to allow me to get good glass-to-glass bonding there.

Tomorrow I plan on laying up the second part of the fairings to get these things installed and off the to-do list.