Chapter 25 – Primer, round 2

Today, after a lot of fiddly surface prep, taping, etc. I was able to lay down a nice thick coat of white primer on the bottom airplane surfaces: fuselage, nose, strakes and wings.

As I did with the gray primer, I thickened the Epifanes 2-part polyurethane white primer with a good bit of micro.

Since white is a good base color, added to the fact that I really don’t want to have to apply any more primer, I applied this coat on fairly thickly using considerably more primer this time around than I did with the gray primer… about 3/4 of a “quart” (750 gm) can more.

I have to say I’m pleased with the result and think I have a good base coat for the paint.

Although I’m sure there will be a few low areas requiring just a bit more thickened, high build primer before painting ensues.

As I’ve stated before, the adhesion and durability of this primer is notable as you work with it… and so far this really seams to be a high quality paint system.

Of course I had to include a nose shot…. really liking the lines of the bird thus far, especially with it all in ONE color!

I also applied a good thick coat of the white primer to the landing brake as well.

And with that, I left the newly white primed aircraft surfaces to cure.

Chapter 25 – First primer coat sanding

Today I started the task of wet sanding the gray primer that is the initial primer coat covering the bottom surfaces of the plane: fuselage, nose, strakes and wings.

I’m sure an expert could tell a story of what all the resulting splotchiness on my fuselage and nose surfaces indicates, but nonetheless I’m pressing forward.

The wings and and strakes didn’t have nearly as many breakthrough spots as the fuselage and nose… simply because the curves are much less pronounced, eh?

The next round of the primer will be white. If you’re wondering why I used gray for the first coat it was simply to act somewhat as a guide coat so I could note the different levels of primer as I worked the finish on this bird.

Here’s a shot of the other side after I finished the sanding of the gray primer.  I will note that the most difficult area to dial in is the corner junction between the inboard strake and the top of the fuselage.  It really has been a bit of a pain to sand one side aggressively without tearing up and/or damaging the surface 90° to it.

In addition to sanding, tweaking and prepping all the gray primered surfaces, I also added some more thickened (with micro) gray primer to a few areas on the landing brake.

After A LOT sanding today I’m taking a break before diving into the final prep and application of the second, white primer coat.


Chapter 13/25 – NG3/NG4 Reinstall

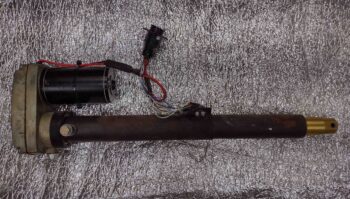
Today I had one objective: remove the flox-secured NG3 and NG4 brackets from the nose gear strut and remount them using industrial adhesive.

The reason for doing this is twofold:
First, during Oshkosh a canard owner had the NG3/NG4 bracket break loose and slip out of place on the nose gear strut.  I was remiss in not immediately downloading the pic from the discussion on FaceBook (I searched for it but couldn’t find it).  In that discussion Gary Hunter recommended using silicone to secure the NG3/NG4 brackets, where James Redmon recommended using industrial adhesive…. which again, is the route I chose.

To be clear, some other folks recommended drilling a hole through the strut and securing the brackets with a screw/bolt, but I wanted a better attachment than flox that did not require drilling through the nose gear strut.

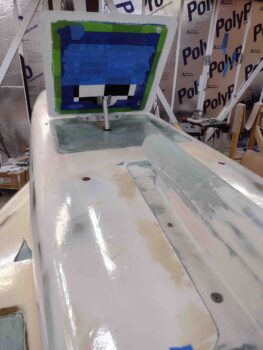
Second, I figured with the recent issue our fellow canardian experienced at Oshkosh that as I took the time to work other nose gear strut issues with my plane inverted that I would also knock out this task.

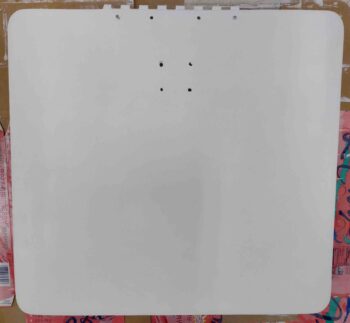
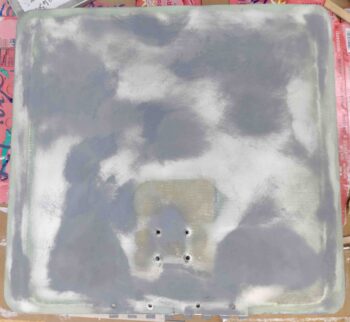
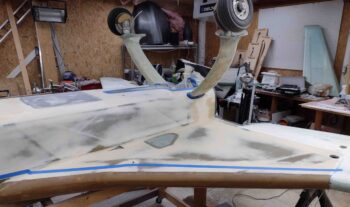
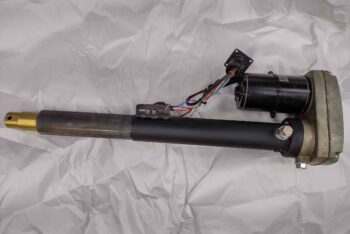
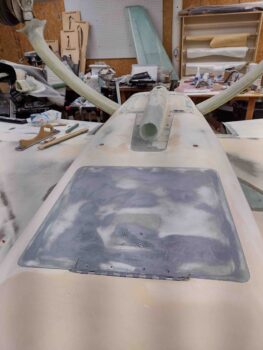
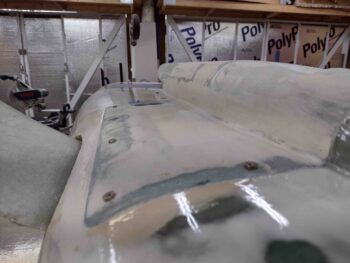
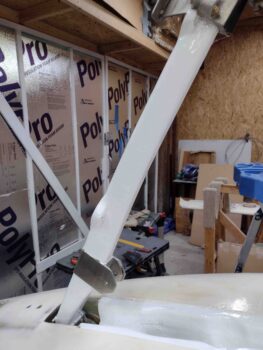
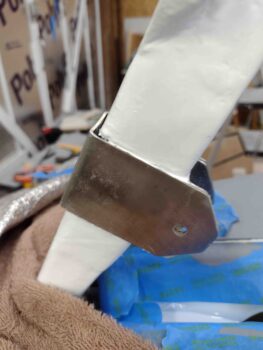
Here is the “before” pic that shows a gap between the NG3 and NG4 since, not surprisingly, securing pieces of stainless steel together without welding is of course tricky, especially using some type of epoxy or adhesive.

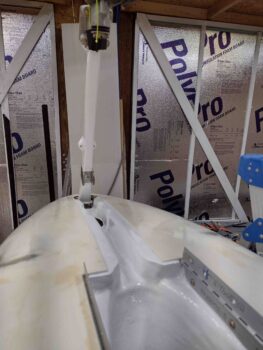
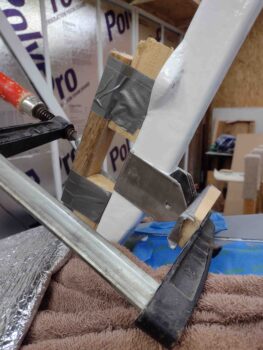
I started by setting up a clamp with a wood bridge that would allow the NG3 to pop free.

I wanted to simply warm up the bracket before hitting it with a soldering iron to break the flox hold on it, so I hit it with a heat gun for less then 10 seconds on each side.  Very interestingly and surprisingly, with just a fairly minor bit of heat, the NG3 popped free.

I then slowly and carefully pried off the NG3, leaving only the NG4 bracket in place.

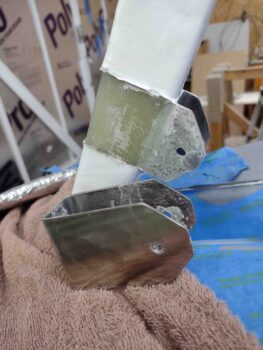
Again, after some minor dead flox removal in a short order of time, the NG4 just fell off without any effort.  The initial release of the NG3 after just a bit of heat applied and the NG4 falling off while working on removing flox from the side area drove home both Gary Hunter and Jame Redmon’s points that flox is not the best securing medium for these stainless steel brackets.

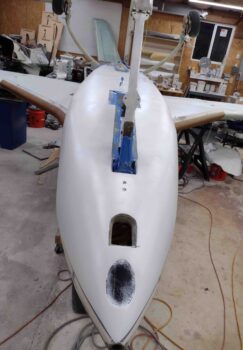
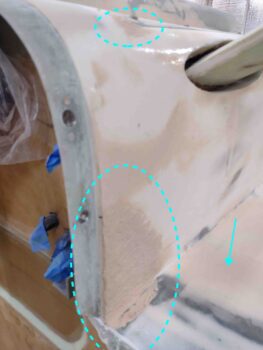
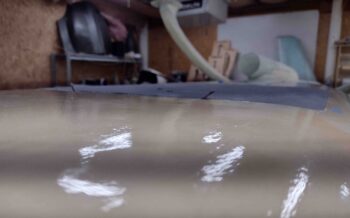
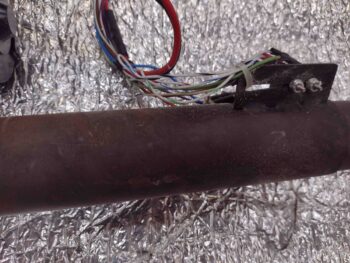
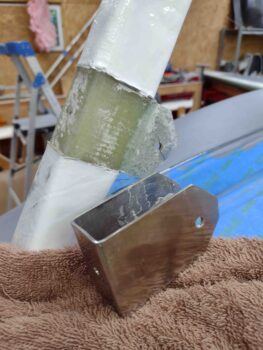
Note the center nub both on the front and aft side of the gear strut from the original flox application.  I left these nubs in place to use as guides when remounting the NG3 and NG4.

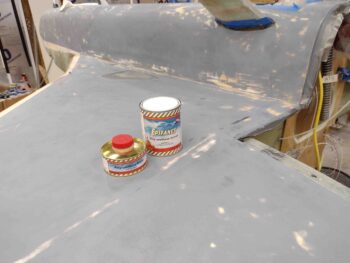
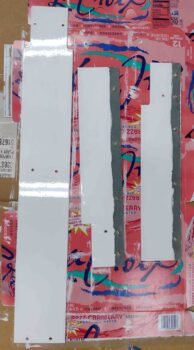
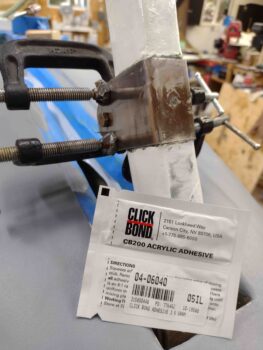
Yep, I failed to get some intermediate pics during the re-mounting process of the NG3 and NG4 using industrial adhesive, which would have shown the bracket area glass much cleaned up and sanded in prep for bracket reattachment.  I’ll note that while doing my research on which exact industrial adhesive to use I found on Aircraft Spruce and McMaster-Carr that the acrylic industrial adhesive seemed to have the strongest grip, so I went with that (shown below).

After mixing the 2 part adhesive and applying it to the gear strut, I then slid the NG3 bracket into place —again, using the original cured flox nub for alignment— before then sliding the interior NG4 bracket into place, also using the aft remaining nub for alignment.

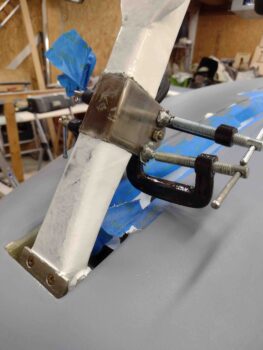
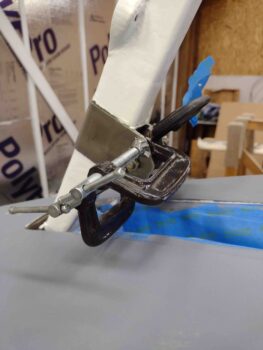
With a bit of fiddling to get the 2 brackets aligned, I then slid the AN4 bolt through the side holes to align and secure the brackets.  Then, to secure the inside walls of the NG3 to the exterior side walls of the NG4 I clamped the top and bottom edges on each side.

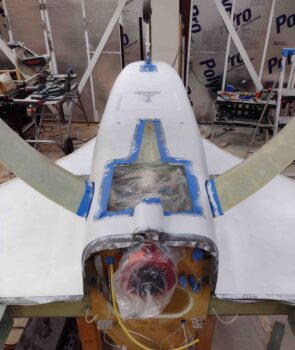
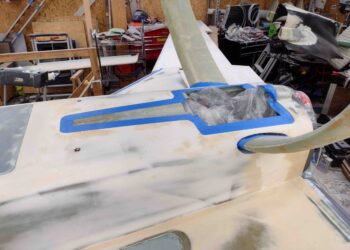
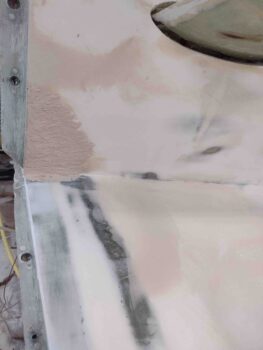
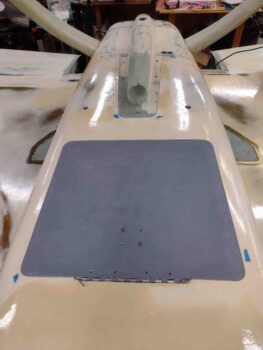
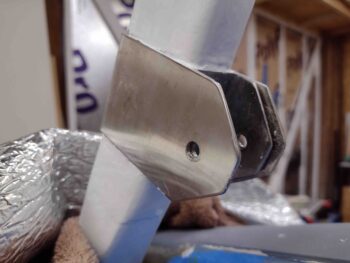
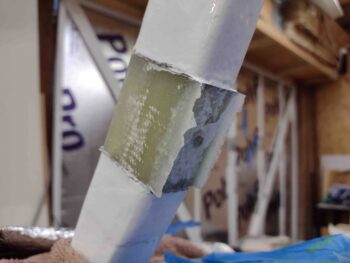
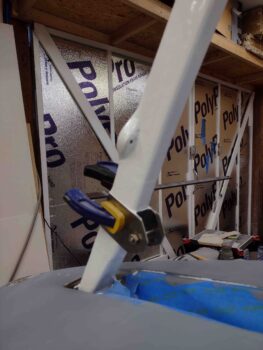
I then left the “glued” NG3/NG4 brackets to cure.  Here you can see the original flox center nub peaking through the front center hole in the NG3 bracket.

Also, I placed the second packet of the acrylic industrial adhesive that I picked up from ACS in the pic.  I chose the Click Bond adhesive since it comes in a small 2-part ez-mix packet that doesn’t require a separate mixing nozzle or applicator assembly.  Best yet, these small packets are less than $3 each.

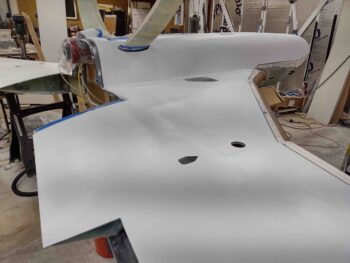
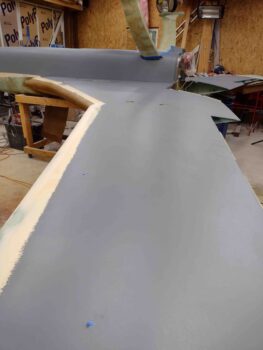
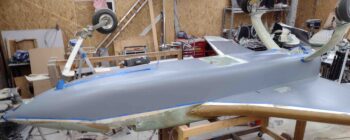
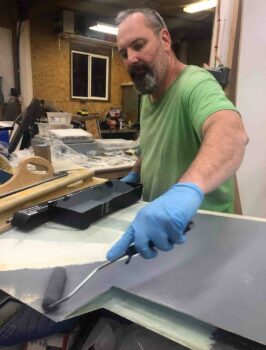
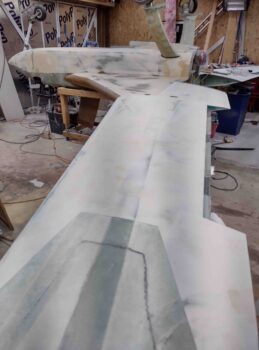
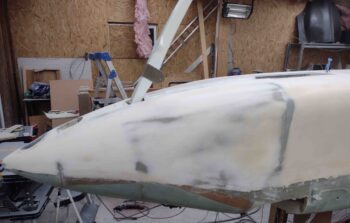
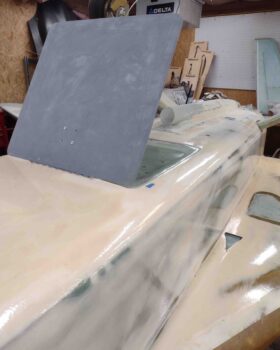
A number of hours later I mixed up some white paint to apply to the inside surfaces of the nose gear doors and the nose strut fairing, so I repainted the edges around both the top and bottom side of the NG3 and NG4, thus finalizing the re-install of these brackets.

I didn’t grab a shot of the white paint applied to the inside surfaces of the nose gear doors and the nose strut fairing since it looks exactly the same as prior pics.

I’ll note that I really don’t like redoing tasks that I’ve previously completed, but I do attempt to be prudent when opportunities present themselves (inverted fuselage + nose gear strut work) to optimize functionality and safety on this bird.

Bumming around

As I mentioned a couple of days ago, I took yesterday off to go to the beach and just relax. The weather over the last few days has been about as perfect as you could ask for, especially for the East coast.

Friday night I remembered that Cherry Point Marine Corps Air Station was having an air show, so I got a parking pass for today (Sunday).

I took my little 12 year old buddy (and her mom) to the airshow since I knew that she had never seen the Navy’s Blue Angels before.

We were able to get a front row view along the fence, and except for the exceptional amount of noise that they made when crossing right in front of us, she loved every minute of it.  Of course these guys never disappoint!

So tomorrow I’ll stop my bumming around and get back to work on the plane. Cheers!

Chapter 25 – A few pinholes

Admittedly after the fairly intense prep leading up to the bottom primer, and then actually knocking out laying down the primer on the bottom surfaces of the plane … well, I didn’t get a lot done today.

I did spend nearly 2 hours carefully assessing the surface of the cured primer to identify any problem areas.  Across all the surfaces I found about 6 pinholes, 8 minor divots (2-4mm in diameter), and some depressions along the strake-fuselage corner that needed filling.  All in all I had about 20 areas total that needed addressing.

Again, since I’m experimenting to a degree on the bottom of the plane to dial in my processes for the arguably more critical topside surfaces, I decided to use West 410 here as my filler… mind you for the stuff bigger than pinholes.

I started with straight West epoxy with 205/fast hardener in the pinholes, then mixed up some West 410 to a creamy peanut butter consistency for the other fills.  I then did my filling duties with that mix.

I did check everything a few hours later and it all looked good…. I’m thinking the West 410 as a minor body paste filler should work fine here.

I never made it back out the shop, and I’m taking tomorrow off to go to the beach since the weather is starting to get noticeably cooler and there won’t be nearly as many sunny warm beach days coming up.

Chapter 25 – Primer anyone?

After about a week of final tweaks, again mainly to the aft fuselage and intersection area with the bottom cowling front lip, I was ready to apply some primer to the bottom of the plane.

I started off by thoroughly vacuuming, blowing off and cleaning the bottom surfaces.  I then taped up the front edge of the strakes.

And taped the inside the nose wheel well and strut channel, as well as along the nose’s bottom edge (here inverted… actually top edge).

I taped up around the inboard edge of the main gear legs and the inside flange of the RAM air scoop/hell hole hatch cover.  And the cowling mounting flanges around the firewall and strakes.

Note that I did not tape off the wings since my thought was that one “quart” (750 ml) of gray primer wound not cover the wings as well…. which I would later discover was a false assumption.

With my helper Jess, I then got to work applying gray 2-part polyurethane primer to the bottom surfaces of the airplane, including the wings.

As a point of note, I thickened the primer a good bit with micro to make even higher build, which really worked a treat.

Again, as you can see, I had enough primer to cover the bottom of the wings as well.

I didn’t cover the inside of the landing brake depression since this area will simply get one coat of the subsequent white primer that will come next.

And of course a nose shot.  I’m really happy with how this primer went on: the coverage and what looks to be very good adhesion and durability.

And a shot of me applying just the last very bit of primer in the tray to the outboard end of the bottom right wing.

I let the primer cure a good 24 hours before sanding it down for the next and near-final coat of white primer (of course spot touch ups and minor depression fills may be needed).

Chapter 13/25 – More sanding!

Today I finished block sanding all the epoxy wiped surfaces on the bottom of the plane. The last piece of the puzzle was the right wing, which I was able to sand.

I then grabbed some shots of the final white paint on the nose gear strut, strut channel and wheel well.

And another shot (not the best I know) of the white painted gear strut.

In addition to getting the nose gear strut, etc. painted, I also wire brushed and sanded the upper tube of the nose gear actuator to remove the surface rust before priming and painting it.  I think this good coat of paint should stave off any corrosion for quite some time.  In addition, I plan on discussing anti-corrosion steps on the lower tube with Jack Wilhelmson.

Finally, I block sanded the gray primer on the exterior surface of the landing brake. I’ll hit it with another round of the micro-thickened high fill primer to fill in some slightly depressed areas. After the next round of thickened high fill primer I’ll do a final coat of white primer before painting it.

Tomorrow I plan to finalize all the prep tasks that will allow me to apply primer to the fuselage and the strakes, and possibly the wings.

Chapter 25 – Aft fuse final tweaks

Today I worked on some West 410 refill tweaks required to finalize the shape and contour of the aft fuselage.  The main refills were on the vertical wall to add depth to further minimize the indentation at the aft fuselage sidewall junction with the bottom cowling.  In addition, I found a slight depression in the aft strake corner that needed filled (arrow).

Here’s another shot from a slightly different angle….

In addition to the final fills on aft fuselage, I test sanded a portion of the left wing with my 5″ orbital “DA” sander with 100 grit sandpaper.  It worked great so I proceeded to block sand the entire bottom surfaces of the plane that I had previously epoxy wiped (all but the right wing).

Note the final painted nose gear strut.

Here’s a shot of the aft fuselage and right strake block sanded, and are now very close to being ready for primer.  Note the piece of blue tape at the very aft corner of the fuselage with the strake, where I added a bit of West 410 filler there as well.

Finally, here’s a shot of the bottom left strake and bottom left wing block sanded with my 5″ orbital sander, again with 100 grit sandpaper.

Tomorrow I plan on block sanding the bottom of the right wing and remaining small areas that I haven’t sanded yet.

Chapter 25 – Post epoxy wipe refits

My primary focus right now is the nose gear strut, strut channel, wheel well, internal strut fairing and inside wheel well doors painting.  But since I need a good 24 hours between coats, I had a fair bit of time to work other issues.

So besides painting, which ironically I fell down on the job and didn’t get any pics of (all looks pretty much the same as the pics over the past few days!), my main focus today was refitting the landing brake and the RAM air scoop/hell hole hatch cover back into their micro-finished “pockets” on the bottom of the fuselage.

Yep, it appears that adding 5 coats of epoxy to the micro tends to make it so that the things that fit before with a decently tight tolerance, no longer fit into place.  It took a good hour on the RAM air scoop/hell hole hatch cover (Above — btw, in my notes I always shorten that label to RAS/H³C) edge to sand down the epoxy both on the interior horizontal and vertical edges to get to the point that would allow the actual RAS/H³C to be mounted back into place.

It took about 45 minutes of sanding and shaping the epoxy-wiped perimeter fuselage edge around the landing brake for it to fit back into the “pocket.”  Of course these were those iterative processes where I would sand and contour the edges, then attempt to reset the components back into place, just to find more sanding & contouring was needed.  Even in the pic above and below you can see blue tape pieces, that represent areas that need further work/refining… notably almost always at the corners.

That’s not say that I am not happy with how all this is turning out.  Although these nitnoy refitting tasks will always be required to-do stuff, overall I’m very pleased with how these components fit into their respective bottom-of-fuselage “pockets.”

Here’s yet another shot of the gray primered landing brake in front of the RAS/H³C, Again, note the blue tape that represents areas that need to be tweaked.

I tried to include a couple of shots to show the transition between landing brake and fuselage bottom, as well as the RAS/H³C and fuselage bottom.

And a couple of shots, front and aft, with the landing brake open….

A bit later I got back to work painting the final coat of white on the nose gear strut, strut channel and wheel well.  I also painted the nose gear strut fairing and gear doors, both on the inside, with their next-to-the-last coat of white.  These latter components get an extra coat since I’ll actually be buffing them out to get rid of some of the dust particles that settled into the paint.

Chapter 13/25 – Nose gear actuator out

After a decent little bit of research, even on my own site, I was having a heck of time over the last couple days removing the nose gear actuator out of the inverted NG30 housing.  I honestly couldn’t remember exactly how it went in when I installed the actuator into the gold anodized mounting brackets… did I have to remove the brackets and install them all as one unit?  It didn’t seem like it.  And my own build log wasn’t clear on this issue (perhaps I should do better reporting on my build actions… ha!).

The bottom line is this sucker did not want to come out.  And the mounting pins on the side did not want to come out either and seemed permanently installed into the gold anodized mounting brackets.  Thankfully fellow builder Brian Ashton had a better memory than I did and was able to remind me how it all went together, and thus how it should —in theory at least— come back apart.

With Brian’s helpful reminder in hand I was able to remove the nose gear actuator… and to be clear: NOT with ease!  It still required quite a bit of machinations and expletives to get those side bolt pins removed.  I guess having such a tight tolerance between pins and mounting brackets is probably a good thing operationally.  Plus reaching up into the dark nose didn’t help the removal process any.

One reason I needed to remove the nose gear actuator is simply that it is filthy… and rusted.  As you can see in the pic above and below.  It needs a good cleaning and I’m thinking some judicious application of primer and paint to keep it rust free for as long as possible.

Also, I’ll be swapping out both the side mounting pins for new ones that Jack Wilhelmson makes for this unit, and drilled bolt heads to secure them with safety wire so they don’t loosen over time.

With the nose gear tied up into position I then applied another coat (#2) of white paint to the nose gear strut, strut channel and wheel well.  Note the access I had with the nose gear actuator removed to completely cover the inside of the strut channel with paint… allowing me to cover the small unpainted patches that were immediately adjacent to the nose gear actuator, and thus inaccessible.  Not anymore of course…

Here’s a closer up shot of the painted nose gear strut.

Of course I applied another coat of white paint to the inside surfaces of the nose gear fairing and the nose gear doors.

With that, I called it a night and left the painted surfaces to cure.