Chapter 25 – Bottom cowl micro

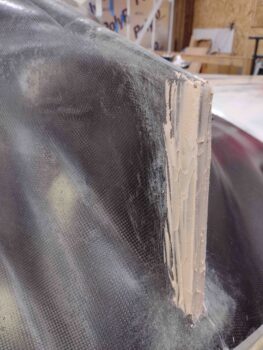
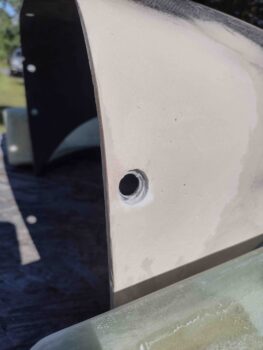
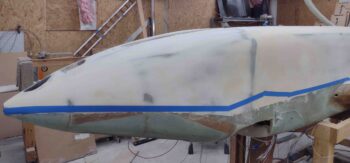
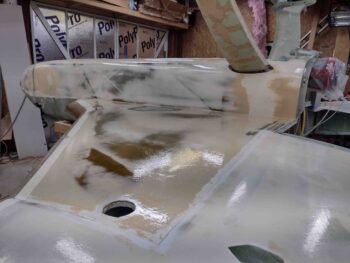
I started out today by sanding, shaping and leveling the added West 410 filler at the lower left aft corner of the fuselage for a smooth transition with the bottom cowling.

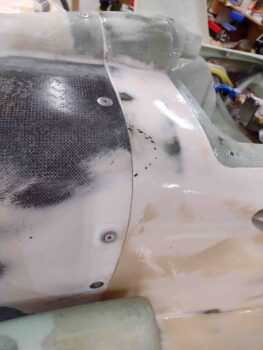
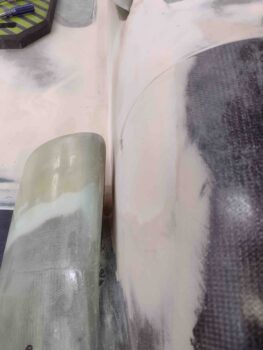
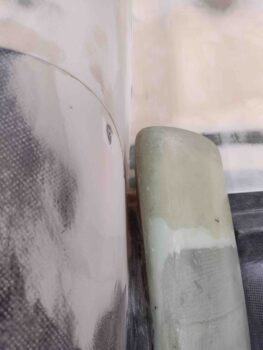
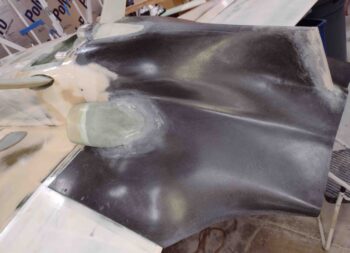
I then pulled the bottom cowling off to wash off any mold release agent and then sanded the areas that would be getting “micro” fill.  Here’s the right side cowling ready for “micro”.

And the left.

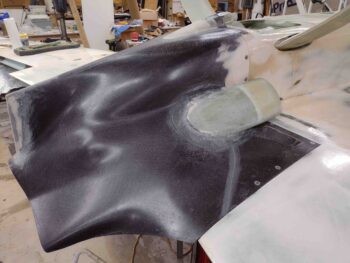
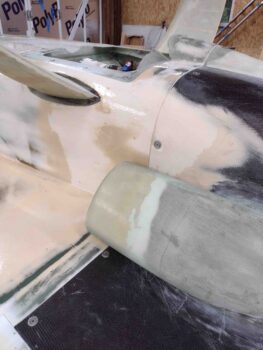
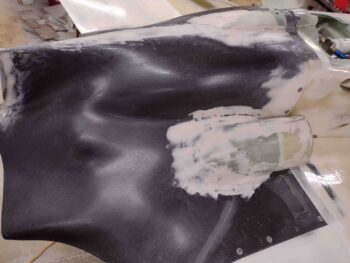
I then mixed up some “micro” fill (micro + West 410) and applied it to the areas that needed it.

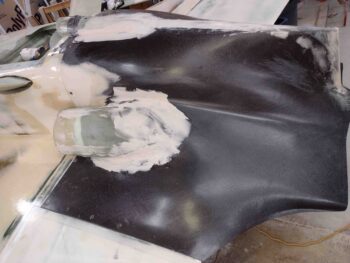
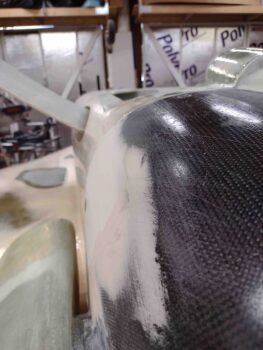
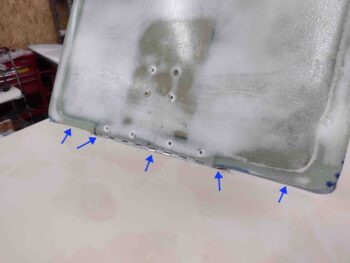
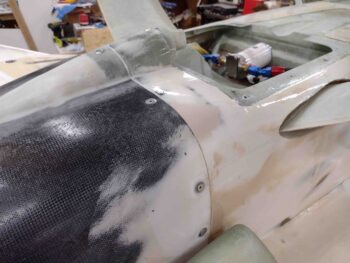
The black carbon fiber areas showing are somewhat porous, but more along the lines of what I would consider pin holes… so I won’t be using micro to fill them, but rather 2-3 epoxy wipes along with the micro-filled areas of the cowling.

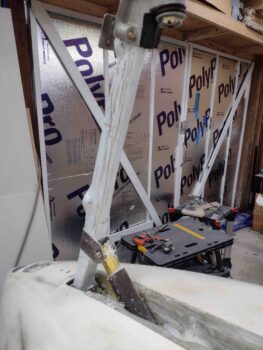
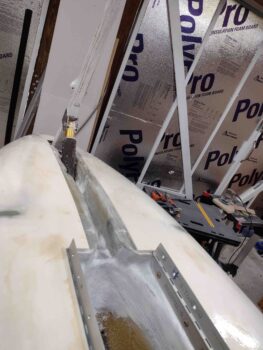
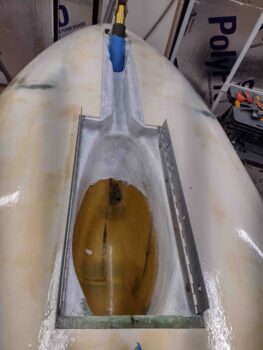
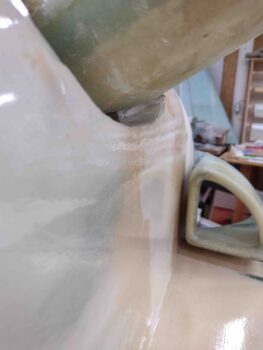
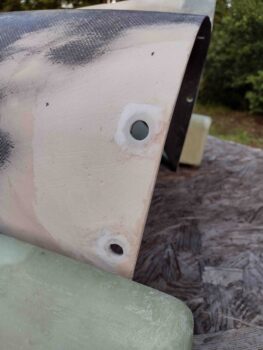
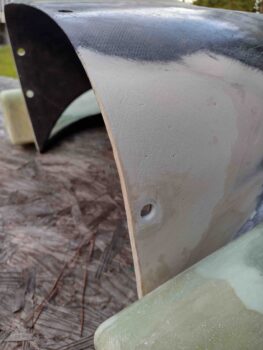
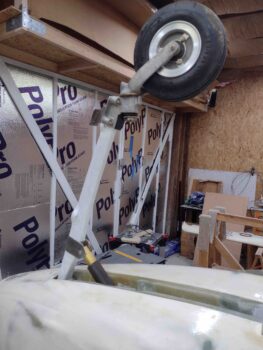
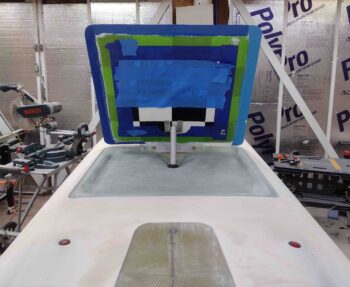
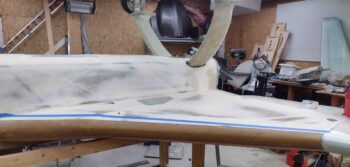
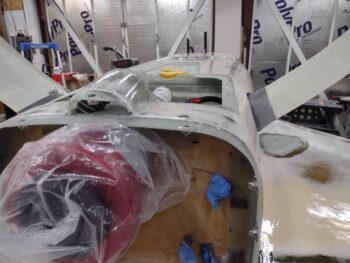
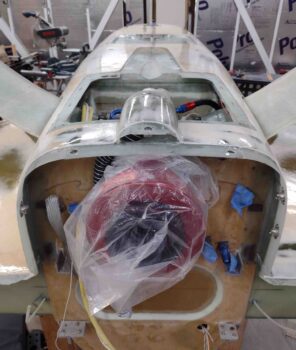
A bit later, after the micro fill on the bottom cowling, I then made up a batch of white paint and painted the nose gear strut, strut channel and nose wheel well.

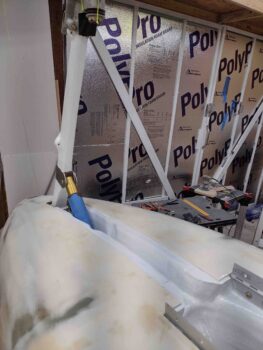
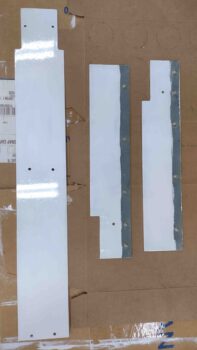
I also painted the inside surfaces of the nose gear strut fairing and the nose wheel well doors.

One reason I wanted to start painting the inside surfaces and the nose gear strut (as well as the general bottom surfaces of the aircraft) was so that I could dial in the painting process.  You might be able to notice a fair bit of dust in the air that has conveniently settled on my white painted surfaces.  I’ll address this dust issue and also see how well it buffs out, if at all.

I’ll reiterate that a significant reason I started the finishing, priming and painting process on the bottom surfaces of the plane was to test out and dial in my finishing and painting methodologies.  Obviously on the bottom of the plane, which is exponentially less visible and/or viewed while the bird is sitting on the ramp, is a better place to repair or redo any finishing, priming or painting actions that don’t work out as originally planned.

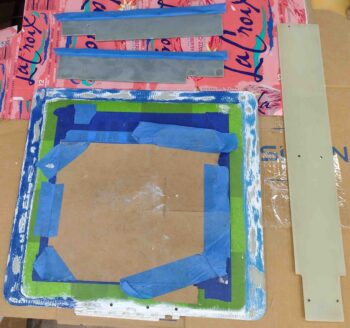
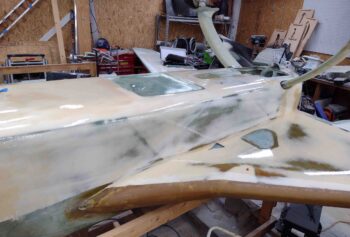
One such area is high build primer.  The primer that is used in the Epifanes 2-part polyurethane system seams to have really good adhesion, but isn’t what I would consider a high build primer.  In my research in preparing for finishing the airplane to paint, I noted a number of builders that reported whipping up their own version of high build primer by simply adding a bit of micro to their respective primer.  Again, many builders, using a variety of different paint systems, reported on this method in the Central States Association newsletter.

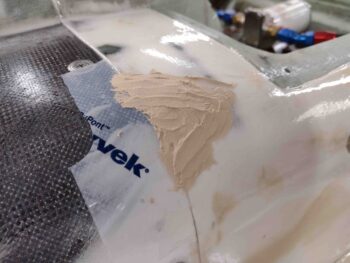
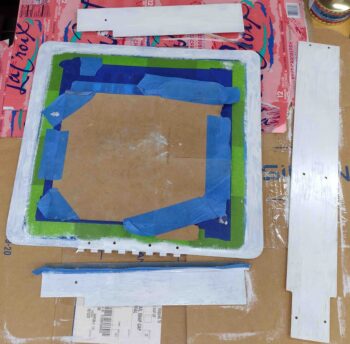
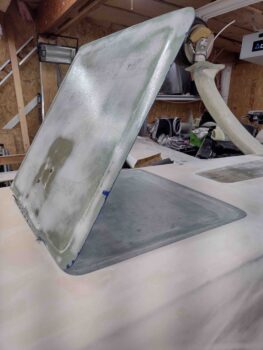
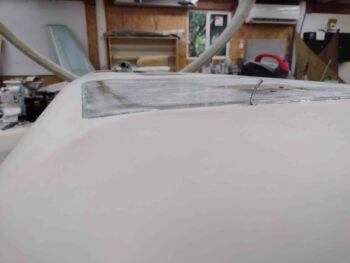
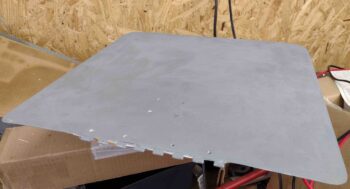
So, what the heck?! I might as well give it a try eh?  And that’s exactly what I did on the exterior side of the landing brake surface… which still had some minor imperfections that needed filling before final primer/paint.  I used a cheap brush to apply it, and it was a bit wonky going on, but definitely not bad enough to try again.  I think I’ll try using a roller next time to see if it goes on a bit more uniformly.  Still, it appears to have filled the imperfections, and I’m excited to see how it looks after block sanding it out.

I then left the painted/primed items to cure overnight.

Chapter 25 – Bottom cowl final fit

I started out today sanding down the primer I applied yesterday on the nose gear strut.

I also cleaned up the wheel well a bit more, including some primer applied in there as well. In addition I sanded the nose gear strut well… all except the area covered by the nose gear actuator.

I then finished priming the nose gear wheel and strut wells.

I then slathered on another round of white primer on the nose gear strut with its first coat of white paint.

I also applied another round of white primer to the inside surface of the nose gear doors and strut fairing as well, but didn’t grab a pic of those components.

I then spent a good 45 minutes cleaning up the interface between the aft/bottom fuselage and bottom cowling to allow me to re-install the bottom cowling.

I also took a few minutes to annotate the stud lengths of all the CAMLOCs that secure the cowling in place.

Note the bottom cowling side CAMLOC in place with its new reinforced floxed hole edge.

The right side looked good, although I had to do some slight sanding on the bottom right corner of the cowling to get the elevation dialed in with that and the lower right fuselage corner.

Here’s a shot from the front… note the indentation at the side fuselage and cowling is pretty much gone. Mission complete!

Although with that said, sadly I have a couple of minor tweaks I need to do on the left side cowling and aft fuselage…. with a couple of West 410 filler added fills on the aft fuselage. One at the corner since there is a slight elevation mismatch with the fuselage corner low, causing the cowling corner to jut out into the wind slightly (about 30-40 thou of an inch).

The other area is behind the armpit air intake scoop… as pictured below, from about even with the lower CAMLOC down to the corner with the strake.  About a 1/16″ thickness needs to be added in to match the bottom cowling sidewall.  Again, all to help eliminate the indentation at this point.

Note the bottom cowling side CAMLOCs in place with their new reinforced floxed hole edges.

The lower (“upper” as situated here) refill was a fairly quick kill, so I marked the slightly depressed area on the bottom lower left corner of the fuselage.

Then sanded the epoxy wiped aft lower fuselage corner to provide a nice textured surface for the West 410 to grip to.  I also taped up the front edge on the bottom cowling.

I then whipped up some West 410 and applied it to the lower aft left corner of the fuselage.

After I sand and contour this to the correct shape tomorrow, I’ll then remove the bottom cowling and work the other area requiring attention on this side.

Of course you can never mix up just what you need (at least I can’t!), so I had some West 410 filler left over.  Not wanting to waste it I applied it to the back tip of the bottom cowling boat tail, which definitely needed some love.

I then left this West 410 refill to cure overnight, closed up the shop and spent another good hour+ doing research on my Epifanes 2-part polyurethane paint application process before calling it a night.

Chapter 23/25 – Flox & Primer!

Today I started off by sanding down the flox “plugs” (if you will) around the CAMLOC holes on the sides of the bottom cowling.  I’m hoping and expecting that the straight flox will prove much more durable than the flocro I had employed before around these holes.

I then got busy with applying white primer on the inside surfaces of the nose gear strut fairing and nose gear doors, as well as the sanded perimeter of the inside landing brake.

Here are these components with the primer applied.  Since these are the inside surfaces and will get sanded before paint is applied, I went ahead and brushed the primer on with a narrow brush.

In addition to the items above, I also primed the remaining unprimed surfaces of the nose gear strut.

With that, I left the primer to cure overnight.

Chapter 23/25 – Cowl CAMLOC holes

Today I focused on fixing the CAMLOC holes on the vertical sides of the bottom cowling.  I had originally filled the immediate area surrounding these holes with flocro, but quickly discovered that it wasn’t up to the task of the constant inserting and removing of the securing CAMLOCs… so I decided to switch to pure flox to provide much more strength around the perimeter of each hole.

Here are the before pics, left side bottom cowl and right side.

And the after pics… after I Dremeled out a good edge around each hole, pretty much back down to the original carbon fiber.

I didn’t get any pics of it, but I then slathered some flox around the edges of each of these CAMLOC holes.

The main reason I didn’t get any pics is that I got sidetracked with the delivery of my Mountain High supplemental O2 system.  As you can see below the kit includes a 9 cf bottle, regulator, mounting bracket and two Oxymizer cannulas.  I needed my supplemental oxygen system in hand to allow me to install the mounting brackets onto the original sidewall of the fuselage —inside of the right strake baggage area— before I close out the tops of strakes… after I flip the bird back upright (hopefully within the next week or two).

Yes, it was a light build day, but I did get some stuff knocked out.


Chapter 25 – Bottom plane epoxy wipes

Today I started off by knocking out the final fitting of the landing brake on the bottom of the fuselage, in the depression I created with the micro around the perimeter of the landing brake.

I first temporarily mounted the landing brake.

Here’s a gratuitous shot from the aft side.

My initial main focus was on the front edge, where the landing brake interfaces with the bottom of the fuselage.  I worked on this interface for nearly an hour.

After getting the front edge of the landing brake interface with the bottom fuselage micro fill or sorted out, I then dialed in the left, right and aft sides of the landing brake.  There was a good little bit of a ridge on the fuselage on all sides, so it took another good 45 minutes to sand it down and fair it all in with the existing micro fill.

Here’s a shot looking aft after I dialed in the seam elevation of the micro fill around the perimeter of the landing brake.

The landing brake interface with the bottom fuselage micro fill was the last item on the list that required finishing before I was cleared hot to epoxy wipe the bottom of the fuselage, nose and strakes.

After vacuuming and blowing off all the dust with filtered high compressed air, I then taped off the front edge of the strakes . . .

and the top edge of the fuselage and nose, to allow for a bit of bare micro fill for transition with the new micro fill when the plane is back upright and I finish all the topside surfaces.

I then started the fairly lengthy process of the epoxy wiping the bottom of the fuselage, nose and strakes.  The following pics are after round 2 of wiping on a thin coat of pure West epoxy (with 206 hardener) ala the Corey Bird finishing method.

And this shot is many hours later, after I finished later in the evening.  Normally surfaces would get 5 coats, or wipes, of epoxy, but once the scratches and holes are filled in, there is nothing for the epoxy to really “grab” onto on the vertical side surfaces.  Since the surface was looking nice and filled, and a lot of epoxy was ending up on the strake and/or floor, this was one of the main contributing factors for me stopping at 4 wipes total.

Here’s a shot from the firewall, looking forward at the bottom of the fuselage.

And a good shot of the nose.  These last 2 shots were taken many hours later, when the epoxy was virtually cured.

I’ll give these epoxy wipes a couple good days to cure, then start sanding it all down, including the wings.  Tomorrow I plan on working on the bottom cowling, and the nose gear fairing and doors.

Chapter 24/25 – Aft fuselage junction

As I mentioned before, I’m kicking myself that I didn’t grab some before shots of the indentation at the junction between the aft fuselage sides —right at the firewall— and the bottom cowling vertical front edges.

Again, the issue was my rounder (more football shaped) fuselage vs an original stock fuselage and then mounting Mike Melvill’s carbon fiber cowlings to it.

A little reminder of what I’m talking about with this diagram I’ve used a couple of times previously.

I’ve been slowly going through the machinations of getting this seam filled, on both sides. Not a hugely difficult task, but definitely a bit of a time bust considering all the back and forth iterations of filling the aft fuselage side, then matching that to a degree by filling the bottom cowling vertical front edges… then repeat.

If I had to do it over, I would probably do 2 things:
A) Work this area pre-armpit cooling intakes install, and
B) Use pour foam, shape and then glass with a ply of BID before finishing.

You can see on the right side (left pic) that the indentation has been pretty much filled and the sidewall is straight.  On the left side (right pic) —which definitely had a more significant indentation at the seam— there is still as slight depression, but it has been minimized greatly.

Also I’ve noted, the filler adds about 1/8″ to 3/16″ on each side, so my gap between the inside edge of the armpit scoops to the fuselage sidewall are now around 7/16″ vs the 3/4″ called for in the Melvill cowling install instructions.  I’ll reiterate that I don’t foresee any issue with these new narrower gaps between intake and sidewall.

I’m heading out of town for a break to visit friends for the next 5 days, and will get back to work full bore when I return.