Chapter 13/23 – Dialing in Firewall

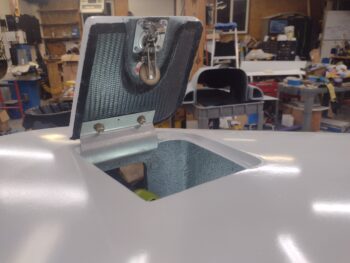
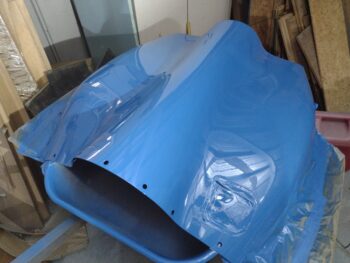
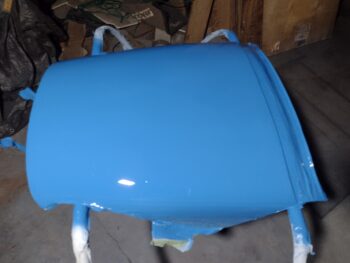
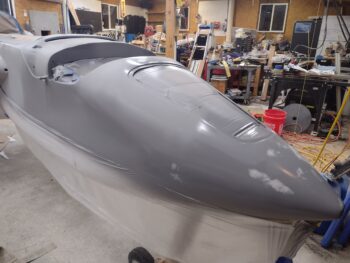
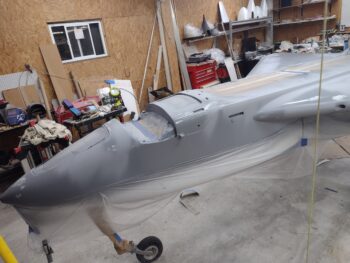
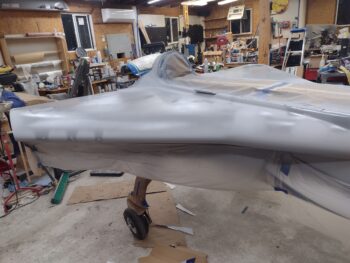
This post covers the past few days, where my focus has been dialing in my Titanium firewall covering that will be overlaid onto Fiberfrax.

As I reported in my last post, I used an old paper template that I had made for not only the firewall size and shape, but the locations of components, pass-through holes, etc.

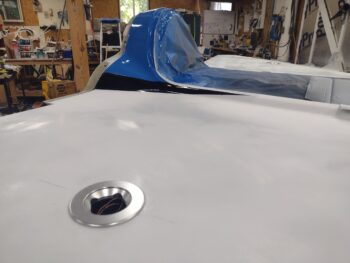
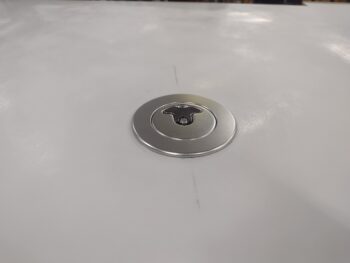
After cutting out a few points to allow me to pin the paper template to the current firewall, I then marked all the pass-through holes that would need to be made in it.  I then imported the firewall template into CAD.

After getting all the pass-through points and perimeter inputted into CAD, it was now time to start the iterative process of ensuring all those holes were in the correct spot.

Here I’m once again using my plasma cutting table as a plotter, with a Sharpie replacing the plasma torch, for my initial firewall template.

Here’s the initial and a couple of other templates immediately after being plotted out on the plasma cutting table.

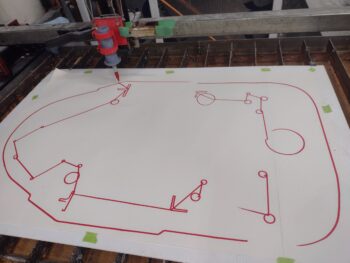
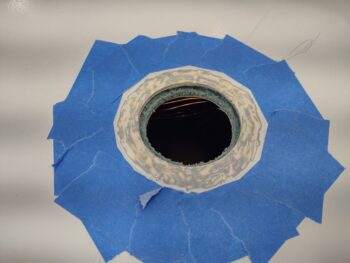
I would then spend a good half hour cutting out all the holes to allow me to attach the template to the current wood firewall to check fit and hole locations.  I would then mark up the template as to which direction the holes needed moved, the perimeter lines and if any holes or alignments needed widened or narrowed.

As you can see, after the initial paper template, I did this 7 more times to get the firewall dialed in.  At over 2 hours work per template, that represents over 14 hours of work on these templates.

With lucky #7 needing just a few minor tweaks, my plan is to plasma cut the titanium firewall covering tomorrow.

Inching forward!

Chapter 13/25 – Canopy install ready

As I’ve transitioned into working on the firewall, I wanted to grab a couple of shots to show my efforts in painting the canopy and the inside cockpit.

Here is the canopy with all the inside and exterior tape, paper and plastic removed, except for the protective saran wrap I leave on there until it gets to the hangar.

Although the inside of the cockpit is not visible, clearly all the protective plastic and tape have been removed.  After the firewall is in place I will then work a bit on rollbar to get it finalized for install (some welding for camera attach points then final paint).

I am gearing up to start all the electrical component and instrument panel install as well.

Chapter 25 – Canopy & cabin final paint

After mucho preppo and a day’s delay in having to reshoot the black edge stripes, I was finally ready to paint the canopy… at night vs mid-morning to mid-afternoon which I prefer to do.

Since I had a fair bit of boat paint on the canopy frame, I needed to seal it before shooting the blue Nason paint.

When sanding the boat paint to get it smooth and contoured for the spray-on paint, I was cautious not to have any break-throughs in the paint down into raw micro.  That being said, there was a significant amount of micro showing through (epoxy wiped vs raw), but I definitely did not strip off as much boat paint as I would have wanted (for weight reduction) in being cautious NOT to have such a break-through.

After shooting the sealer above I had 2 large hairs (not human) on the aft frame near the D-deck intersection.  I scooped them out with my finger and tried to shoot another couple of coats to fill in the 2 areas, but the sealer is so thin it has no real build to it, so no leveling out of imperfections.  Thus I had to wait a good 45 minutes and carefully sand down the spots with 400 grit paper.  This, and one more light coat, did the trick and I was back in business (this is just ONE example of the myriad of on-the-fly repairs, remediations and mitigations that I have to perform on nearly every paint shoot).

I didn’t like the pic I got of the painted canopy, so I grabbed another one the next morning.  The yellow vinyl is to ensure no paint getting through the multiple layers of Saran wrap.

With the canopy finally painted, I carefully pushed it over into the far corner of the shop next to the milling machine.  Since the dew was up to its dirty tricks, I had covered the taped, covered and degreased fuselage/strakes/nose and pushed the bird outside.

With the canopy out of the way, I pushed the fuselage into the shop just far enough to be out of the “dew zone.”

I then uncovered the cockpit areas and shot the aft longerons and the aft corners where the longerons meet the base of the Turtledeck.  Also, although hard to tell here, I also shot a 1/2″ strip on the inboard side of the left longeron with the gray rock paint.  This is because the white longeron peaks out under the canopy on the inside, so I made a stylistic decision to remedy that… easy enough since I was shooting other internal cabin stuff.

I shot a little on the front right longeron as well as inside the right strake where the burn mark was from my heat lamp mishap.  I also did a couple quick bursts on the right edge of pilot’s seatback (bottom right corner of pic) since it was looking dull and not “rocky” enough.

On all the longerons, but especially the left side, the white paint seeped down about 1/4″ inch and literally melted some of the gray rock paint.  Thus the reshoot on all the longerons.  I also had bare longerons peaking out from my roll bar side attach frames, so I shot those edges as well.

Finally, I shot the top of the pilot seat back since apparently during the strake build/tops install I had ham-fisted this area each side with nasty brown EZ-Poxy on my hands… that all had to go.  Oh, and let’s not forget the left armrest storage bin hinge, which was looking pretty gnarly… that got some love in the form of primer + rock paint + clear coat as well.

During my induction period and wait times on the degreaser, etc. I worked for another good hour-plus on my paper firewall cutout, finishing up the bottom half so that’s it now ready to start the iterative process of drawing it up in CAD… coming soon!

Still pushing forward to get this bird in the air ASAP!

Chapter 25 – Paint clean-up

I took a couple of hours starting off today to uncover the fuselage/nose/strakes and pull all the tape and protective paper off the painted parts from last night.

On the strake hatch doors I carefully scored the paint around each latch button with a razor blade as to not have any big unsightly chunks of paint breaking off when I popped them into the open position for the first time.

For the right side (pic 1) I merely had to clean up around the edges a little bit and pull the inside tape off.  I’ll note that on my foam hinge spacer I had drilled some holes through and filled those with micro to ensure the spacer didn’t squish on me.  Well, apparently I only did that on the outboard sides because when I finished ratcheting on the middle nut by feel as compared to the outboard nuts, it felt the same when I stopped… but it had squished the foam down a good bit.  Oh well, it’s still mechanically sound and operational.  Plus I have a good “Boy, was I dumb!” build story to tell.

On the left side (pic 2), after cleaning up the latch buttons I then installed the hatch door with 2 nylock nuts.

Here we have the outside of the strake hatch doors showing, both in the open position.

And the real test: How do they looked closed??  Not too bad at all (IMO).  Done and pressing forward!

Here we have the top cowling outboard strips painted white as well as the lower sidewall “wings” (or “flaps”) on the aft nose/avionics cover.  I have to say I’m really pleased with how my color scheme is turning out on this bird (smile!).

So I didn’t grab a pic yesterday of my shooting the black stripes along each outboard edge of the canopy… which was probably a good thing.  The dew/humidity/(rain?) was so bad last night, and got to my black paint before it cured well enough that when I checked the stripes this morning they were all mottled and cloudy.  A big NO-GO.

Thus, I sanded the stripes with 400 grit sandpaper, hit them with degreaser and shot the stripes again.  Before early evening I moved the canopy back into the shop to avoid any dew issues again . . . live and learn, eh?

Last night I spent a good 30 minutes getting some initial measurements annotated for my titanium firewall.  I had also removed the CS124 aileron pivot bracket from the firewall.

Well, tonight I spent a good hour-plus utilizing an old paper cutout I had made of the firewall to fit in place on the existing firewall to map out all the components and thru-holes.  Here is the initial fitting, with the top area aligned.

I then worked downward, finding and marking all the the holes and using blue tape to mark the edges (width) of the firewall.  Tomorrow I’ll continue working my way downward and then soon put all this into CAD and start the trial and error iterations of plotting out thick paper templates until it’s spot on… then plasma cut the titanium sheet.

Inching closer!

Chapter 25 – Paint winding down

While I’m undecided on painting the wings just yet, the remaining paint efforts are now starting to dwindle down from being the main project push to simple sideline ancillary tasks now… to be done in between other non-painting tasks.

That being said, today was one of the last big painting push days, where I got a lot of the smaller, low hanging fruit tasks done.

Case in point: here we have the aft nose/avionics installed on the bird, looking pretty spiffy if I do say so myself.

However, notice the gray primer lower side “wing” on each side that is still in gray primer.  This of course needed to be remedied.

Last night I installed the right strake hatch door permanently with A/C grade hardware.  I then filled the 3 exterior Phillip screw heads (“poor man’s clickbonds”) with Icing filler.  Today I sanded down the filler and door surface in the last prep for a coat of sealer before painting it white.  Note the plastic covering the entire bird (I also painted the aft bottom hinge black, but forgot to get a pic).

Since the left strake hatch door’s exterior surface is already good without it being installed, I prepped it, shot it with a coat of sealer and then painted it white as well.

Here I’m painting the right outboard strip on the upper cowling white . . .

and here is both outboard sides of the upper cowling painted white.  Obviously this carries my color scheme all the way from nose to tail on this bird.

Finally, I also shot the lower side “wings” (that I pointed out were gray above) on the aft nose/avionics cover white as well.

I’ll note that I also spent a good couple of hours this morning with the canopy in place on the bird taping up what will be the black stripes on each side edge of the canopy frame.  I then spent nearly an hour taping up the canopy to ensure no errant paint got anywhere it wasn’t supposed to.  I then shot the black stripes outside, but it was so dark I couldn’t get a good pic of them.

I finished well after midnight, and packed it in as soon as I was sure the paint was curing well.  No issues!

Pressing forward.

Chapter 25 – Fuselage painted

Today was the day to finally get the fuselage, strakes and nose in white paint. As par usual my target mid-morning paint shoot ended up occurring late afternoon.

One major difference in shooting this round of paint was that I used the Spectrum paint cup system, which allows for shooting upside down/inverted without spilling paint everywhere.  I shot both a sealer coat on the sanded yet remaining boat paint primer on the bottom of the strakes before then shooting the white paint.

I also shot a seal coat wherever I had done filler work or previous 2K primer, and of course along the lower nose strip of previous white boat paint primer.

Although it doesn’t look much different in these pics due to the gray cloud cover we had today (but no rain thankfully), the fuselage, strakes and nose are painted white.

But . . . there’s rarely a free lunch, and for some reason the left sidewall seam between new primer and old primer, although I sanded it smooth both visually and by feel (or so I thought), was showing through the paint.  I contemplated leaving it since the paint was all on nicely, but then having to fix it got the better of me.

AND… things would have been fine, but I shot just a hair too much on wanting to ensure a wet glossy reshoot on this forward sidewall/nose area, and I got two ~5″ long sags just under the seam I was trying to “fill” with a good extra couple coats of paint.  My fault and stupid mistake, I should have been more controlled and patient in my painting.  Now I have 2 runs to contend with…

And the seam is still very slightly visible, but significantly less so. Clearly the added slathering of paint worked, but at a cost.  I’ll revert back to my “combat painting” moniker of this phase, which to be clear isn’t my desire, but just the reality of getting it all done ASAP.

Another shot of the painted fuselage.  You may note the dew on the strakes after just putting the bird in the shop, since now at mid-evening (7’ish) all outside composite components (e.g. wings) start dewing up quite significantly, while my vehicles, boat, etc. are all bone dry.  Very odd.

Here we have the RAM air scoop painted blue.  Not perfect since I have some required touchup spots since I taped off the inside opening and the NACA scoop.  But passable and flyable (probably for years… we’ll see!).

I also taped off and shot the center of the top cowling blue . . .

As well as the same for the aft nose/avionics cover… (this may get sanded and reshot due to the insane amount of bug Kamikaze attacks for some reason on this part).

Still pressing forward.

Chapter 25 – Black & blue in harmony

Today I started off by removing the plastic sheeting that covered the entire bird while I shot the blue paint on the turtledeck, which you can see here turned out pretty darn good.

I then removed the weights and the tape from each of the floxed-in-place “gas-hole” rings.  Which are looking nice and spiffy as well.

I’ll be honest when I look at the pic above and below, it’s hard to tell initially whether the white is primer or paint, obviously fairly close in appearance… with the white being just a bit more bright.

Here I popped in the gas cap to test out the install.  I’m very pleased with how these turned out.

And here’s the nose and aft nose sub-structure blue paint.  Again, looking pretty darn spiffy, as far as combat painting goes (yes, there are a few bugs and dust in the paint… moving on!).

And a shot of the blue nose, with black stripes on each side.  I am digging how the color scheme is coming along.

Here’s a shot of both the nose hatch door and the top cowl oil check door painted blue. I painted the nose hatch door under my carport, which I’m noticing has a lot more dust and bugs than just outside the front of the shop.  Thus, I won’t be painting anything under the carport anymore.

Here is the RAM air scoop that I spent ANOTHER good hour sanding after another round of Icing filler to get the surface uniform and smooth.  I then hit it with a coat of sealer before painting it blue (blue paint pic coming tomorrow).

I then spent another couple of hours taping up the gas-holes and every bit of black and blue paint on the fuselage in prep for white paint.  Here we have the turtledeck and shoulder stripes taped up.

And the nose and substructure blue and black paint taped up for the final white paint to be shot tomorrow.

It was quite late, so I called it a night.

Chapter 25 – Feeling blue! (paint)

Today was first about getting the Newton fuel filler caps installed into the strakes.

And of course what I thought would be an hour or two job turned into about a 4 hour job, with the first hour or so simply measuring everything out to make sure my gas caps were in the correct spot on each strake… and symmetrical to each other.

The inner steps on the mating side of the gas cap ring is 2.5″ on the top ring, then 2.25″ on the bottom ring.  So obviously I used a 2.5″ hole saw for my initial cut, just to get through the top skin into the underlying foam.

After popping off the skin piece to expose foam, I then used the 2.25″ hole saw to drill the inner hole.  This is show on the right (pic 1) and left (pic 2) strake.

Here we have the inner hole cut all the way through the inside fuel tank skin on the right strake (pic 1).  Of course I had the shop vac sucking up the debris during this op.  Note that you can see the grounding wire just inside the hole (I didn’t stage this. It’s exactly as I found it!).

I stopped short of drilling the inner skin out on the left side to allow me to prep the perimeter strake top for mating the gas cap ring when I flox it in place… see below.

Here is the left side, where I carefully cut the inner hole after use the Dremel drum sander bit to remove most of the top strake paint.

Here we have both right and left “gas holes” prepped for the gas cap rings to be floxed in place.

Ahhh, speak of the devil!  Here we have the right and left gas cap rings and “gas holes” floxed up, ready for mating.

Here is the left side gas cap ring initially floxed in place.  Of course I cleaned up all the excess flox both around the perimeter and inside the tank around the mating edges.

I weighed down the floxed in place gas cap rings and spent another few hours prepping the bird for its blue paint down the center: the nose, nose sub-structure and turtledeck.

Another shot of the blue centerline paint on the fuselage.

Pressing forward!

Chapter 25 – So much filler!

This post covers the past couple of days.

First off, I spent many, many hours refining and cleaning up the surface of the fuselage, strake, nose, etc. It’s amazing what all is hidden from view (or even feel) once you lay down a solid color of primer or paint.  Yikes!  So many surface imperfections that needed fixing.

So what I had planned for as an early morning shooting of white epoxy primer, due to all the above machinations of filling and repairing, not to mention a full wet sanding of all the gray primer areas —along with repositioning all the tape down/aft a good 1/4″ to eliminate a hard edge buildup— had turned into a late afternoon white epoxy primer shoot.

Here we have (FINALLY) the bird ready for epoxy primer coat #2.

Which I shot in 2 medium coats.

It’s amazing (to me at least) how much different, even refined, the bird looks in white primer… although I love me some tactical gray!

Way later in the evening I had tried to see if the primer was ‘tape ready’ and all my initial tests were good, until actual no-kidding application.  When I went to reposition the Fine-Line tape for my black stripes, it pulled a tiny patch of white primer up with it… creating a couple 1/4″ diameter divots.  Ugh!

With only a bit more minor damage, I did get both the aft nose cover and top cowling mounted in place, and taped the black stripe features up on those… but again, NOT on any white primered areas.

The next morning, after a full night’s cure, I then got to work taping up the white primer areas for the black accent stripes.

Wow!  Again what I thought would be 1-2 hours of work turned into over 4 hours of work once all was said and done.  I had really had to get this right since the black stripes, the separating border between the blue and white paint, really is the linchpin for the whole design… it took a good extra hour or two to get them nailed down.

So early evening I finally got to shooting black paint.  Here we have the left shoulder swoosh painted black.

And the same on the right side.

And the nose stripes both on the right (pic 1) and the left (pic 2).  Those of you with an eye for detail may note that I’m carrying the blue center field and black accent stripes to the nose SUB-structure (under the aft nose/avionics cover) for some hidden bling… yes, took an extra 20 minutes to tape up those stripes (worth it!).

When loading my pics I realized that I had forgotten to grab shots of the top cowling and aft nose cover black stripes.  Probably because I shot those out under the carport, so out of sight, out of mind.  But those are done as well.

Tomorrow I plan on knocking out the gas cap installs into the strakes.  Jess had me busting out laughing when she asked how my “gas-holes” were coming along.

Here is the underside of the gas cap collars/retaining rings, with the original clean undersides (pic 1), and then after I Frankensteined them with Dremel grooves and drilled divots for extra flox grippage (pic 2).

Again, another very late night, so with the “gas-hole” collars ready for install, I called it a night.

Chapter 25 – Fuselage in primer

I was able to get the fuselage mostly prepped for primer last night, so this morning I wheeled it outside and did final degreaser wipe down and prep for primer.

I then shot 2 medium coats for the first round of epoxy primer (gray) for the fuselage (strakes, nose, etc.).

Another shot of the fuselage in gray epoxy primer.  Obviously the bottom half of the nose and fuselage, already in white boat paint primer, is taped off.  That will get a sealer and then topcoat along with this primer later on.

Much later in the evening, I hit pinholes, scratches and divots with Icing filler, and some of the rough/low spots with gray 2K high build primer.

More shots of nose and fuselage surface cleanups with Icing filler and high build 2K primer.

One last shot of Icing filler and 2K primer on the epoxy primered fuselage/strakes.

It was quite late by this point, so I called it a night.