Chapter 25 – Final big micro sanding!

Today was all about the last big area micro-finish sanding that I plan on doing on this bird (ok, perhaps some might be required on the baggage pods).

I started by pulling the inverted right wing outside on its dolly (which meant half hour of getting my big power tools moved out of the way and stowed), before spending a good hour hitting the cured micro first with my air file, then with the Jitterbug sander.

Here’s another shot of the initial power sanding of the micro on the right wing lower outboard wing, inside winglet and newly glassed bottom winglet intersection fairing.

I then spent about 45 minutes hand sanding the newly applied right wing micro, first with the 30″ long board, then with some smaller sanding blocks.

No micro —that I’ve done at least— is ever immediately ready for epoxy wiping right after its initial sand down to shape, and this was no exception.  I whipped up some micro, heavy on the West 410 and filled all the bigger holes, scratches and major divots in the micro finish.

I then used some of the micro left over in the cup to apply a layer on the just-glassed aft end of the left wing’s winglet intersection fairing.

Jess had the night off, so before heading off mid-evening for a relaxing date night, I wet sanded the epoxy-wiped right side fuselage.  It was nice and smooth after the sanding… ready for primer.

Still pressing onward!

Chapter 25 – Last major micro-finish!

Yes, I’m continuing to highlight just how friggin’ hot it is inside the shop… yet another 100° shop day.

I started off by pulling the peel ply from the right winglet intersection fairing.  All looked good and after some minor cleanup and sanding, it was ready for micro.

Which I got to next… here is the last major segment of the plane that required micro, yet another major milestone (#3 major milestone coming up with the last major epoxy wipe!).

I then did a good bit of sanding and then wet sanding on various epoxy wiped areas: aft wheel pants and turtle-deck, as well as some errant epoxy on the topside of the left wing TE and winglet fairing.

I also knocked out some non-planned tasks inside the inverted right wing root, adding some more heat shield on what is actually the top inside surface of the wing root, and adding a ply of BID to each forward face of the 90° heat shield mounting tabs, as well as some micro fill and a ply of BID over the modified angled corner where the front inside wing edge meets the CS spar flange (both for cosmetic and reinforcement reasons).

I also cut out the edges of the foam on both top and bottom segments of the aft face of the left winglet intersection fairing.  I essentially made “flox” corners for laying up a single ply of BID, but for weight reasons I used micro vs flox since this is not a critical structural component.

After laying up the BID, I then peel plied the layup.

With that, I called it a night and left the layups and micro’d bottom right outboard wing and winglet areas to cure overnight.

Chapter 19/20 – Last major layup!

Today I did the last major structural layup on this Long-EZ build.  To be sure there are still a myriad of small layups such as the tabs on the vortilons and the aft faces of the winglet intersection fairings, but as far as no-kidding bigger, must-do structural layups for this bird to fly, this right winglet intersection fairing is the last one.

Again, here is what the bottom of the right wing and winglet looked like this morning when I started… with a couple small caveats.

Those caveats being the bottom winglet aft corner reinforcement layup and the light washer embedding for securing a protective corner cap via magnet.

I then got to work reusing the same tape covered cardboard strips to make up my pour foam dam around the winglet-to-wing intersection.

As before, I dumped enough pour foam mixture in the dam to create a lot of foam, about 90% of which would be removed.  But I wanted to ensure that I didn’t have to redo any pour foaming, and thus the large amount of foam (pic 1).  I then trimmed a good bit of the foam off before removing the dam (pic 2).

And spent nearly an hour trimming and sanding the pour foam down to its final shape.

I had a small oops in that my aft dam piece must have slid forward when I taped it, leaving an area uncovered by pour foam.

To remedy that I simply used a chunk of cured pour foam, did a rough shape to fit into place, and then used fast hardener to mix up some micro to glue the foam filler extension piece into place.

While the micro’d in place aft filler foam piece cured, I then got busy cutting a ply of UNI, a ply of BID and a piece of peel ply for the layup.  I also gave the surrounding glass a good sanding and cleaning.  By the time that was all done, the micro had nearly completely cured and I trimmed and sanded down the foam filler extension piece in prep for the upcoming layup.

I then whipped up some Pro-Set epoxy and some wet micro to apply to the foam.  I used some thicker micro around the edges and a few big pockmarked areas in the foam (pic 1).  I then laid up the ply of UNI and wet it out (pic 2).

Next came the ply of BID, which I carefully laid into place (pic 1) and then wet it out as well (pic 2).

And of course let’s not forget the peel ply!

By this point in the evening it was starting to get late, especially after doing a good round of cleanup from both the foam sanding and the layup.

But I wanted to knock out one more task, which was to expose the threaded insert in the bottom wing surface that serves as a wing tiedown hardpoint.  The location is just off the tip of the red pen in the pic below.

Here we have a closer view of the embedded (back in 2012!) threaded aluminum insert that will serve as the right wing’s tie-down hardpoint (pic 1).

I then carefully drilled out the covering glassed wing skin to reveal the 10-32 threads of the aluminum threaded insert/hardpoint (pic 2).

One quick check of the threaded insert “functioning” by installing a 10-32 bolt, and all is good here.  I love it when a 13 year old task is completed! (I then filled the threaded insert with plastic Saran wrap in prep for micro-finishing this area of the wing).

Tomorrow I’ll clean up this layup and then micro up the bottom of the right outboard wing, inside winglet and just-glassed winglet intersection fairing.

Pressing forward!

Chapter 25 – More musical chairs…

First off, as a point of note: the heat wave continues… mid-90’s in the shop later in the evening.  Yes, the heat is a factor that I’m currently dealing with on this build.

Another multi-day blog post here.

I took this later in the evening after I knocked out some final wet sanding on the areas of the bottom wing.  I spent the first half of the day out at Guy’s hangar helping him get his main gear up to snuff.

And here is the bottom of the left aileron, epoxy wiped and left for curing.

Here is some of the work we’re doing on Guy’s Long-EZ, currently on the right gear.  It may be hard to tell, but I repainted pretty much the entire right gear leg yesterday, and today we’re mounting the right axle with the new 1/4″ spacer and 1/16″ thick larger area heat shield.

We discovered that the AN4-25A bolts that Guy had ordered from ACS were too short, plus we didn’t have the right nuts on hand.  I had AN4-26A bolts and the correct nuts at my shop, so we scheduled another round of work to knock this thing out the following day.

Still, here are some pics of the new spacer installed along with the new heat shield.

As yet another side “project,” we discovered that one of Guy’s hangar mates got careless moving around a Grumman Tiger and dinged the nose of Guy’s Long-EZ (sorry, no BEFORE pic as it was HOT and I was working mainly on the gear).

I cleaned up the Quarter sized ding where it chipped the paint off as well as left 2 decent sized scratches across the nose.  We went to a local auto parts store to get some filler, but they only had bigger cans of Bondo or a JB Weld filler, which we tried.  You can see the repair a bit still in the middle of the right hand light reflection.  Another issue was the paint match wasn’t the best, leaving a slightly greenish tint after I painted the nose, so there is a distinction (plus, I don’t claim paint blending as one of my skills!).

That all being said, it does look better than with the big ding and scratches on there, but definitely not better than the original un-damaged nose.

The evening on day 2 after working at Guy’s hangar… he came over to my shop later in the evening to help move the left wing onto saw horses, flipping it back upright in the process.

He also helped me remove the right wing on the wing removal/installation dolly, and then transfer the wing to the wing dolly that the left wing had just previously been on… the right wing of course inverted at this point.

With the left wing back upright, I took the opportunity with first the Fein saw and then a hand sanding block to trim/clean up the top strake-intersection flange on the front face of the wing spar.  Pic 1 shows the before, where I had added in some micro in spots to clean up the lip, and the after pic when it was trimmed, sanded and cleaned up (pic 2).

Although it was getting late, I cut 4 plies of BID off the roll to create the two 2-ply corner BID tapes for topside flanges for both the right wing and strake.  Since it was late I only laid up the glass on the aft top edge of the right strake.  Here we have the 2 plies of BID prepregged and ready for epoxy.

And here is the layup, after peel ply, of the 2-ply corner BID tape that connects the aft top flange underside surface to the aft face of the CS spar, right side of course.

Here we have a shot of the underside surface of the right wing, including the unfinished bottom side of the right winglet intersection fairing.

I noted that although not chipped, the aft bottom corner of my right winglet was quite rounded, so I added the same postage-stamp-sized combo of UNI + BID onto this corner, with peel ply.

I also quickly dug out the TE micro and floxed in an AN-3 sized light washer for securing via magnet my eventual corner cap, which should keep the aft corner from getting damaged and/or puncturing any potential victims.

It’s definitely been a very busy past few days, for both my and Guy’s Long-EZs, respectively.  It was very late, still very hot and so I called it a night.

Chapter 25 – Finalizing left wing

This post covers the last couple of days…

DAY 1:

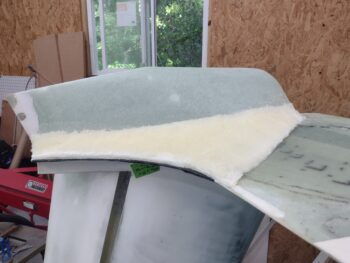
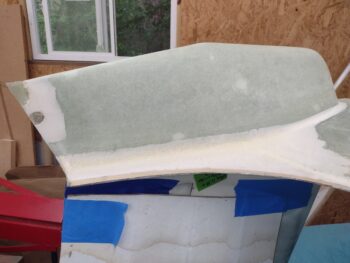
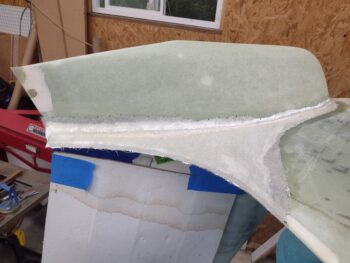
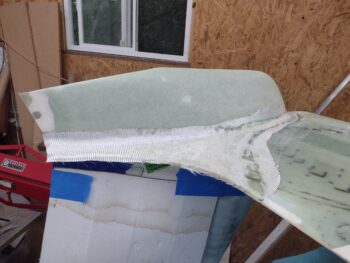
I did a bunch of work on the left wing bottom side both power and hand sanding the epoxy wiped outboard area, bottom leading edge, inside winglet, and winglet intersection fairing.  I added another round of micro/West 410 to fill the larger scratches and divots that were missed, in all areas and left that to cure.  In addition, I sanded the micro’d delam depression and began a series of Epoxy wipes on that.

I then got busy prepping for Guy William’s arrival to the Salty Shores Shop, which he did as I was just finishing getting the plasma cutting table to cut out his left and right main gear wheel heat shields out of a sheet of 1/16″ 6061 that he just received from Aircraft Spruce.  I forgot to grab a pic of those, but they came out beautiful with VERY little dross on the backside… about as good of a plasma cut as you can get (IMO).  Better yet, on both of the heat shields.  Zero issues with those.

Now, not so much the case on the PREP for machining Guy’s 1/4″ axle spacers (again, their purpose to get the brake rotors OFF the main gear surface… way too close for comfort).  As you saw in my last post, I had thrown my fuel injection distribution ‘spider’ bracket into the machining fray, but it helps to remember that one has a 5″ vise, and it can’t machine a 6″ square piece of stock!

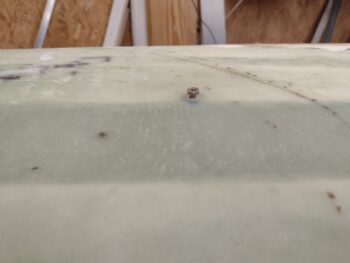
Luckily I had a 4″ x 6″ piece of 1/4″ 6061 aluminum so I dumped my ‘spider’ bracket off the cut list and simply rewickered the G-code file to only cut his axle standoffs/spacers. Those came out very nicely as well, as you can see in this pic.

After Guy departed with his parts in hand, I then did about another half hour of sanding on the left bottom wing epoxy wiped areas.  I then blew all the sanding dust off the wing before pushing it back inside the shop.

DAY 2:

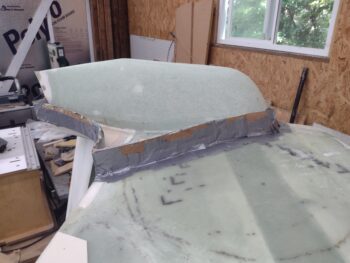
I started off by sanding down the epoxy wiped delam depression on the inboard wing.  It turned out pretty darn nice and is ready for primer.

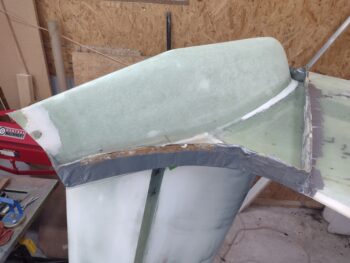
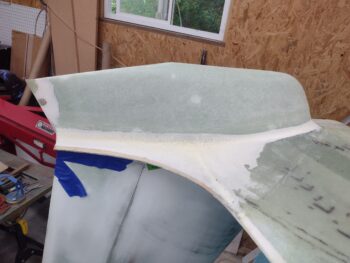
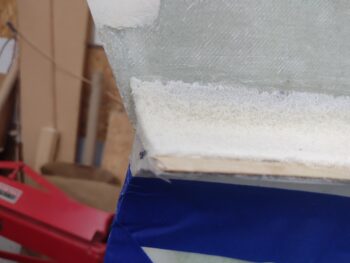
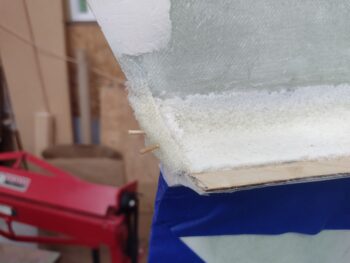
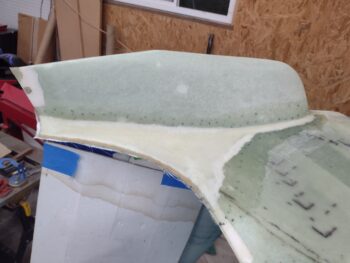
I didn’t discuss this a few days ago when I started the task of laying down pour foam for the left winglet intersection fairing, but when I flipped the wing upside down I noticed the bottom corner of my lower winglet had been chipped off.  About 3/16″ was simply gone. Ironically, not too long ago I put the shop trash can underneath the winglet to keep exactly this from happening.  I must have clipped it with something at some point to cause the damage.

So I sanded away the lower winglet’s TE micro and added a ply of UNI and a ply of BID in the depression.  I then peel plied it (note in pic below).  Once micro’d up it was good as new.

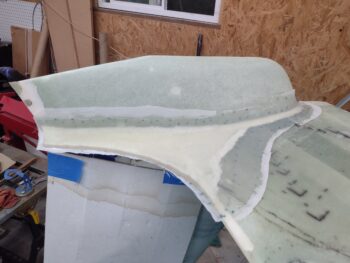
I tried to find a pic of Marco’s lower winglets to add here but no joy… it shows where he added hi-vis white and red striped tape onto his lower winglets corners.  It got me thinking, fixing this corner prior to paint is 10 minutes worth of work tops… no problem.  But what about after paint?  In addition, as many times as I’ve scratched myself on that sharp point, what’s to keep anyone in my hangar or at a fly-in from doing the same?

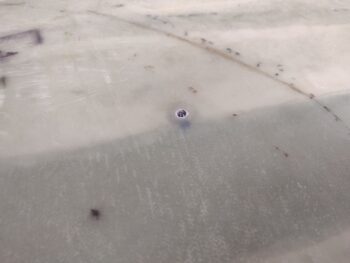
After about 3 minutes of testing with an AN960-10L (light) washer and a magnet at the winglet trailing edge, I decided now was the perfect time to embed that washer into the TE to allow me to “snap” a protective corner cap onto the winglet after landing and parking to prevent just such damage to the plane and/or injury to anybody (most likely me! ha).

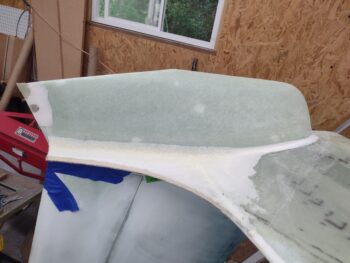
I bent the washer ever so slightly to sit in the TE trough tightly, then roughed it up a bit with sandpaper before applying just enough flox to keep it in place.  I then put peel ply over it and taped it in place.  Here’s the result… (later I covered it with micro).

And here’s the associated magnet that will keep the future protective corner cap in place.

Another sideline task: many moons ago I left the bottom sides of each aileron with micro merely sanded, without epoxy wiping them, to allow for any micro additions possibly needed to get the bottom aileron surface matched with the bottom wing surface.  Since all looks good with the elevation on the left wing, I went ahead and did the final sanding in prep for epoxy wiping the aileron, which I plan to complete in the next day or two.

And since I had done another round of touchup micro on the bottom left wing, why not make a trifecta out of my sideline tasks!

I decided to knock out the remaining two attach points on the wheel pants.  I had originally planned on using 2000 series CAMLOCs for aft 4 attach points (all on the aft pant, inboard & outboard) but I decided that after I had problems getting them to reseat after adding primer to the gear, that I would simply swap them out on the outboard side with 2 CS screws, and with two 4000 series CAMLOCs (for speed and ease of wheel pant removal) on the inboard side.

I had completed the outboard CS screw additions, but hadn’t finished the CAMLOC conversion… until today.

Now, I’m showing this process for both left and right together, while in reality I did the entire right side first to ensure it was all good, and then knocked out the left side.  Here’s the ‘before” on each side.

And the bigger holes drilled through for the CAMLOCs.

Here we have the “after,” with the CAMLOC receptacles riveted to the aft wheel pants, and CAMLOCs now installed.  They aren’t perfect and need some minor tweaking (hole angles massaged first… possible repositioning receptacles).  But, they are in and doing their job of securing the wheel pants!

Pressing forward.

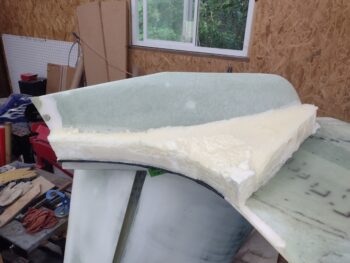
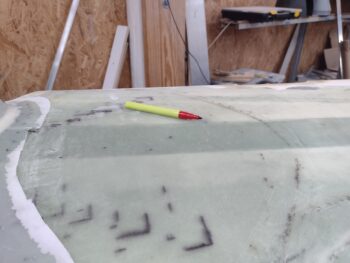
It was getting dark when I did my final sanding on the outboard bottom left wing, winglet, intersection fairing and leading edge… thus the light to illuminate the subject.

I have a few minor micro refills that I will sand tomorrow, including over the added winglet TE washer, and possibly some epoxy wiping.  But I’m calling the bottom of the left wing very nearly done (say 98%).

Tomorrow I’ll be looking to play more musical chairs in the shop to get the right wing off and start down the road to get it finished.

Getting closer to flying every day!

Chapter 25 – Underwing epoxy wipe

Today was all about getting the underside outboard left wing, inside bottom winglet and winglet intersection fairing epoxy wiped.

Using West epoxy with the fast 205 hardener, I barely had time to start on anything else before it was time to do another round of epoxy wipes, which I did 5 in total (yes, it’s still VERY hot weather currently).  In addition, along with the outboard areas I also epoxy wiped the left wing bottom leading edge.

I then spent about 3 hours prepping and post processing the CAM G-code files to machine Guy William’s main gear 1/4″ thick axle spacers.  These will kick the main gear wheels and especially the brake rotors out away from the main gear a bit to protect from any inadvertent rubbing or heat generating events.

Since I have a 6″ x 6″ 6061 aluminum plate, I’ll also be machining my fuel injection fuel distribution “spider” mount (blue part) to eventually move it down to the underside of the engine IF I experience any vapor lock or hot start issues with it located currently on the top side.

Part of that multiple-hour effort in CAM was prepping 2 separate post processed G-code files to plasma cut Guy’s new larger heat shields that will be mounted in between the main gear legs and the axles/spacers.  I also created the drawing from a quick cardboard template we made at his hangar after I glassed up his right main gear leg.

I then headed back out to the shop and removed the clamped block that was compressing my epoxy-injected delam on the bottom inboard side of the wing. I then cleaned up and sanded away the excess epoxy.

And grabbed this shot showing that what was a delam “bubble” is now a repaired delam depression.

After which, I spent a few minutes whipping up some micro/West 410 and filling in the delam repair depression.  Tomorrow I’ll sand it and epoxy wipe the repair area.

Also, tomorrow should prove to be quite the busy day as I plan to sand down the epoxy wiped left wing bottom outboard wing, bottom leading edge, inside winglet and winglet intersection fairing.

In addition, Guy is coming over tomorrow to help me move the left wing off the wing dolly and onto saw horses under the carport. We’ll then remove the right wing and put it on the elevated wing dolly (inverted) so I can foam, glass, micro and epoxy wipe the right bottom outboard wing, bottom leading edge, inside winglet and winglet intersection fairing… a repeat of what I just did on the left wing.

Finally, we’ll machine Guy’s main gear axle spacers and plasma cut his main gear heat shields.

Moving forward!

Chapter 25 – Left wing delam

I started out today putting all my efforts into finishing up the bottom of the left wing.

When I installed the winglets onto the wings I had 2 functional wing dollies, but since I have no room inside my shop they’ve had to live outside in the weather.  The one wing dolly I’m using here, although weathered and unsightly, is still operational. The other one (much older of the two) is rotting out in spots… in short, with only one wing dolly I have to get the left wing finished to get to working on the right wing.

I first spent over half an hour doing a final sanding on the micro finish of the outboard bottom wing, bottom inside winglet and bottom winglet intersection fairing. I had a number of major divots from air bubbles in the micro, as well a myriad of smaller yet distinct depressions and holes as well, which I remedied with a quick round of micro & West 410 mix applied to these offending aberrations.

I then got to work on the left wing aileron pocket’s bottom lip, sanding it for about 45 minutes to widen the gap between it and the front lower edge of the aileron (which is the embedded aileron weight rod).  I was able to sand the aileron pocket edge away to give me a hair over a 0.1″ gap, with the minimum per plans being 0.08″.  Obviously, I want to have a little extra to allow for paint.

I had other tasks on my list that I had planned to work on, but it looked for a few hours that a thunderstorm might be passing through, so I continued to focus on the wing.

Sins of the past….

My next task on the bottom of the left wing (once again moved outside in front of the shop) was to A) do a final sand on the previously boat-paint-primed bottom surface, and B) remove as much of the boat paint primer as possible since I’m now going to shoot the paint vs roll it on.  I will note that this primer is as hard as nails and takes a good bit to get it removed.

Moreover, as I was working near the inboard edge, I found a linear bump that after further investigation was clearly a delam.  My guess is that when glassing in the extended lip to attach the oil cooler I must have set a heat lamp too close and caused this delam… but I’m not 100% sure.

After doing a bit more aggressive sanding to get down to glass, I used both a large washer (quarter tapping) and pushing with my fingers to find the area of the delam, which it certainly was.  You can see the ridge marked above and with the ruler “riding high” in the pic below.

With it being a longer narrow delam, I drilled 4 holes down the center, and a couple more holes with one on each side of the perimeter. I then mixed up some MGS 335 with fast hardener and injected the epoxy into the holes.  I had both a taped up long narrow block and my clamp ready to go, which I employed immediately following the epoxy injections.

Another shot of the inboard bottom wing delam repair: clamp securing taped block in place.

After dealing with the delam, by this point my added micro to outboard bottom wing micro’d areas was cured.  I spent another 30 minutes sanding all that down so that this area is all ready for epoxy wipes.  But as it was past 8 pm, I punted on the epoxy wipes until tomorrow.

I then spent another good hour sanding the boat paint primer down on the bottom of the wing.  Here’s a shot of where that took place outside the shop.  I’ll note that I tried using both my air file and electric orbital sander but found that what worked best by far in this task was my new jitterbug pneumatic pad sander.

Here’s a better shot of the primed and now sanded left wing bottom surface inside the shop, under the lights. I will probably do another good round of sanding towards the middle outboard area of the wing, since there’s still a few shiny spots that can be seen under lights.

And yes, I will incur a slight weight penalty by not removing all the primer completely, but I’ll note first that it is serving as a filler in leveling out the high and low spots on the bottom surface of the wing, which under the lights and to the touch is very uniform and smooth.

Secondly, I am pushing hard to get this bird done, thus time is of the essence.  Sanding down this primer takes a fair bit of time, and more importantly I don’t want to do any damage to the finish of the wing or have to start over in the finishing process due to excessive removal of the primer.  I’ll take the slight weight hit and press forward.

Chapter 25 – I hate sanding.

But it is quite the necessary evil if one is building a Long-EZ, eh?!

So today I had to bite the bullet, quit my belly-aching, and get to work sanding down all the epoxy wiped areas on this bird.

I started out with a couple hours of sanding down all the epoxy wiped areas first with 150 sandpaper dry, followed by going over the same areas with 150 grit wet sandpaper.

Here we have the right longeron exterior sanded to 150 grit wet and ready for primer. That being said, I will need to do a bit of cleanup on the inside areas once the canopy comes off, when I have full access to the right longeron just under the canopy lip.

Although my persistent problem area is much less egregious, the right sidewall still had a number of shiny spots (depressions) that I felt needed to be dealt with now, prior to primer and paint.  So I marked the areas with green tape for another 3-5 coats of epoxy wipes to level them out with the surrounding surfaces.

I will say that the right top side of the nose turned out nice after a round of dry sanding, then wet sanding…

as did the left side as well.  Yes, the nose is looking good with minimal defects and is ready for primer and paint!

I then wheeled the left wing pallet dolly outside to minimize the dust from sanding the just-micro’d outboard underside wing, winglet and intersection fairing.

But first, I used a ruler to check the elevation between the bottom wing surface just forward of the bottom aileron surface: inboard, middle and outboard.  All looked good, or at least acceptable in the case of the outboard elevation.

I then checked the gap between the bottom wing aileron pocket edge and the front bottom edge of the aileron.  The plans say 0.08″ minimum to 0.2″ maximum.  I’m clearly towards the minimum side (which is good in my book) with all the blue areas below denoting less than 0.08″ gap.  Clearly I need to do some judicious sanding along the aileron-wing aileron pocket edge… all on the wing side.

While sanding the aft end of the right longeron, I also checked the quality of the surface of the Turtledeck… well, it wasn’t as smooth as I remembered.  Where I had to do subsequent micro fills, there where elevation differences at the seams of old and new micro.  So after a good bit of sanding (which helped a lot) I decided to slather on a few good coats of epoxy to help even out the surface: 5 coats to be exact (pic 1).

I also use the mixed epoxy to hit all the very slight low spots on the right fuselage sidewall.  Again, 5 coats (pic 2).

Outside I spent nearly 2 hours doing the initial sanding on the left bottom outboard wing, the inside bottom winglet and the bottom wing-winglet intersection fairing.  I’d say I’m at least 80% finished.  But it was getting late so I wheeled the wing back into the shop to finish up the fine-tune sanding tomorrow.

Here’s another shot of the initial sanding of the left bottom outboard wing, inside bottom winglet and the bottom winglet intersection fairing.

My goal is to finish up the left wing tomorrow and get cracking on the right wing.
Rock on!

Chapter 25 – Left wing micro-finished

Last night I knocked off about an hour earlier than I normally do to fill out the paperwork to get a new passport, since I need to travel to California for a reunion next month and also plan to travel out of country both with the new Long-EZ and overseas for some adventures with Jess.

My passport appointment was late morning, so before I left I wanted to get a task or two done as I let last night’s layup cure a bit more before I pulled the peel ply.

I turned my focus to the aft upper lip of the left strake where I had laid up 2 plies of BID on the underside of the lip.  The lip trailing edge had a fair amount of dings on it, so after I trimmed the cured overhanging BID a bit I then added some flocro to these aforementioned dings, etc. (pic 1).

Trimming the remaining glass and sanding it all nice and straight was a perfect task for this morning, so I knocked that out and was quite pleased with the results (pic 2).

After returning home from my passport appointment and running a few errands, I then pulled the peel ply off last night’s layup of the left wing-winglet lower intersection fairing.

Before I snapped this pic, I placed a red zip tie pointing at the plans (CP) position for placing a tie down bolt thru-hole.  But instead of that, I simply embedded a threaded aluminum insert with flox while glassing the wings.

In the future I’ll make up some low-drag tie-down points that I’ll install on each wing at these points.

For now I simply used my drill and carefully exposed the threads (pic 1), and then tried out a 10-32 screw to check that it threaded in nicely… which it did (pic 2).

I then stuffed the threaded insert with plastic Saran wrap and taped off the lower flanges of the wing leading edge light to protect both from the upcoming micro finish.

I then whipped up a few batches of micro (with a dash of West 410) and slathered it all onto the lower outboard area of the left wing, the inside lower area of the left winglet, and of course the added winglet intersection fairing.

I had planned on doing some more sanding on the plane, but at nearly 10 pm it was still about 90° F in the shop … so I called it a night.

Chapter 24 – Quick fairing layup?!

NO!!

Now it wasn’t overly difficult nor was there any issues, but good heavens did it kill about an entire day!

But I digress… let me back up to the beginning.

I started by cleaning up and sanding the area on the left wing-to-winglet intersection fairing —bottom side of course.

To keep the whole fairing light as possible my substrate material is balsa wood.  Thus, to get a good glass-to-balsa wood bond along the trailing edge, I taped in from the TE about 0.5″ to keep the foam off of it.

I then built a taped cardboard dam for my pour foam (pic 1).  Granted, the footprint was significantly larger than I needed, and I put in a LOT of pour foam (pic 2), but at least I never had to ADD any more pour foam: one shot, one kill!

After I let it cure for about 30 minutes, I then spent the next 45 minutes using a hack saw blade and a piece of cardboard tube (from a used up fiberglass roll) I cut and sanded it down to shape.

A bit more fine tuning and it was ready to glass!

And one more shot of the finished foam shaping on the left winglet intersection fairing from the front side.

I then whipped up some wet micro using Pro-Set epoxy and applied it to the entire foam area.  On some spots I needed some thicker micro so I applied that as well.

Before applying the micro I made a plastic sheet pattern about an inch out from the edge of the foam, to allow me to cut the glass. The first ply I cut from a large scrap piece of UNI was about a 1/4″ less around the perimeter (except the trailing edge).

I put the UNI ply in place (pic 1) and then thoroughly wetted it out (pic 2).

The second ply I cut was BID off the roll biased at 45° angle.  I cut this piece about 1/4″ more than the plastic sheet pattern to give me a 1/2″ overlap over the UNI (I like to cover UNI with BID).

I then did the same and put the BID ply in place (pic 1) and then wetted it out as well (pic 2).

I then peel plied the layup and left it to cure overnight.

One departing shot of the left winglet bottom intersection fairing shaped and glassed!

As long as it took it’s rather exciting since I’m truly getting down to only a handful of layups left before the airframe is officially constructed!