Chapter 25 – Fighting the fight!

So today was a transition day, with a lot of odd jobs and bits getting worked, and of course tons of sanding.

I started off by knocking down the epoxy wiped right wing, winglet, rudder and aileron top very carefully with 80 grit sandpaper.  Just enough to get it smooth and all the shiny areas dulled.  Tomorrow I plan to wet sand it with 150 grit sandpaper and a long board, as Cory Bird describes in his finishing how-to instructions.

I had done some fills on the left side, and one such task was filling in the edges of the left baggage pod’s top wing mounting screw holes, which had chipped a decent bit as I uncovered them.  I used a very thin amount of grease on some spare 10-32 SS screws and used them to keep the flocro out of the holes (pic 1), and as you can see it really worked a treat (pic 2).

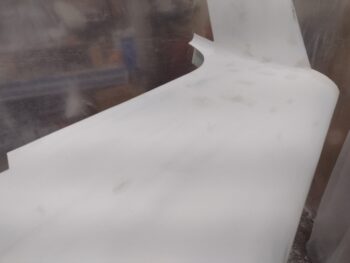
I also employed another technique for micro finishing these birds that I found in a Central States Association (CSA) newsletter article.  It’s a rather simple method of finding the high spots on a wing or strake by using an aluminum “yardstick,” or any long piece of straight aluminum, to find the high spots.  You simply slide the edge back and forth on random intervals, using different axes and a pattern shows up where the high points —or ridges— are (pic 1).

I’ll do this a good 6-8 times, then mark up the surface (see below) and sand the entire surface 1-2 times before back to finding the high points.  I will note that after I got the surface as level as possible on the right strake, I still needed to backfill a small patch at the aft inboard area that was a bit too low compared the surrounding surface (pic 2).

I then got busy sanding the top of the left wing to finalize its contour in prep for the next step: epoxy wipes.  I started by marking up the entire top of the left wing using a pencil, the poor man’s guide coat if you will (pic 1).  I then spent a good couple of hours dialing in the surface of the top wing, and I’m happy to report that it is complete and ready for some epoxy wipes… although I still need to finalize the left winglet before that happens.

Tomorrow my goal is to get the right strake epoxy wiped, and finish sanding the left winglet so that the left wing and winglet can be epoxy wiped the following day (the goal anyway).  I need to fit in some sanding on the epoxy wiped surfaces of course too… yes, I’ve had to do some crazy juggling of tasks over the past couple of weeks to get all this micro finishing done before the cold weather comes rolling in… at some point.

But I’m still pressing forward!

Chapter 25 – Popping air bubbles

Today was all about getting some West epoxy wipes down on the right wing and winglet.

But first, I made a fair bit of dust by sanding the right strake top a good bit.  After really getting a good bit of the micro finish knocked down I assessed the surface before applying some filler West 410/micro to the low spots.

Although I didn’t grab any shots, I also did another good round of sanding on the left wing, and am slowly dialing that in… although it still needs a bit of work to get all evened out.  The central wing area is good, but the outer wing and around the wing bolt area inboard are my stubborn problem areas.  The fix at this point is simple and standard in that more sanding should solve my elevation issues.

I also worked over the left winglet again, especially the upper outboard area.  Again, no pics on that.

I then got to work on the right wing and winglet prepping it for epoxy wipes.  At this point I wasn’t going to create any more dust on any other parts until the epoxy is fully cured on the right side (overnight).

To start, I needed to expose all the air pockets that were covered with just a very thin cover of micro.  I don’t want these showing up as blemishes in my finish later on.  I took about 30-45 minutes surveying my wing and winglet surface and simply exposed the air pockets (AKA “popping bubbles”) as I found them.  Here we have a representative before (pic 1) and after (pic 2) of how that looks.

And a whole area of popped micro pockets on my wing.  It’s not really a fun thing to do: making your wing surface look pockmarked and much worse.  But it’s definitely a good thing when all is said and done to expose these air pockets now and fill them with raw epoxy.

I taped off the perimeter of the wing at the leading and trailing edges, and also at the junction with the strake.  I then vacuumed all the surfaces and then went over them with high pressure air to remove any remaining dust.

I cut some 1x2s to create a quick hanging contraption for the right rudder, to allow me to epoxy wipe both sides of it.  I also prepped the right aileron to epoxy wipe just the top surface of that.

Fast forward 5+ hours later we have both sides of the right rudder and the top side of the right aileron epoxy wiped.

Another shot of the epoxy-wiped right rudder and aileron.

And here we have the right wing and winglet epoxy wiped.  Note that all the perimeter tape is pulled.

I’m calling it 4.5 coats since I had some epoxy left in my cup after 4 entire coats and all looked good except for some of the deeper holes and divots, so I simple dabbed a drop onto each one of those.

I only had maybe 6-8 little divot-fill dabs on both sides of the winglet, so I’m simply calling it 4 coats total for the epoxy wipes on the inboard (pic 1) and outboard (pic 2) sides of the winglet.

My epoxy wiping efforts on the right wing, winglet and accoutrements took me well into the wee hours of the mourning.  But, again, after the epoxy cures (as I sleep) I can once again make some dust on the other major components in prep for getting them epoxy wiped as well (whichever one comes out with the best surface contour first!).

Pressing ahead…

Chapter 25 – Sand, sander, sandest

I started off today by sanding down the micro/West 410 added fills to various areas on the left side, the first being the left wingtip, which was a bit “droopy” on the outboard edge.

I also added some micro/West 410 to the left wing’s BL 55.5 dip, where there is an elevation change on the wing.  Some builders sand this to natural contour, while others tend to hide it and have it filled more.  Since I’m very sneaky (ha!) I decided to hide it a bit more and make the top of the wing look a little more even here (pic 1).  Not to waste any leftover micro/West 410, I also filled in a few distinct low spots and any major divots I could find on the wing/winglet surfaces (pic 2).

Again, today with the added fill cured, I sanded all those down a good bit.

I’ll note that when I specify micro and “West 410,” the emphasis for these added fills is on the West 410.  What I’m doing here is essentially cheating by upping the ratio of West 410, which makes the added fill easier to sand without digging into or deforming the previous micro fill.

That being said, I also had enough left over to fill low spots and divots on the left strake as well, which I then sanded smooth today.

As I mentioned in yesterday’s blog post, a goal of mine today was to work all the wing and strake leading edges to get the bottom edge of each smooth/erased, and also the actual shape of the leading edges dialed in to final for the upcoming epoxy wipes.  Well, I’m happy to report that I accomplished this goal… sorry, no pics because it wouldn’t really show any real difference than before.

However, a distinct BEFORE and AFTER difference is the pre-shaping of the left strake leading edge oil heat/fresh air RAM intake scoop (pic 1), and the AFTER shot of that, now ready for epoxy wipes (pic 2).

Jess had the night off so it was date night, and I wanted to get out of the shop mid-evening.  I was working to get the right strake micro completely sanded when I got a call from my local Long-EZ buddy, Guy Williams.  He found a potential problem with his right gear and wanted my help in troubleshooting it.

So after a bit on the phone with Guy, I got back to the right strake sanding.  But alas, I didn’t have enough time to finish it so I’ll have to pick up on it tomorrow.  I’d say currently we’re at about 90% complete on the right strake (that’s not including cowl shoulder or longeron micro), so getting close to epoxy wiping!

In working on the right strake, as I did on the left side, I cleaned up the intersection of the strake where it meets the fuselage side.  Moreover, part of that was also working the right strake root fresh air intake port.  I’ll probably do just a bit more fine-tuning in this area, but it too is very close to final.

Finally, part of my strake sanding shenanigans this evening involved recutting and cleaning up the junction gap between right strake and wing.  I need to add a bit more flocro to both the wing edge and the strake edge where some chunks have broken off, but beyond that, this junction is pretty much final.

Tomorrow I’ll continue to press forward… And hopefully get to some epoxy wiping!

Chapter 25 – Slowly dialing it in…

Last night I added a bit of micro/West 410 to the front and top inboard edge of the right rudder, and today I started off by knocking that down a bit before remounting the rudder. I then spent about 45 min. sanding the front edge of the rudder on both inboard (pic 1) and outboard (pic 2) sides to match the surface level of the winglet at the intersection between the two.  I may need some very minor tweaking after my final checks, but for the most part the right rudder is done.

With the leftover micro/West 410 in the cup from my inboard rudder added fill (and outboard right aileron edge too), I had filled a few key low spots on the wing as well as a bunch of egregious divots.  I spent about 15 minutes with a sanding block knocking all those back to level.

I then dove in on the right aileron, doing pretty much the same with it as I did the right rudder: matching the front and side edges surface level to that of the intersecting wing.

Again, I added some micro/West 410 to the outboard front and side edge, about 8-10″ of the top aileron, and then knocked off the rough stuff before re-installing the aileron.  Besides the outboard area that I added micro to, the remaining front edge of the aileron actually needed sanded down to match the wing surface level, so I taped the edge of the wing and hit the aileron’s front edge first with the orbital sander, then with a straight board (pic 1).  I then sanded down the added micro on the outboard side and leveled that with the surrounding wing surface (pic 2).  Also note the sanded down clickbond install that was also micro filled last night as well.

Here we have the matching surface levels of right aileron to wing, going clockwise from the top left pic, I started inboard near the first hinge and then moved outboard approximately a foot each position.  Not bad…

Although I need to work on the right strake, I chose to focus the rest of my time this evening on the left side since I had gotten the front half of the wing fairly dialed in with a nice smooth contour, but the aft side wasn’t cooperating as much.  The left wing seems to be requiring a bit more attention than the right wing.

After a few rounds of sanding mainly with the air file and 30″ boat board, I made a lot of progress, and tomorrow I’ll start back in with the long board.

I hit the left strake with a couple good rounds of sanding, doing the 45° sanding strokes once to the left, then once towards the right (standard op for all my flight surfaces).

I then spent about 20 minutes just focused on the left strake to wing intersection, mainly at the leading edge.  It still needs some final dialing in, but it’s pretty darn close at this point.

I grabbed these shots for both left (pardon the weird LED light patterns) and right sides.  The right wing is VERY close to being ready for epoxy wipes, while the left wing still needs a bit of work… I’d call it 70% finished at this point.  I also need to work both strakes as well, especially the inboard aft sides of those and their intersections with the top cowling front lip.

I didn’t grab a shot of it, but I whipped a small batch of micro/West 410 and did some filling on the left side, with my main targets being the BL 55.5 dip on the left wing (too low), as well as the wingtip just in front of the winglet leading edge (edge was low compared to wing).  Then, as I did on the right side, I used the remainder in my cup to fill a number of distinctly low spots and divots on both the left wing and strake.

Tomorrow I’ll continue to press forward on both right and left wings, winglets, and strakes.  One specific task I plan on completing on all surfaces is the blending of the bottom leading edge micro with the previous bottom filled surfaces.  I also plan on getting the left winglet squared away, to allow me to install the rudder and get it dialed in.

Pressing forward… slow, but persistent!

Chapter 25 – Sticks of pain

And rights of passage

Any canard builder can tell you that yet another of many, I guess the grand finale, right of passage in building these birds is the micro-finishing process.

I started off this multi-day process with hitting the left wing and strake tops again with the air file.

This knocked down the micro a good bit more, but still a long way to go on the left side.

Here’s a selfie towards the end of the evening to capture just how amazingly messy this whole micro-finishing affair is all the way around.

I cut to length and ripped on the table saw a pre-primed board to create a stick of pain that is nearly 67″ long, which allows me to attach 4 each ~3″ wide peel-n-stick 36 grit sandpaper strips onto it, end-to-end.  To secure the board’s straightness, and give me a handle to grip, I screwed a 2×2 down the top (which I ripped on one side to ensure it too was straight).

Let the real pain begin!

As a level marker/guide coat I decided to use pencil vs spray paint, mainly because all the paint I have on hand has too long of cure times.  And I forgot to pick up some guide coat paint at the store.

No worries.  I grabbed my carpenter’s pencil and simply went to town on the right wing and strake tops (pic 1).  I then grabbed my stick o’ pain and started work from the leading edge aft on the right wing (pic 2).  I was a bit surprised at how many low spots I had, but that is the entire reason for using a guide coat in the first place, eh?

After a number of rounds of using the long sanding block, and then the 30″ boat-sanding block (with 4.5″ wide 3M Stikit 36 grit paper), I stopped when the wing’s micro surface was close to final level… I’d say over 90% final.

I then installed the aileron on the wing and the rudder on the winglet.

I spent the rest of the evening and most of today working to fine-tune and dial-in the intersecting seams of the aileron to wing and rudder to winglet.

Part of the effort on finalizing the right aileron finishing and install was mounting a clickbond in the middle of outboard hinge, in between the 2 existing screws.  I 3D printed a sanding block and prepped the clickbond for bonding.

Here’s a shot of the clickbond floxed in place and secured with a ply of BID and a ply of UNI (after cure).

I shot a video detailing what exactly I’m up to with adding this clickbond to the right aileron’s outboard hinge.  It also includes a project update at the current state of the build.

Tomorrow I’ll continue to press forward with sanding the micro-finish on the wings, strakes and winglets in my quest to get them finished and ready for paint.

Chapter 25 – Sanding ops commence!

Again, my current status is that I have both wings, both winglets, both strakes, both rudders, and both ailerons now in micro [caveat: underside outboard few feet of wing and inside lower winglets currently not micro’d].

My next task that I didn’t grab a shot of was prepping and microing the top surface of the left aileron.

As you might have guessed, I’m trying to keep the micro cure times somewhat matched for the control surfaces: inboard rudder to inboard winglet; top of aileron to top of wing, etc. to match sand those surfaces here shortly.

I bought some 40 grit sanding disks for my orbital sander and did a full regime of that on the right wing and strake tops.  I also hit both sides of the right winglet, the winglet-to-wing fairing and around the wingtip area at the Nav/Strobe light bump.

I then did a few more rounds on the right side with my air file, which really got the micro knocked down to much closer to final contour… I’d say about 80% done.  Tomorrow I’ll probably do one final round with the air file before switching to hand sanding with what my buddy Dave B. calls “the sticks of pain,” AKA sanding boards.

As with so many things on this build, the micro-finishing work is an iterative process. It’s certainly a workout, and can be monotonous and repetitive, but it really is a cool process to see the imperfect surfaces get so smoothed out.  I have to say I’m really pleased so far as to how it’s all shaping up.

Here we have the right wing tip Nav/Strobe base, also at about 80% to final.

I then got to work on the left side, mainly just get the high spots knocked down and the micro to general shape.  I hit the entire micro’d surfaces of the left wing and strake, and also leading edge on both of those as well.  I still have quite a bit to go on the left side, but it was a good start.

I’m at the point on the right side where I’ll be breaking out my pencil (or black paint) to ensure my surface level is even across the board as I finalize my micro application.

Moving forward.

Chapter 25 – Left wing micro’d up

This blog post covers the past two days, since I’m just now getting to posting it.

First off, since I was up pretty darn late microing up the left strake top and leading edge, it was mid-afternoon when I got around to cheese grating the surface to knock down the high spots.  This took nearly 2 hours.

I then needed to run out and knock out a few errands, and upon my return mid-evening I spent another good 2 hours prepping the left wing and inboard winglet for micro.

I taped up the wing-strake seam gap and also mounted the top cowling, with its interfacing edge taped up.  And I finally remembered to get a shot of the extended/ relocated strake flange edge over to the wing… eliminating an air gap along the front outboard edge of the top strake.  You can see the difference from before (pic 1) and after (pic 2).

Here’s a shot of the cleaned and prepped left wing top and inboard left winglet, ready for micro.

Today I got busy with my left wing/inboard winglet micro task by first apply flocro around the wing-strake seam edge, as I have on all my other micro finishing jobs.

And again, over 4 hours later here we have the left wing top, leading edge and inboard winglet surfaces micro’d.

Another shot of the left wing top micro’d up.

And one final shot of left wing top and inboard winglet micro’d.

Tomorrow I plan on applying micro to the top of the left aileron and cheese grating the micro I just applied on the left wing tonight.  In addition, I plan to start sanding the right wing, inboard winglet and strake.

Chapter 25 – Left strake micro’d up

Today I continued on in my micro finishing fury by knocking out the microing of the left strake.

But first I spent a good hour+ cheese grating the just-micro’d right strake.

I needed to get some prerequisite tasks completed before I could get to microing up the left strake.  First on the list was to recut the aft strake-to-wing junction 1 ply BID layup that I did a couple of days ago.

I taped a metal “yardstick” in place as a straight line cutting guide (pic 1) and then made the cut (pic 2).

While I was right there in the immediate area with my ‘Fein’ saw in hand, I also cut the flange reallocation layup that I did where I moved a piece of the strake flange over to the wing [I had meant to get a closeup pic of this now non-gap when I put the top cowl on during the left strake micro finishing… but forgot].

I then pulled my air file out of its semi-retirement, knocked off the dust and put some tool oil in it.  I spent a good 15 minutes (what a workout!) knocking down a good bit of the micro on the outboard side of the left winglet.  The majority of the finishing on this area from here on out will be hand sanding with sanding blocks.

I then did the same thing on the outboard side of the right winglet.  Again, because the workshop wall is so close to this winglet, I needed 2 pics to get a shot of the entire winglet.  Also, the same holds true here as on the left side, where I’ll be using mainly hand sanding blocks to finish the contouring of the winglet.

I received two separate phone calls from my son and my daughter, so I was on the phone a good bit… since airplane building has kept me quite occupied lately.  Thus, although it was getting later into the evening, I wanted to get micro laid down on the left strake top.  I prepped the strake top, cleaned it up and then taped the seam edge with the wing.

Again, I started off by whipping up flocro and putting a bead around the strake-wing seam edge.

And a few hours later I had completed my task of microing up the left strake top and leading edge.  I also added some micro I had left over to the fuselage wall just forward of the strake junction with the fuselage.  Note that the strake-to-wing seam edge tape has been pulled.

Here’s another angle of the left strake in micro… no more crazy multi-colored strakes from this point on.  Kinda weird to see in a way!

Here we have a closer shot of the junction between strake and wing, with the gap tape pulled and the razor knife run through it multiple times to clean it up.

It was very late (or technically very early morning), but I wanted to get another round of micro in on a large component to allow me to rest my shoulder and back with some sleep before tackling the left wing top, leading edge and inboard winglet… which is next on the docket.

Getting there… one bowl of micro at a time!

Chapter 25 – Right strake falls to sword!

The micro finishing sword that is…  ha!

Today was nearly all about getting the right strake top and leading edge slathered up in micro.  I did take the ailerons outside and sand the bottom of those a good bit with the orbital sander as well as the outboard side of the rudders… I had to get to that micro knocked down some before it got too hard to work with.  I still seriously need to sand the outboard side of the winglets, but keep getting distracted with laying down more micro while the days are warm.

But the very first thing I did this morning early was to spend a couple of hours cheese-grating the inboard right winglet and right wing top micro.

I then cleaned and prepped the right strake top and leading edge for micro, taping off the seam with the wing and also the top cowling, which I remounted for this task.

As I did on the wing, I laid in a narrow line of flocro on the edge of the right strake seam with the wing, to harden up the edge a bit for wing installation and removal ops.

I then spent the next few hours slathering up the right strake top and leading edge with micro.

I had a good bit of micro left over from my last batch, and not wanting to waste it I simply slathered up the fuselage forward of the strake, underneath the canard and a bit on the nose as well.

Here we have the right strake and some of the forward fuselage micro’d up. Obviously I still have the canopy in place, so I didn’t do all of the longerons or turtledeck… that will come later.

After all the micro was applied, I then went through and pulled the thick Gorilla duct tape from the strake-to-wing seam.  I ran a razor knife down the seam to clean it up a bit, and will sand it clean when I remove the wing, but I do have a nice, narrow distinct seam line between the two.

And here’s my final parting shot of the evening, with the right winglet, wing and now strake all in micro.

Tomorrow I do plan on paying the piper in sanding the outboard winglets (and hopefully right wing as well), but do plan on prepping and getting the majority of the left strake top micro’d up as well… but no fuselage micro at this point on the left side since I need to do some canopy interface work on the forward longeron and fuselage.

Pressing forward with finishing!


Chapter 25 – Right wing/winglet micro’d

Today was all about getting the top of the right wing and the inboard side of the right winglet micro’d up.

I started by cutting my new conjoined strake flange and wing edge to once again make two separate flanges.  As you can see I have eliminated two problems in doing this little step:

First, I’ve eliminated an engine compartment air escape gap, and second —and honestly perhaps more importantly!— I removed a very unsightly gap between wing and top cowl edge.

I had planned on doing a bunch of component micro sanding first, but I didn’t want to push my luck as far as time.  And boy oh boy did I make the right call… this was a beast!

After final sanding, vacuuming and cleaning, I then taped up the edges around the inboard side of the wing.

I mixed some thick flocro up and created an edge around the strake interface gap, to harden this edge during wing removal and installation.  Off on the far end you can see I started micro’ing up the inboard winglet.

The first pic is exactly an hour into my wing micro task, while pic 2 is 2 hours in (no kidding!).

Here we have the entire right wing top and inboard winglet in micro… all in all it took me nearly 7 hours (yep, not lying!) to micro this beast up.  Clearly there was no dilly-dallying going on either.

And one more shot of the completed micro on the right wing top and inboard winglet.

Tomorrow I plan to seriously get to sanding the inboard sides of my rudders, the bottom sides of the ailerons, and the outboard sides of the winglets.  I also plan on microing up the top of the right strake, and the top of the right aileron as well.