Chapter 25 – Bottom blue paint

Today I started by knocking out a comparatively quick micro finishing application on the aft nose/avionics cover. Before I started I snagged one last shot of the cover in its unfinished state.

I then mixed up a fair bit of straight micro (as compared to adding West 410 filler) and slathered it onto the aft nose/avionics cover.

I then got busy painting the final blue coat on the fuselage, as well as the 2nd coat of blue paint on the canopy frame… both shown here.

Another shot of the canopy frame in its 2nd coat of blue paint.

And a shot of the bottom of the nose and fuselage in its final coat of blue paint.

Some shots of the aft bottom fuselage in its final coat of blue paint.

I didn’t recoat the landing brake depression in the bottom of the fuselage, since it currently has 2 coats of blue paint… which I determined is enough for it.

As before, I painted the final coat of blue on the nose hatch door, nose gear fairing, and nose gear doors.

As I also did on the RAM air scoop/hell hole hatch cover and the landing brake.

Although I mixed up the same amount of blue paint as I did the last round, I had a good bit left over… I guess I must be finally learning to lay down the paint in lighter coats!  So what to do with it?

I didn’t want to waste the extra blue paint, so I quickly sanded and cleaned the milling machine CNC control box before applying the excess paint to it.

After painting the CNC control box door, I wedged a piece of steel bar into the latch and set it in the open position as I painted the rest of the control box.

With even more blue paint left in the cup, I quickly cleaned up the old rusty shop electrical box and applied a good coat of blue paint on it as well.

I then left all the blue painted components to cure overnight.

Chapter 25 – Final blue paint sanding

I started out today by taping up the canopy edge (with its intersection of the frame) with duct tape in prep for sanding the first coat of blue paint. I then pulled the tape from the canopy hinges to do a final cleanup on those before I moved into the final coats of paint on the canopy frame.

I then spent nearly 5 hours wet sanding the bottom fuselage/nose and canopy frame in prep for paint.

The fuselage sanding of course involved working the bottom of the fuselage (mid-sanding pic here) to prep it for its final coat of blue paint.

As you can see, I then worked the canopy frame even more, with quite a bit more white primer showing through the initial coat of blue paint.  I also filled a couple of very minor holes along the edge of the canopy frame hinges (one front, one aft) before taping up the canopy hinges.

I also did some extensive sanding on the edge of the canopy towards the front on the left side of the frame to dial in the contour.

Here we have the aft end fo the fuselage and strake sanded in prep for the final coat of blue paint.  I had some breakthroughs in the paint back to the primer coat, but for the most part these breakthroughs were minimal.

I also wet sanded the nose hatch door, nose gear fairing and nose gear doors in prep for final blue paint.  Note that I also countersunk the screw holes in the nose gear fairing and gear doors for the screws just prior to the final coat of blue paint.

Finally, I wet sanded the landing brake and RAM air scoop/hell hole hatch cover for their final coat of blue paint.

I had planned to paint the final coat of blue on the fuselage and all these components (except for the canopy frame, which will require at least one more coat), but the sanding took longer than I expected and I didn’t finish until later in the evening, so I will paint it all tomorrow.

Since I didn’t start painting tonight, I figured I would get one more fairly quick task knocked out: the filling of some delams in the pour foam of the aft nose/avionics cover. Actually, I only found one delam/air pocket initially but after some coin tapping I found a couple more. I’ll do one final check tomorrow to ensure I found all the delams in this apparently lackluster pour foam fill.

With that, I left the aft nose/avionics cover epoxy-filled delam voids to cure and called it a night.

Chapter 25 – Underside wing paint

Today I finished sanding and prepping the underside of the wings in prep for paint.

I then mixed up some white paint and applied it the bottom of the wings using the roll & tip method.

Within the next 24-48 hours I’ll sand this paint coat and will then let the wings cure for another day or two before removing them.

Later on when the top of the wings and leading edges are micro finished and primed, I will then apply another coat of white over this one as the rest of the wing surfaces are painted.

This wing painting was pretty much all I did today.  Tomorrow I’ll sand down the blue painted sections and repaint them with the final coat of blue.

Chapter 13/25 – Blue great… paint meh

With the white primer curing on both the canopy frame and the minor Metal Glaze spot fills on the fuselage, it gave me time to tackle some other tasks starting off this morning.

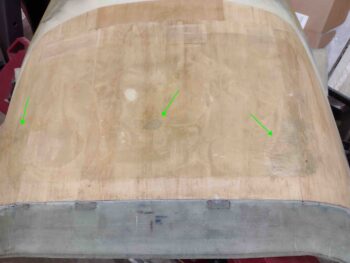
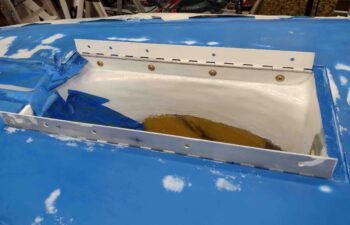
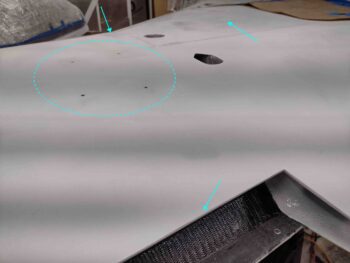
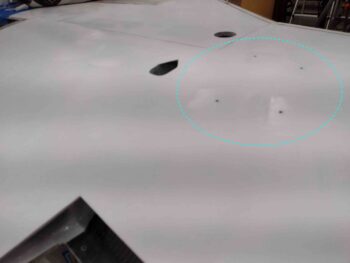
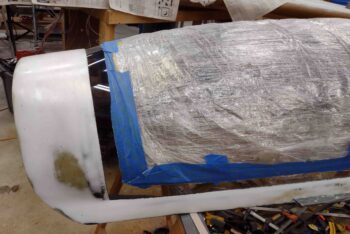
First off was a bit of glasswork.  A to-do item on my task list for some time was to mend some oops’s I made when I cut out the extra layer of wood & glass with the Fein saw on the inside of the aft nose/avionics cover.  I broke through in about 6 spots total, all slices averaging from about a 1/4″ to 1″ in length.  I also had one spot to repair where I cracked it just a bit too when I was scraping out the excess wood and glass on the inside.

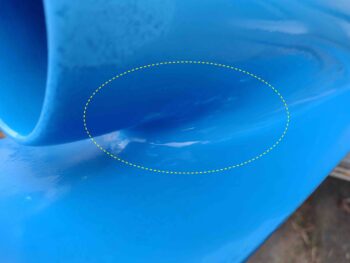
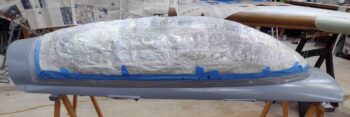
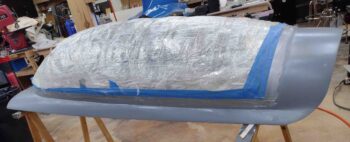
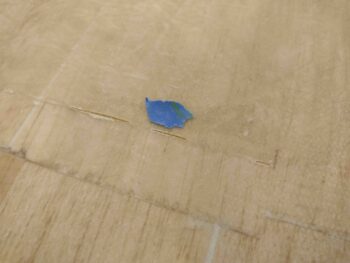
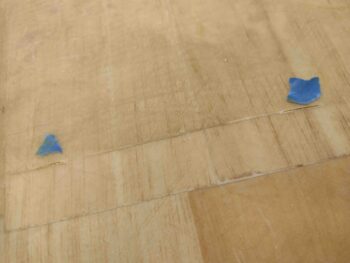
Here are a couple shots of the accidental breakthrough cuts showing on the top of the aft nose/avionics cover.  I’ll note that these are only on the exterior of the cover since the inside has long been filled with pour foam and re-glassed.

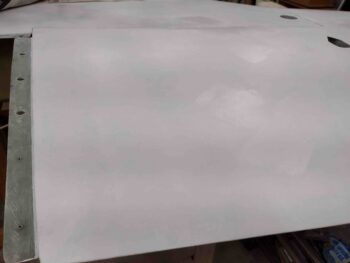
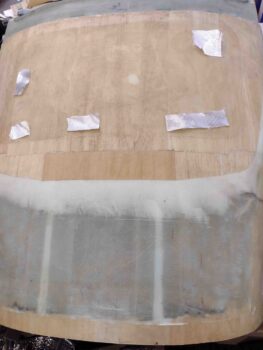
I then dug around in my spare glass box and found a perfect long thin piece of UNI to use as repair patches.  I want some glass to bridge these cuts but the thinner the better for finishing purposes.

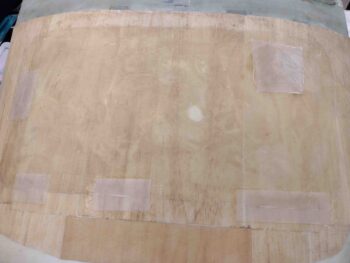
I then laid up the UNI patches and peel plied them.  Task complete!

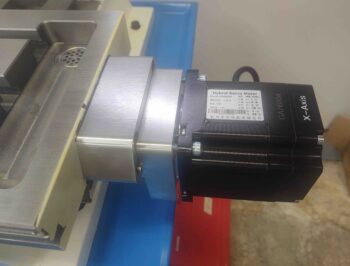
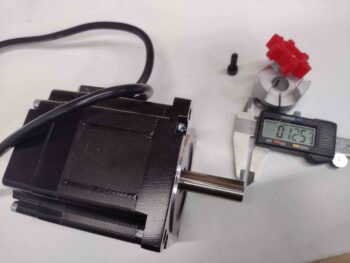
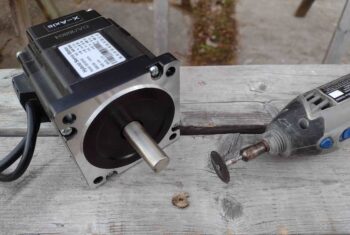
I then got to work on my milling machine CNC capability for a bit.  I started off by finding the stepper motor cables (2 per) and hooking those up to get an idea of how I would run and secure them.

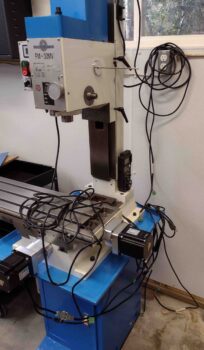
Next up was the control box.  I needed to make a decision on how it would get mounted to the wall, and I actually reversed my previous decision and flipped ends for what would be the top.

I then inventoried all my ports, cable passthroughs, switches, etc. that would need to get mounted to the control box.

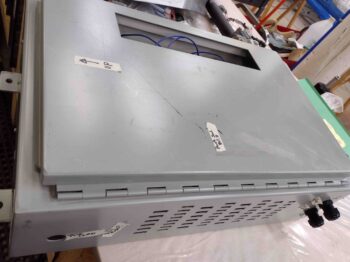
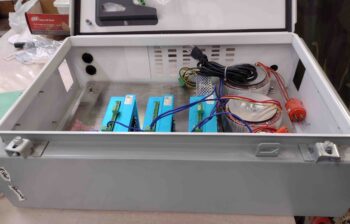
I also assessed & planned out the layout of the components inside the control box as well.

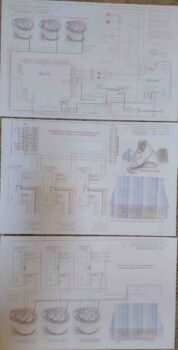
Finally, after not being able to locate my wiring diagrams for the milling machine CNC control box, I decided to simply print them out.  I haven’t used my printer for 11×17 sheets in quite a while so the printouts look a little raspy… but usable.

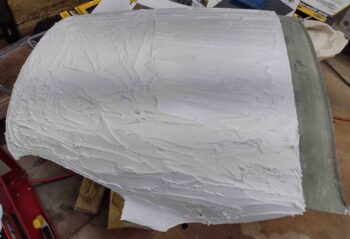
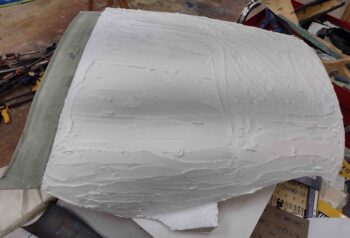
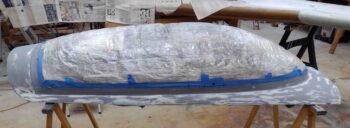
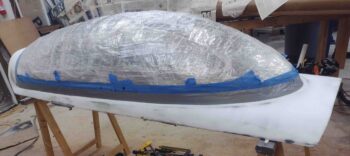
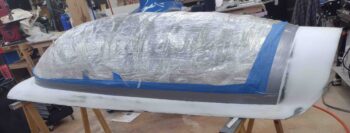
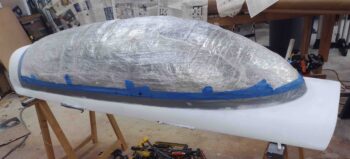
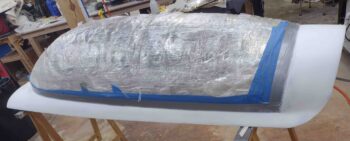
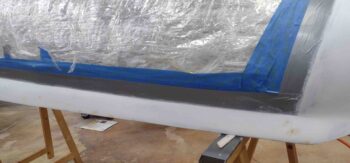
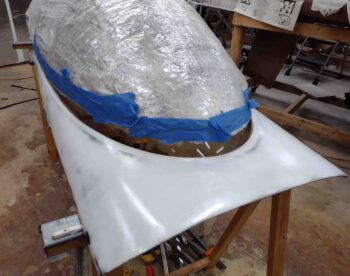
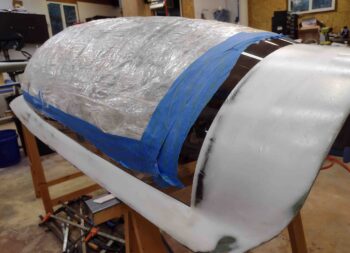
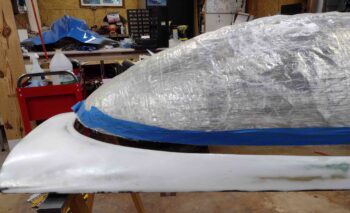
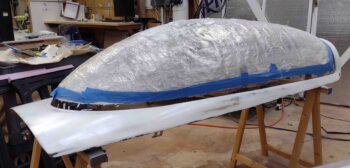
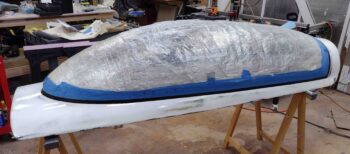
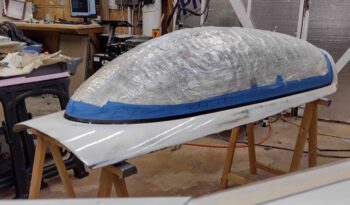
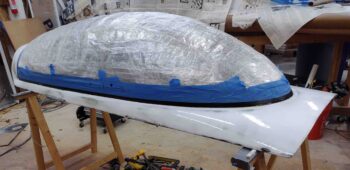
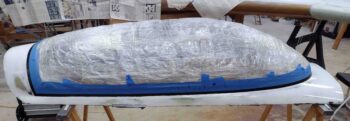
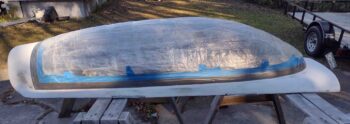
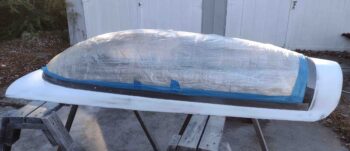
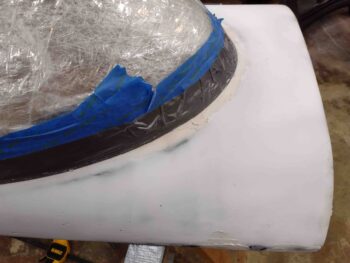
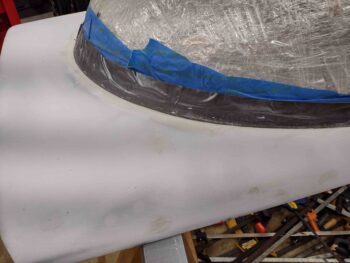
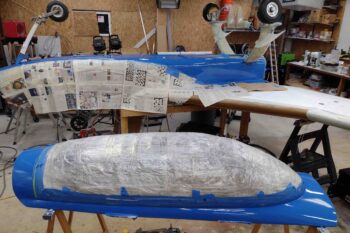
A bit later the canopy frame white primer was ready for sanding, so I spent another good hour + final contouring it in prep for paint.

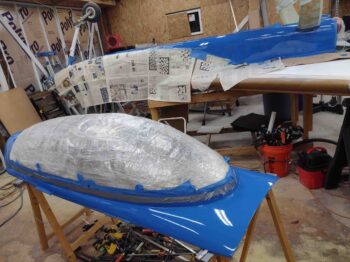
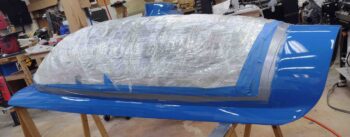
I then removed the protective duct tape and underlying painters tape around the edge of the canopy where it abuts the frame.  Once again I spent a good 45 minutes very carefully cleaning up the edge and removing minute bits of excess tape.

With no show-stopping blemishes on the surface of the canopy frame or around the edge, I then re-taped the edge of the canopy at the frame with painters tape in prep for paint.

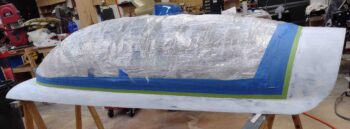
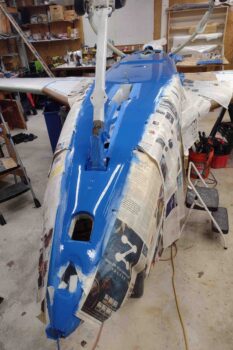
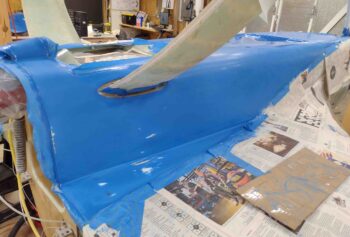
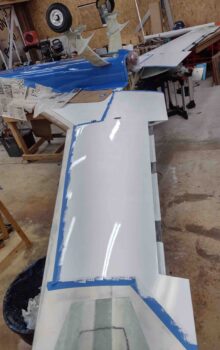
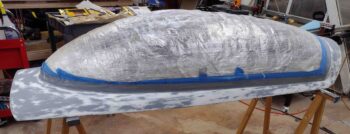
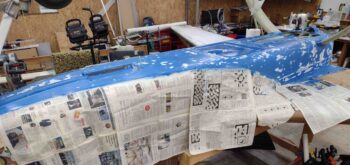
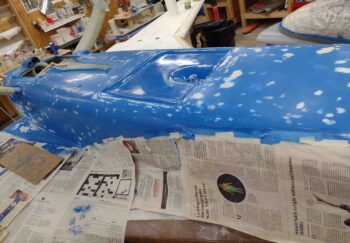
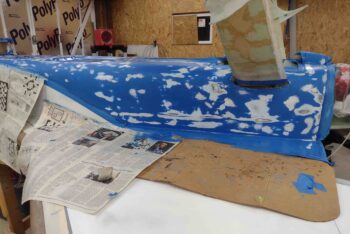
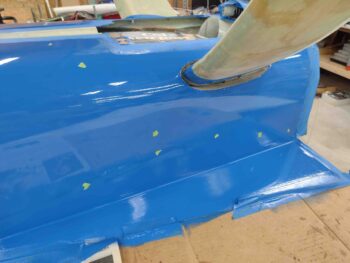
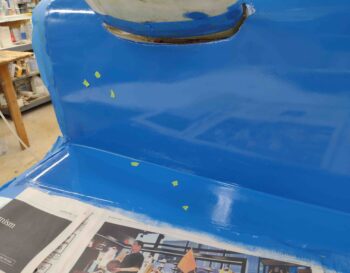
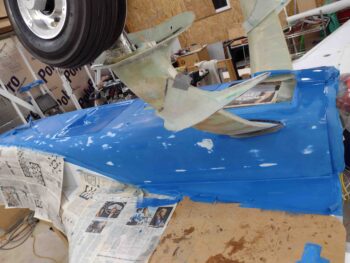
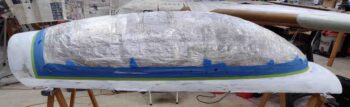
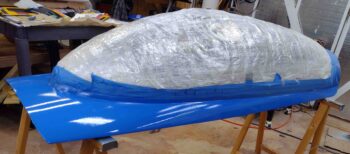
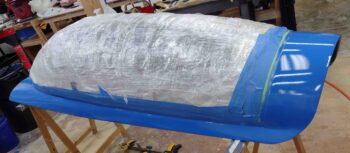
After sanding down the small dollops of white primer on the fuselage and prepping it for paint, I mixed up some blue paint and started painting… using the roll and tip method on all surfaces.

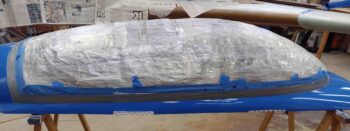
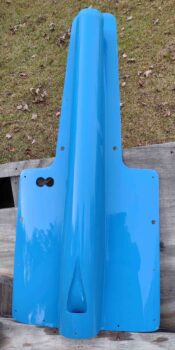
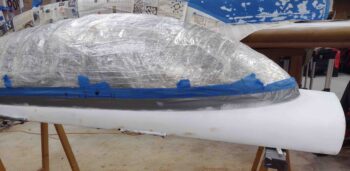
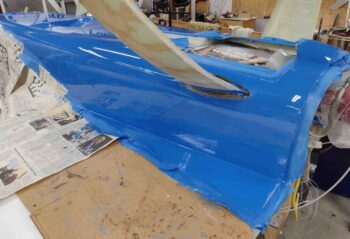
Since I’m discussing the canopy I’ll show it in blue paint although I painted it second after the fuselage.

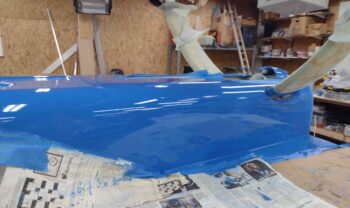
I didn’t mix up enough paint for all the parts, so after painting the fuselage I decided I had just enough to finish the canopy frame next… although it was just a tad thin/dry.  Although that still didn’t stop the runs in some spots. Crazy!

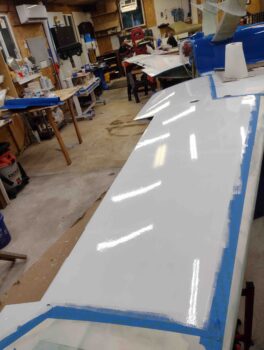
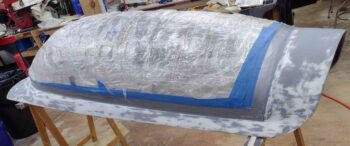
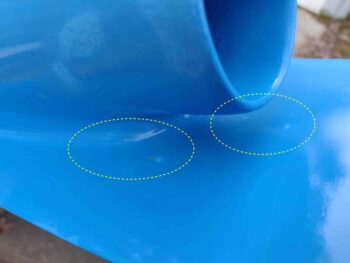
I have to say for the record that tipping the paint generates far better results than without. However, that doesn’t mean the results were perfect…

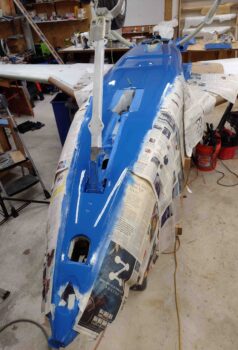
especially on the sides of the fuselage where I still had a few issues with runs even though I was diligent —or so I thought <sigh>— in keeping the paint thick enough to cover evenly, but not too thick to run after I tipped it.

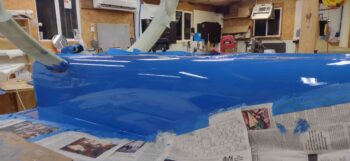
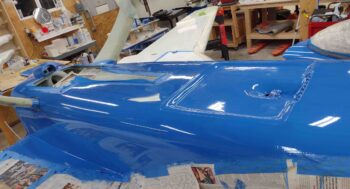
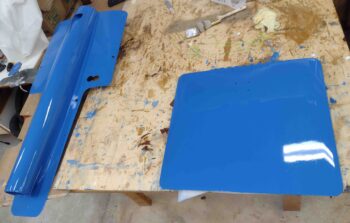
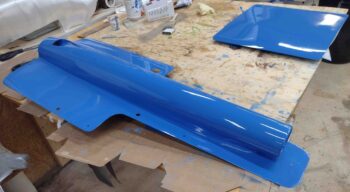
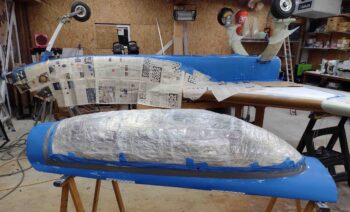
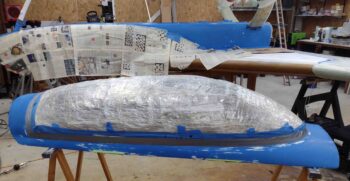
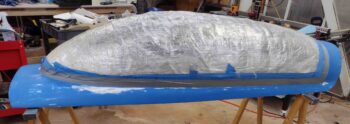
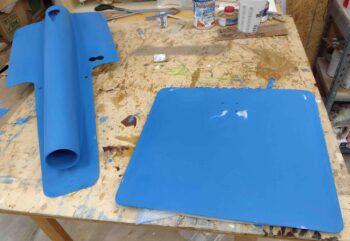
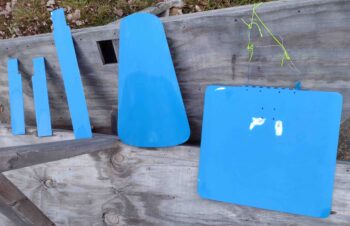
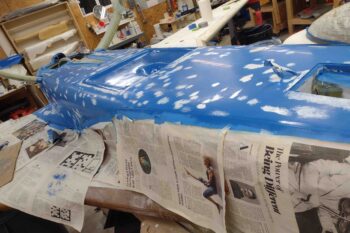
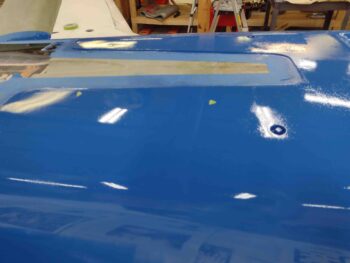
Here we have new coats of rolled & tipped blue paint on the landing brake and the RAM air scoop/hell hole hatch cover… after I mixed up another batch of blue paint.

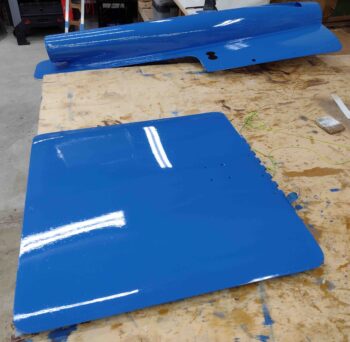
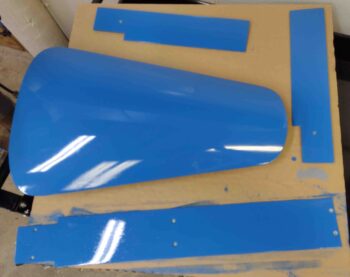
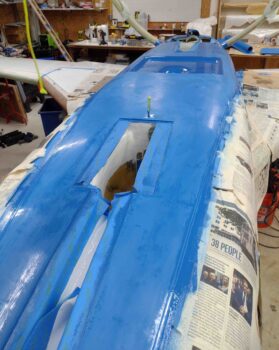
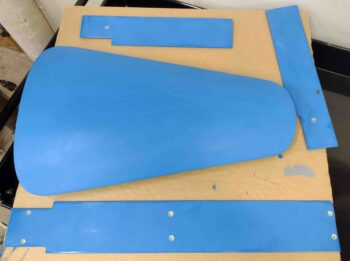
I then rolled and tipped the blue paint on the nose hatch door, nose gear fairing and nose gear doors.

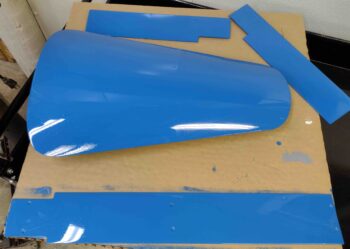
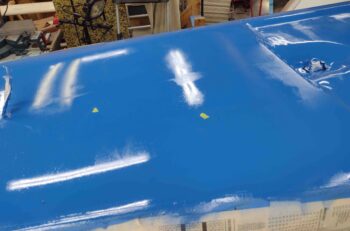
I love the blue color of this paint and how it looks… from 10′ away.  I have to say I’m not thrilled with how this paint levels out while curing… or technically doesn’t level out.

Although the surface is exponentially better by adding the tipping method to the rolling, in some parts it’s not a huge improvement.  Some of that is my inexperience with rolling and tipping to be sure, but I think some tweaks will need to be made to my process to enhance how this paint goes on.  In addition, I still feel that a final sand, polish and buff-out ala traditional auto paint will be required to get nice smooth surface along with the gloss shine.

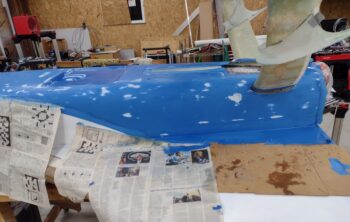
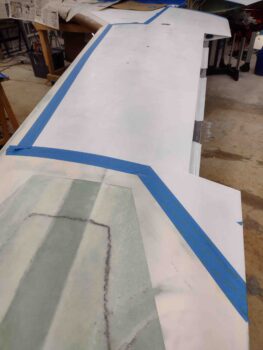
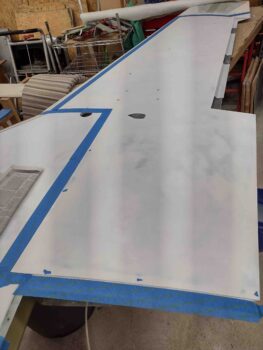
I then wet sanded the white primer on the underside of the wings with 500 grit sandpaper. I have to say that I learned yet another hard lesson in that I should have sanded the primer on the underside wing surfaces to its final texture before it cured to a much tougher surface.

By the time I got this tough sanding knocked out (although I do have a number of spots to do final re-sands), then taped off the surface edges for paint, it was just too late to start painting.  I plan on knocking out this paint job first thing out the gate tomorrow.

With that, I left the blue paint to cure and called it a night.

Chapter 13/25 – Still paint prepping!

I started off today by filling the fuselage paint pockmarks and divots with Metal Glaze filler to fill these small blemishes in the paint.

I then reinstalled the painted nose gear door hinges using button head screws.

I wanted to get these nose gear door hinges installed before the final paint coats on the fuselage and nose to ensure I didn’t ding up, damage or scratch the paint.  I’ll note that the unpainted area on the aft inside of the wheel well will be completed once I install and dial in the orientation of the belly-mounted video camera.

Again, to utilize the minimal amount of daylight currently available I went ahead and spent about 1.5 hours sanding the gray primer on the canopy frame.

I’ll reiterate that for the remainder of this build I really need to dial in the surface prep to be spot on at the primer phase so the subsequent painting goes smoother than these first rounds have.

Thus, I aggressively sanded the gray primer coat to reveal a good bit of the underlying white primer coat.  Moreover, I now start with 220 grit and finish with 320 grit, to provide a smoother, even surface for the next round of primer/paint.

I then mixed up some white primer and applied it to the canopy frame (actually, just prior to this I used the last bit of available sunlight to re-sand some areas I missed on the RAM air scoop/hell hole hatch cover… which resulted in a few more breakthroughs in the paint down to the primer coat. Definitely a recoat will be required).

As with the gray primer coat, I used a small bit of the white primer laced with a good bit of micro to do yet even another round of fills on a few minor surface blemishes.

Although the white primer never seems to fully obscure the underlying coat, this coat went on well and I’m happy with it.

In addition to the canopy frame, I sanded down the underwing baggage pod threaded mounting inserts and then applied white primer to those areas.  I also sanded and applied white primer to the bottom trailing edge of the aileron pocket, on both wings.

I also applied white primer to the West 410 refills along the edge of the wing and strake junctions, as well as primer-thin areas on both the wings and the strakes.

Here we have areas of the left wing and strake where I’ve reapplied white primer.

I had planned on getting the next round of blue paint knocked out, but it was not meant to be this evening since I decided to also apply white primer to the sanded fuselage/nose Metal Glaze fills.  On a positive note, if all goes right tomorrow I’ll be able to add the canopy frame to the list of things to get painted blue.

Pressing forward… slow but steady!

Chapter 25 – “Final” paint prep

Since the days are so short now I started off today by wet sanding the RAM air scoop/hell hole hatch cover outside while I still had daylight.  With it still wet in this pic below it looks like it doesn’t need any more paint and I should call it good.

But alas, I had a number of breakthroughs in the surface so I will be applying at least one more coat of blue paint

In fact, a bit later after it dried I realized I needed to do another round of final detail sanding on the RAM air scoop, which I’ll knock out tomorrow during daylight again.

I then spent well over 4 hours sanding the fuselage white primer “freckle” retouches that filled small depressions and surface speckles in the paint.

It doesn’t look pretty for certain, but the surface is now smooth as silk.  I still need to sand down the inside of the landing brake depression for one more coat of blue paint there, but for the most part the fuselage is ready to go, except . . .

There are still a just handful of small pockmarks (slightly larger than pinholes/only on the surface) and a couple of divots (look more like dings that you’d make with the edge of a coin) that need fill.  Since they are so small, and I don’t want to wait for a full cure on West 410, I will cheat and use Evercoat Metal Glaze to fill them.  I had planned on doing that prior to paint, but with the weather so cold I didn’t want to start painting in the evening to fight the really cold overnight.

Thus I’m kicking back the painting until tomorrow late morning/early afternoon.  I also had a couple of phone calls this evening and spent some time with those.  I guess one more day won’t break the bank, eh?

Chapter 3/25 – Tooling Up & Primer

With the white primer that I applied to the “freckles” on the fuselage still curing, I started off today by wet sanding the landing brake, nose hatch door, nose gear fairing and nose gear doors.

The landing brake has some very minor varying surface levels that I refined much further to really dial in the surface smoothness, thus the breakthroughs back into the primer coat.

On the other components, although I didn’t have what I would consider 2 solid coats, I tried my hand at surface finishing those to see if I could proceed into the buffing and polishing stages… but alas, I either broke through in some minor spots back to primer, or I got some uneven paint coloration.  Bottom line is that all these components will need another 2 solid coats before they are ready for either final cure or buffing and polishing.

A note on the paint: between self-inflicted issues in my not being diligent enough on surface prep, to needing to do deeper research on the application process, I think I’m finally ironing out MY issues with the paint application.  After watching some Epifanes produced videos, I believe that my lack of tipping (very gently gliding a brush over the roller applied paint to even it out) is the root cause of my current problems.

You see, the paint lays down beautifully in about 90% of the areas when simply rolling it on, but then the 10% where there are slight imperfections can’t be worked with a roller.  Then later the final finish of these 10% areas become problematic and require a recoat.  My epifany is that I can see where tipping with a brush not only evens out the paint for final leveling and subsequent cure/finishing, but it provides a method for quality control.  Combine this refined paint application process with a renewed focus on surface prep and I think I should be on the right track regarding paint.

It’s all about learning and dialing it in when it comes to a new system like this.

I had told my little buddy that I’d hang out for a few hours today, knowing that my canopy frame white primer needed a good 24-hour cure time as well.  One area I need to start focusing on again as I get towards the end of this build is my true CNC machining/lathing capabilities so I can make some parts for this bird.  I figured during these paint and primer cure times I would start knocking out some tasks to get my milling machine, and in turn lathe, CNC’d and online.

I have all the milling machine stepper motors installed, except the shaft on the X-axis stepper motor is about 1/8″ too long, preventing the motor to be fully mounted onto the motor mount… as below in a pic I took a LONG time ago.

I rechecked the gap and it was right at 1/8″, or 0.125″.

Yes, I should have some fancy way to remove the extra material, but alas, I don’t… so I resorted to my neanderthal machining ways.  First by marking the 1/8″ excess with a Sharpie . . .

And then trimming the stepper motor shaft with my trusty Dremel Tool.  Not a perfect finish of course, but it will do!

I then remounted the quick connect stepper motor coupler.

And remounted the stepper motor… Voila, it fits.  Success!

After coming back from hanging out with my little buddy, I spent about an hour and a half sanding down the white primer coat on the canopy frame.

I then mixed up some gray primer and applied it a good bit thicker than I did the first white primer coat, although the white primer adhered just fine.

With just a tiny bit of primer left in the bottom of the cup, I then stirred in a good bit of micro and applied it to some minor gaps at the junction of the canopy and frame.  I also filled a few small divots as well with the thickened primer.

Tomorrow I plan on sanding down the RAM air scoop/hell hole hatch cover and the fuselage before doing another round of blue paint on all those components.  The bottom cowling will get sanded, but I won’t do any more blue paint coats on that until I dial in the paint scheme with the top cowling, when the plane is upright.

Chapter 25 – More sanding & primer??

I didn’t get much done yesterday with it being Thanksgiving… although I did get a bit of sanding in.

Today I actually started off with about an hour and a half of sanding on the fuselage paint, before taking a break outside to sand the cured epoxy wipes on the canopy frame. Overall I spent about 3 hours sanding down the epoxy surface on the canopy frame.

Here is the result.

And the other side.

I then whipped up some white primer and thickened it a bit with micro.  I’m adding another coat of primer (3 minimum) into the mix to ensure a better finish before paint from here on out.

That being said, I was just a bit shy on the amount of primer that would have been optimum to finish the first coat, but I was able to squeeze out the minimum on this first round and get ‘er done.

I then got back to the fuselage where I spent another good hour wet sanding it, after which I then mixed even more white primer and applied it to the low spots for what I call “freckles”… which are speckled areas typically smaller in size than a quarter that are showing low bits as compared to the surface of the good paint.

I’d say just under half the white you see is from actually sanding through the top blue paint to the underlying surface, where the other mottled splotches of white are from primer filing the speckled areas.

After a good 4+ hours of cure, I went ahead and filled a good number of spots on the canopy frame with West 410.  These areas are really quite small so I’m not overly concerned with heat generated from what will be the blue painted topcoat.

Here’s another shot of the West 410 refills on the other side of the canopy frame.

Cheating just a bit and doing these refills now will allow me to sand them down and roll right into the next round of primer fairly early on tomorrow.

And with that, I called it a night to let all this stuff cure.  I’ll keep churning on the fuselage paint to enable me to get this bird flipped back upright ASAP.

Chapter 25 – Canopy frame epoxy wipe

Today I started out by sanding the micro + West 410 refills on various low spots and deep scratches on the canopy frame, which I set up outside.

I then set the canopy back up in the shop and proceeded to epoxy wipe the canopy frame.  A bit later I pulled the tape off the edge of the canopy where it met the frame.

I am pleased with the edge of the canopy frame where it meets the actual canopy, although I did spend about 45 minutes shaving down a few high spots on each side of the forward edges of the canopy in an effort to create a straight line at the canopy edge all the way around the canopy frame.

Here are a few more pics of the initial epoxy wipe and the exposed canopy edge.

I had planned on sanding the paint on the fuselage and associated components in the hours in between the epoxy wipes, but the canopy ended up needing a bit more attention than I had initial planned on.  In fact, before the second epoxy wipe I spent almost 2 hours carefully digging out the fine bits of tape along the edge of the canopy.

Here we have the canopy frame in its 4th and final epoxy wipe.

Although it was a bit of a pain, each round of epoxy wipe I would pull the protective tape after the epoxy set up after about an hour.  I would ensure there was not epoxy on the canopy, and any that was present I would clean off . . .

then before the next round of epoxy I would apply fresh tape around the edge of the canopy to protect it from the fresh epoxy wipe.

I came back after about an hour of cure time on this last wipe and pulled this tape.

Again, kind of an entailed, niggling process but I am very happy to have this critical step completed in the finishing process on the plane.  I’ll let this epoxy cure for a couple of days before taping up the canopy again and sanding down the epoxy coat in prep for primer.

Chapter 25 – Expensive Guide coat!

Today I started out by spending nearly 4 hours sanding the straight micro finish on the canopy frame.  I have to say that I can understand the reports by builders of countless hours of sanding if one uses the traditional straight micro application.  I’ll tell ya, micro laced with West 410 is definitely WAY easier and WAY faster to sand.

For some reason I must have some mental issue with piling on micro thick enough to fill the entire surface… but it seems beyond my capacity to accomplish, so, alas, my canopy frame micro will require refills.  That being said, so far I am very pleased with the overall shape and finish of the canopy frame… I’m consistently impressed with how this finishing process cleans up unsightly composite surfaces.

I’ll report that both yesterday and today I have been working the blue paint on the bottom of the fuselage.  While looking closely at the paint surface I found about a dozen and a half depressions and blemishes in the paint (technically the underlying fuselage surface).  The first couple of pics below are of the fuselage sides.

As you can see, I identified all the blemishes with small pieces of green tape.

And here we have some divots/blemishes on the bottom of the fuselage.

I needed to make a decision.  Do I A) simply fill the depressions, divots and blemishes and press forward?  Or B) sand the entire paint coat down to really dial in the smoothness and quality of both the paint and fuselage surface?

I know I have repeatedly stated that “perfection is the enemy of good enough” and that I’m not shooting for a perfect paint job… just “good enough.”  However, the issue here is not just about looks, or even quality, but weight.  Albeit it may be negligible, but I felt I should do my due diligence by really dialing in the surface as it should be for both smoothness and minimal paint and fill.

Thus another sanding adventure ensued.  I used 400 grit and started wet sanding, and wet sanding, and wet sanding . . .

I will state that it’s a mind-boggling mystery to me how you work the micro finish over and over, then sand down the epoxy wiped surface, then multiple rounds of sanding on multiple coats of primer, only to then still have enough surface irregularities to have essentially a sacrificial first coat (actually two) of paint.  Regardless, I’ll note my lessons learned (finish with a higher grit sandpaper at nearly all phases and use guide coats to ensure no depressions in the surface), chock it up as part of the process and press forward to get it done.

After about another 5 hours of wet sanding of the blue paint on the bottom of the fuselage, I stopped sanding for the day to do some surface refills on the canopy frame micro.  Since I’m adding micro on micro I did cheat a bit by adding just a hair bit of West 410, even though the canopy frame will be blue (ie a bit hotter surface temps than white).  I added the West 410 because just a bit of it in the micro really creates a creamy filling to aid in getting it into the deeper, narrower voids.

Yep, just a scant bit of the West 410 really affects the consistency, but as you can see the amount I added didn’t change the color of the micro that much.

With the divots and deep scratches filled on the canopy frame’s micro finish, I then left it to cure overnight.

Tomorrow I plan on sanding the canopy frame refill and then epoxy wiping the canopy frame.  If all goes according to plan, the canopy frame should be in blue paint very soon. In addition, I’ll continue to work the bottom fuselage and other components in blue paint as well in my attempt to get this bird flipped back upright.