Chapter 21/23 – Wired . . .

I started out today with kind of a fun little project: assembling the engine stand that I picked up at Harbor Freight with a 20% off coupon.  As I was assembling it, a note in the instructions caught my eye: “Not for use with Aircraft” . . . hmmmm?

I also set the lengths of angled steel on the top and bottom mounts to provide an idea of how those will mount to both the engine stand and the engine mount (this angled steel was one of the pieces that Marco cut for me on his ginormous metal band cutting saw… which cut through this stuff like butter!).

I then did about 2 hours worth of spring cleaning in the shop to get it a little squared away for all the upcoming activity.

Next, although I didn’t get a pic, I mounted the right wheel pant.  I noted some trimming I’ll have to do on the wheel opening, but it’s seriously on the order of about a 1/16th of an inch.  That will get it in line with the opening dimensions spelled out by Gary Hertzler.  In addition, I took some measurements on the right wheel pant that I had already taken on the left.  The conclusion was that the wheel pants match perfectly from the gear leg forward to the front pant tip.  However, from the TE of the gear leg to the back tip of the wheel pant the right one is about 3/16″ farther aft, or maybe I should say 3/16″ longer.  No big deal and it was more of a curiosity thing than anything… I can tweak it a bit when I finish the wheel pants.

I then set my sights on mounting the 8″ prop extension to the flywheel and the engine prop flange.  It took about a half hour, a block of wood and a bunch of medium strength taps with a rubber mallet to get that sucker seated to within about 0.1″ of the flywheel. Then I very gently tightened all the bolts to get the prop extension to seat tightly against the flywheel.

Then, as per Sam’s (from Saber Manufacturing) directions, I torqued the 6 prop extension, prop flange and flywheel bolts to 50 ft-lbs each.

I then safety wired the bolts in pairs using 0.041″ stainless steel safety wire.

This is my first go at safety wiring, so if anybody out there sees anything disagreeable, please give me a shout.  I’m always open to constructive criticism.  Of course, I’ll have my EAA chapter bubbas look at the build as well.

Here’s the final shot of the installed prop extension.  Let me tell ya, the only time this thing is getting removed is when the alternator belt needs replaced! [Tomorrow I’ll test mount the prop and of course will take some pics… so I figured I would get the prop extension install out of the way today].

It was getting later in the evening, so I decided to relax and watch some TV while I played with my new toy: a ClampTite tool.  I removed and brought the fuel line and oil heat oil line with me upstairs.

Then, using the Clamptite tool (another first for me), I fire sleeved the 2 hoses.  Note that I’m using blue fire sleeve for fuel lines and black fire sleeve for oil.

As I’ve seen on Joe Caraggio’s site and others, there seems to be a requirement out there (or at least a good idea) to seal up the ends of the fire sleeve so the wool-type lining doesn’t soak up any stray oil, fuel, or what have you.  I had some of the expensive gray 3M fire barrier on hand so I decided to seal up the ends with that.

Here I’ve applied the 3M Fire Barrier to the ends of each fire sleeved hose….

However, I’m not a big fan of how the gritty, blotchy gray Hi-Temp RTV ends looked, so I cut a narrow piece of heat shrink and covered the RTV’d ends up…ahh, much better!

My final build act of the evening was to simply reinstall the hoses back onto the engine.  I definitely think the fire sleeving will work and I’m glad I went this route.

Tomorrow is picture day and my next door neighbor will be using his Uber awesome digital camera to get some nice aft end pics of my Long-EZ build.  Once that happens, my next goal will be to get the engine off the fuselage and onto the engine stand.  I’ll then drop all my engine focused shenanigans and will start on finishing up the nose and getting the canopy built.


Chapter 23 – Engine mounted!

My goal today was to get the engine mounted.  Having the engine mounted for a bit will again allow me to figure out firewall component placement, firewall pass-thrus, the engine compartment hose requirements, firewall/engine electrical wiring requirements, upper cowling fitting (specifically for canopy/D-Deck angle), initial baffling requirements, lower cowling fit and air intake (fuel injection servo & RAM air) configuration.  Then I’ll remove the engine and mount it to an engine stand.

Since A) I needed to remove the engine mount from the engine to get the fuel pump OUT fitting installed, and B) do a final clean and painting of the engine mount, I decided since that since the engine mount was secured in place for the moment that I would trim down 3 of the 4 engine mount stubs to allow for clearance of the firewall face’s Fiberfrax and 6061 aluminum sheet covering.  About an 1/8″ at most getting trimmed off any of the stubs… with the top left already short enough for clearance.

I cut and placed a box that I had just received the second shipment of hoses and hose end fittings from Summit Racing (pretty much finalizing all my hose/fittings orders) over the engine mount/accessory case to protect all of it from sparks and metal debris.

Here’s a closeup of the right side engine mount stubs that needed just a hair trimmed off the front side.

I then spent about half an hour trimming them all up.

Here the right side stubs are trimmed up and filed smooth.

On my errands yesterday I picked up some hardware and some Automotive & industrial strength fast-drying White Rustoleum paint.  I spent a good 30 minutes sanding down the engine mount surfaces with 220 grit sandpaper.  Then I filed off a couple very small weld spatters that I missed before, then washed in hot water and Simple Green.  I then let it air dry.

While the engine mount air dried I spent a good 3-4 minutes shaking the can to mix up the new paint… in painting, preparation is everything, right?!  I then started spraying.  It looked good and sprayed like normal spray paint, but then about 5 minutes into painting the bottom side of the engine mount… apparently my normal spray paint decided it wanted to be a can of textured spray paint.  Within a matter of seconds I had the bottom, bottom right corner and right side of the engine mount peppered with what looked like textured, speckled paint.

Needless to say I was quite pissed.  My saving grace was that this was fast drying paint, so after about 5 minutes I felt a spot and it was what I considered in it’s green state. Another minute more and I was able to rub down the surface with a paper towel with a decent bit of force to remove the spackles of paint over nearly a third of my engine mount. That didn’t leave it feeling the smoothest, but at least the speckles were nearly completely gone. Apparently a glob of paint or something got caught in the sprayer head…. which I cleared out.  And a number of test sprays in the air to be certain, I continued on painting the engine mount.

As I waited the requisite 15 minutes for the fast drying paint on the engine mount to dry, I then preheated my kitchen oven to 175° F.  I then popped the fairly dry engine mount into the oven and baked it for 30 minutes.  My goal here on the engine mount paint is of course to have as nice as paint as possible in a reasonable amount of time, but, moreover, I want the engine mount protected against corrosion and for it to be visually inspectable for cracks (thus why no powder coating).

As the painted engine mount baked upstairs, I got to work on the engine mounted mechanical fuel pump.  I took some BEFORE pics from both the right and left sides…

I then mounted the OUT side fitting on the fuel pump, which is a 90° steel fitting that also includes a 1/8″ NPT port straight out for installing a 45° reducer fitting for the fuel pressure sensor line (on the left in pics below).  I also mocked up an AN6 90° hose end fitting (blue & red) to test out the angle for how the fuel feed to the fuel injection servo would run, and an AN4 90° hose end fitting (silver & red) for the fuel pressure sensor hose.  The aluminum AN6 hose end fitting is just to test the angle.  After I verified the angle was the best possible solution I pulled the trigger on a steel AN6 90° hose end fitting from Summit Racing (as well as a 90° 1/8″ NPT to AN3-3/16″ MAP port fitting).

I then installed the fuel pump fuel line feed IN fitting on the right side (as oriented in right pic below).

After getting the fuel line fittings squared away, and turning off the stove to let the just-baked engine mount cool, I took off for a bit to run some errands, grab some lunch, and pick up some 1/8″ thick steel angle from Home Depot for the engine mount mount that I’ll weld up for the engine stand.

Upon returning home I then grabbed the cooled and cured engine mount and proceeded to remount it back onto the engine.  [A point of note: the paint on the engine mount is about a 1 meter paint job…. it looks great unless you actually get fairly close or touch it…. if it were an external component I would probably wet sand it and hit it with one more layer of paint, or clear coat even.  Obviously it will be subject to high heat, oil, dust, dirt, etc. in the engine compartment, so I’m more concerned about a robust paint job vs. a sexy one.]

After I got the engine mount remounted to the engine, I then installed the last of the fuel pump’s fittings: the overboard vent line fitting.

Yet another shot of the fuel pump fittings.

After my airplane building credentials were called into question by a yet to be named Aussie (ok, I give . . . it was Dave Berenholtz!)  Ha!  I had to prove my mechanical prowess by actually getting the amazingly challenging cotter pins installed on the engine mount castle nuts.  Seems like it shouldn’t be that difficult, but the angles and clearances are just killer! (All in fun my friend!).

Here are the top side cotter pins installed in the engine mount bolts and castle nuts.

And the bottom left cotter pin installed.  I still have no intentions of trying to do this under cylinder #4 and will swap out that castle nut with a lock nut a bit later.

With the engine mount re-mounted on the engine and everything torqued to specs, there was nothing left to do but mount the engine!  It was go time!

So here she is . . . engine is mounted!!!

I only had minor issues with getting the last 2 bottom horizontal bolts in place on the engine mount, but after a few minutes of finagling and some light tapping they went right in.

As you can see, even with the eventual fiberfrax and aluminum sheet firewall covering, the clearances are pretty good (by Long-EZ standards) with the firewall.  The only clearance concern I have is between the fuel pump overboard vent fitting and the left aileron control tube…. I’ll have to watch that closely.

The engine looked a bit small and compact mounted to what I have so far of the fuselage, so wanted to see the cross-section of the engine…. here’s a taste of what that looks like:

Tomorrow I’ll move forward with my engine data collection tasks that I outlined at the beginning of this blog post, and any related tasks as well.  Next week I plan on starting on the nose and canopy, and hope to have all this engine stuff put to bed for a while… until final engine install crops up.


Chapter 14 – Lower engine extrusions

This morning, as it was raining and sleeting outside, I decided to let the shop warm up a minuscule amount before heading down.  So I started off my day by creating yet another tab on my Excel build tracking spreadsheet to compile all the pertinent engine torque values.  This endeavor involved calling a couple of companies, one being B&C, to obtain/verify torque values on their products.  In addition, some of the engine torque values were shared with me by master engine & Long-EZ builder, Chris Seats.

In other news, over the past couple of weeks I have decided to undertake yet another mod (I know, I know . . .!) and build a new canopy latch based on Mike Bowden’s design since his high horizontally-situated/activated latch works much better for my configuration (read: operating space) than does the rotary latch extending down in front of the left-side panel.

Although based primarily on Mike Bowden’s design, I will combine it with the forward latch catch manipulating features of the mystery Long-EZ that I somehow have a pic of, but have not been able to find who owns it or built it.  Coincidentally, as I was compiling a buy list of all the materials I would need to construct this latch, I got a text from Mike Bowden… who graciously provided me a plethora of dimensions that I had asked him for regarding his canopy latch.

It being a very cold day outside, I also decided to do some more assessments on oil heat fittings and firewall pass-thrus before adding them to the buy list as well.

I then finalized updating/verifying the numbers on my lower engine mount extrusions install diagrams that I whipped up in PowerPoint a couple of years ago.  I also did an inventory on the glass I had cut out about a year and a half ago (IIRC). Although it was prepped for being merely wet out in prepreg and then cut, I decided to cut it into its separate component pieces.  I then had to carefully move the engine-on-hoist out of the way so I could then drop down the glass cutting table to then cut some more BID to finalize the glass prep for glassing-in/mounting the lower engine mount extrusions.

Since my fuselage is just a hair wider at the bottom (talking around 0.1″) I decided to forego the “standard” bottom engine mounts of 1/8″ thick by 1.5″ x 1.5″ 2024 angle for ones that are slightly more robust (i.e., take up the gap with aluminum vs glass) at 3/16″ thick with 1-1/4″ x 1-1/4″ legs.

Any longer legs on the engine mount extrusions other than the 1″ stock seem to need some trimming to lessen the height right at where it meets the main gear extrusion. This is so when the thick pad of BID that the extrusion gets mounted atop of (technically below on the bottom extrusions) there is some wiggle room for the engine mount extrusion to get pushed further from the CS spar and more towards the main gear mount extrusion, while avoiding any unwanted collisions betwixt the two.

Thus, for the area of the vertical leg on each lower engine mount extrusion, I removed about 0.2″ at the lower edge.  Again, just for the area immediately above the main gear mount extrusion.  I started by marking the engine mount extrusions.

Then clamping each one to my work bench –with the help of 2×4 underneath the angled aluminum to stabilize it– and used my trusty Skil saw to trim it down.  Worked a treat!

I then cleaned up each thinned out area with a hand file.

After sanding the outboard and top sides of the extrusions that will mate up to the BID pads and flox with 220 grit (as per plans), I then washed the extrusions down in warm water and Simple Green.  I then took them upstairs to mark up the bolt hole locations in accordance with the plan’s dimensions.

To ensure I don’t lose my bolt hole locations with Sharpie-destroying/blurring epoxy (after I double-checked all the measurements!) I took my drill with a small bit and drilled the slightest of a hole beginning at each mark.

It was getting late, but still wanting to get as much done during this very cold spell of weather we’re having, and to free up as much time as possible during the upcoming good build weather (if it ever comes! ha!), I decided to cut out my Beasley Baffles templates that were created by the benevolent Mike Beasley.

If you remembered that I purchased a 320 engine baffle kit from VANs Aircraft, you’d be correct.  So you may be asking why I need to cut out the templates from the ones Mike B. so graciously (yes, a lot of gracious canardians around . . .) provided me.  Well, the VANs baffles would be a great direct use-as-advertised item if I was building a tractor, top-down cooling airplane with an RV style cowling.  But clearly I’m not.  So although the VANs kit will give me a huge head start on the engine baffles, it will not be without a good amount of modification to get it all to fit and work.

That’s where Mike’s Beasley Baffles come into play.  Since his baffles are specifically for a 320 in a Long-EZ, it allows me to dial in my baffle design much, much closer by using these templates to modify the VANs baffle kit as needed.

As a reminder, Mike sent me his Beasley Baffles via email in electronic form a bit before RR last year.  I then took the 3 files down to Staples and hand them printed out on card stock. As for tonight however, it took a good hour and a half to cut these baffle templates out of the card stock.

When I went upstairs to grab the Beasley Baffles to cut them out of the card stock, I also grabbed the outline of the firewall I had traced onto 2 large pieces of scrap paper I had.  I cut & taped the firewall outline together for a real size version of my firewall that will help in determining the final layout and configuration of all the firewall components.

It’s supposed to snow tomorrow, so I’ll assess next steps in regards to installing the lower engine mount extrusions either tomorrow or the day after.  In the meantime, I’ll continue to work any tasks of opportunity that are good for rainy day tasks that I don’t want hanging over my head when the good build weather finally arrives.


Chapter 23 – Engine Preservation

Today I took a hard look at my engine preservation steps.  I’m not exactly sure what’s going on with my engine dehydrator.  It’s definitely doing something because the “dilithium” crystals (desiccant) are turning pink, but the humidity sensor on my out air line keeps showing an internal relative humidity only about 5% less than ambient in the shop.  An example for clarity, say the shop RH is 37%, than the air out of engine will be around 32-34%.  Maybe the 40 gal fish tank air pump I’m using is not big enough and I need more air getting pushed through?  Or the fact that this engine has gaping holes (albeit taped up) in it since it’s not all put together?  Not sure.

I did rewicker the dry air to enter the engine via the oil filler neck and out the crankcase vent vs. the other way around.  Also, I disconnected the out line that was going back into the air pump and instead of a closed system I’m trying a simple dry air in and then wetter air out to shop air.  I’ll assess if this has any impact on reducing the internal moisture in the engine.

I then tried my hand at baking all the pink desiccant I had collected in a small plastic tub.  I put it all on aluminum foil on a baking pan, fired up the oven to 240° F and cooked them for about 1.5 hours.

As you can see (although I guess a before pic would have been a good idea eh?) this baking thing really works and turns the quite pink desiccant crystals back to blue.  It’s hard to capture the brilliant blue with a camera, but it’s a drastic difference.  Pretty cool.

Although I have no doubt that my desiccant efforts is vastly helping keeping my engine internals dry-er, it doesn’t negate the fact that I need to get this engine pickled… and soon!  Thus, weather be damned I’m going back into the shop! (currently in the 30’s and it’s supposed to snow 2 days this week….Ugh! )

I had 2 major issues regarding engine preservation that until this afternoon were unresolvable:  1) I need to be able to cycle through each cylinder to TDC and BDC for spraying preservation oil into the cylinders.  Clearly I can’t do this with the engine dangling by a chain on a hoist. 2) I need to be able to rotate the entire engine upside down to bath the cam in oil/preservation juice.  To solve both these issues –and be able to have the engine on-hand but stored in a smaller form factor– I bought an engine stand from Harbor Freight that will allow me to mount the engine to the stand so that I can handle the 2 issues that I mention above.

This means next steps are to finish (ASAP!) the glassing in the lower engine mount extrusions, get the engine mount bolted in place and then use the engine mount to mount the engine to the stand.  This will allow me to then do all the steps I need to for proper engine storage.  Also, it will allow me to get the engine out of the shop and into my pool hall/rec room/storage so it’s in an a climate controlled area with much less shop dust floating around.

I’ll then finish off mounting the firewall in prep for the canopy build.

I started this phase of the build by going down to a coffee joint and reviewing all my engine extrusion mounting tasks.  I then took a look at some fellow builders’ sites who have finished installing their engine mount extrusions (Dave Berenholtz, Mike Beasley, and Ary Glantz).  I then reviewed the actual build plans.

In real world time, I’ll probably start off with mounting a couple of hell hole items, then finalize my plan and start glassing in the lower extrusions NLT Thursday.


Chapter 22/23 – Electrical Workbench

Starting off, I just want to say that this will most likely be my last post for about a week since I’m hauling another load of household goods down to North Carolina in prep for my move there later this year.

One thing I did that was both helpful in the move sense and with my Long-EZ build was that I tore down the cockpit mockup/simulator that I never really did use much.  I then used the bottom base as a temporary TV stand so that I could pack up and move the actual TV stand, and then I dismantled the top part that made up the actual fuselage mockup.

With the sides of the fuselage mockup I then built an electrical work bench that will also serve to help store a myriad of electrical-related aircraft stuff that was situated on my dining room table, which –you guessed it!– is getting hauled down to NC this trip.

The pegboard that is now mounted on top of the electrical work bench was attached to the storage shelf in my shop right next to my fold down glass cutting table.  Since I’m emptying the majority of that shelf, and no longer need this pegboard down in the shop, I repurposed it to be able to organize my electrical components (note the clear plastic box to the left jammed full of bags of wiring assemblies and harnesses).

What was once the seat back in my cockpit mockup now serves as my end table (the actual end table is visible at the bottom of the pic).  The coffee table (AKA “my work desk”) and round bar-top table that currently holds up the instrument panel mockup are both going as well, so when I return I’ll be building a couple more temporary tables for the remainder of my time in this house.  Obviously tables & workbenches that I can disassemble in no time at all.

As far as actual aircraft stuff, one item that I just received is my brass 90° fuel pump overboard vent fitting.  I have to say that when I simply did a test install for this fitting, I could tell that it is going to be REALLY close to the firewall with the engine installed.  I might be required to provide a dished-out clearance on the firewall for both this fitting and possibly the B&C SD-8 backup alternator as well.  However, I will also be assessing options for a lower profile fitting (perhaps a banjo style) that might provide better clearance.

My last item to report is that I also received the Thermal Fan Controller that will control both fans in the D-Deck/Turtleback/GIB Headrest that will allow cooling for the SD-8 voltage regulator, SD-8 bridge rectifier and Electroair EI control unit, as well as all the other electrical components in that compartment (sorry for the crappy pic).

An aft side view of the thermal fan controller.  I placed the 9V batteries in the pic just as a reference for the size of this unit.  In addition to being quite small, it’s as light as a feather.

The weather has continued to be quite cold here…. again, not freezing, but pretty darn close at night while the days have been in the 40s to maybe low 50s.  Hopefully when I return from my weeklong sojourn down to NC the weather will have improved enough to start some shop work.


Chapter 22/23 – 100% system review

I think in general it takes stressing the electrical system operationally to find various areas of optimization.  Obviously I’m not saying my airplane is at a fully operational state to allow for a real world stress test, but as I get nearer to that goal, and a major of my systems are up and running, there’s simply fewer “stones” to overturn in finding potential issues and fine tuning the electrical system. Through collaboration with other builders and my own armchair flying, I have discovered some key areas of optimization in my electrical system architecture over the last couple of weeks.

Just in the past two weeks –to kick off 2018– was the great “Starter Contactor Relocation” fiasco…. where I think I actually ended up with a much better starting system architecture than what I started with.

Next, in discussing details of Dave Berenholtz’ electrical system with him, it made me go back and take a look at some details of my own system, really in a manner more of “checking something out” just to answer a question he asked.  In assessing my alternator capacities and 3 layered electrical system (main alternator, E-Bus/SD-8 backup, and IBBS) I realized a change that I had made when installing the IBBS into the system –based on some info that Bob from TCW Tech and I discussed at the time– may have been a good thing on the face of it, but a deeper issue was presenting itself.

This made me take an in-depth look at my SD-8, E-Bus and IBBS architecture.  I actually stumbled across something that made me take a second look at how I had modified it from my very original install.  Unfortunately, I didn’t do my due diligence in truly assessing the operational impact/flow in an emergency scenario where I would be required to take the main alternator offline and employ only the SD-8 powered E-Bus.  By having the IBBS on my main bus it essentially made it so I had no pass-thru capability (IBBS will both drive components from connected bus power or provide its own backup battery power) so in an E-Bus only scenario I would be driving single point connected items straight to IBBS power that is my last resort (layer 3: IBBS power)…. in short, meaning only 45 min operating power for those items vs. letting them happily draw power from the SD-8/E-Bus for the duration of the flight.

I called Bob at TCW and we worked through my issue.  The only viable fix to allow these components that are hooked up to ship’s power ONLY through the IBBS’s pass-thru connection (bus power) to draw power via either the pass-thru feature (bus power/layer 2) or IBBS power (layer 3) was that I needed to move the IBBS off the main bus and put it on the E-Bus.  This allowed those IBBS components hooked up to bus power via the IBBS pass-thru feature to then be powered off the SD-8 if I needed to go to layer 2 power, and then eventually to layer 3, IBBS power (~45 min off the IBBS internal battery), as a very last resort.

However, I would then need to take one more step to make it so one of the IBBS’s charging power leads gets disconnected to disable the IBBS from attempting to recharge (2.5A) off the E-Bus when solely on SD-8/E-bus power.  Bob from TCW recommended that I run the IBBS recharge lead through a 5A circuit breaker on the panel, but instead I’m going to employ a relay that will trip automatically once I select the SD-8 as my power source.  Then, when/if the E-bus only scenario ever plays out, in the heat of having just dealt with my main alternator going offline (meaning my having just been subject to haywire readings and troubleshooting to decipher what’s really going on before then deciding to take my main alternator offline… this all of course equals STRESS!) and bringing my SD-8 online as the new primary alternator (main bus offline/E-Bus only power), I don’t have to try to remember to pull that circuit breaker (yes, it would be on the checklist, but I like to automate if/where I can!).  Plus a relay adds considerably less weight and puts that weight in the nose vs more weight on my panel (also, to be honest, a heck of lot cheaper as well!).

All of the above was not without penalty or effort to be certain!  It required a considerable reconfiguration of all of my 3 power bus (main, E-Bus, battery) connections, where I ended up playing musical chairs primarily with my IBBS and Electroair EI power connections.  The big-picture net result was that I moved the IBBS from the main power bus to the E-Bus, and both Electroair power connections from the E-Bus to the battery bus, with the resulting paper trail that ensued.  Of course, not only did I update my power buss tracking sheet, but also as I detail below, every electrical diagram where this info was present.

I then performed an entire review of ALL my wiring diagrams as I updated this latest IBBS /SD-8 circuit change (I added that relay to auto-shutoff the IBBS charging circuit when I go to SD-8 only power on the isolated E-Bus) and all the other little inherent nitnoy changes (wire color, etc.) that I’ve made to make the diagrams match my actual wiring.  The end result was updating and printing out 18 diagrams . . . and even then I had to go back through after I printed a few out and annotate some further changes!  Finally, since I’m in engine install assessment mode, I also annotated all my firewall pass-thru points on my diagrams with either an “H” or an “L” in a big hex outline to depict whether they pass through at the high point or low point pass-thru (I’m thinking the current requirement is only for two firewall wire pass-thrus).

Moving on.

I’d also like to report something that is of minor note to be sure, but a to-do item checked off my list nonetheless: I purchased my fuel flow codes from GRT that allows me to integrate my FT-60 Red Cube fuel flow meter with the GRT EIS4000.  This means that I have one minor non-GRT Hall Effect sensor to purchase to enable a more traditional battery charge/discharge ammeter (only with REAL #’s) at which point all my array of EIS/EFIS feeding sensors will be in hand/configured.

Looking at my firewall components wiring and component placement planning, I then took a bit of time to re-read Section IIL of the plans to glean any good info from it that I could regarding the eventual engine install (a reminder: it’s still below freezing here weather-wise, so I’m still in non-shop work mode).  I was looking at this page (below) and started playing around a bit and ended up graying out all the components on the original firewall diagram that WILL NOT be on mine.  BTW, to be clear there are no “replacement items” for those grayed out below, they are simply removed.  The closest to a swap out you could say is the in/out oil lines for the oil heat system.

One point of note planning wise, is that I relocated the main electrical cable firewall pass-thrus from the lower left corner (looking forward) of the firewall to the lower right, a bit below where the aileron control tube exits the firewall.  This location minimizes/straightens the cable run lengths and keeps my firewall ground, starter, alternator B-lead and F-lead all within about an area around 4″ in diameter.

Also, I understand this is a rather campy, convoluted looking slide below, but it’s essentially just one of my notes’ pages that gives me all the pertinent info I need represented visually. As you can see, essentially I’ve pretty much figured out all my wire runs (initial plan anyway) both in the engine compartment itself and through the firewall.

In prep for the engine coming home to my shop (soon I hope!), I’ve been slowly buying all the parts I need for my engine dehydrator ala Bill Allen’s FaceBook post where he provides details on how to construct one of these things for fairly cheap (see video below).  Here are the components I’ve acquired thus far.  I’m awaiting the humidity sensors (hygrometers) that I ordered and will purchase some desiccant soon as well.  In addition, I also ordered 4 each cylinder dehydrator plugs from ACS.  I figure between an active airflow dehydrator and the cylinder plugs, it should keep the engine internals quite dry enough to prevent galling or corrosion.  Moreover, I don’t want to do a full on oil-soaked pickling of the engine since I really think it will only be unused for less than a year at the very most.

Bill Allen’s engine dehumidifier video:

In addition to my electrical system shenanigans above, I also created a new ground bus “G6” for just the D-Deck/Turtleback area.  It will be a 9-pin D-Sub connector that is connected by two (2x) 18AWG wires that run from the Hell Hole’s G3 ground connector (pictured below).  This will provide me one simple ground point to contend with in the GIB headrest/Turtleback area and will keep me from having to run a fair number of separate ground wires down to the hell hole.

Moreover, I’m removing the firewall “forrest of tabs” ground connector on the firewall side and will use just the bolt since I have only two items on my engine that need ground wire connection points (Electroair coil and PMag).  Below is the original B&C “forrest of tabs” firewall ground busses.  The firewall ground bus identification is G2 while the Hell Hole ground bus identification is G3.

Here’s a shot showing the G2 firewall ground bus.

And the other side of this contraption, the G3 hell hole ground bus (with the terminal for the big yellow ground cable attached for inventory tracking).

As I stated above, since I only have 2 firewall component ground wires to contend with, I’m not putting that busy looking monstrosity back on the firewall to simply take up weight and space when it’s not needed.  Here’s how it will look on the firewall (ok, if my bird were doing a full afterburner climb like an F-15…. ha!)

And one last shot of the G2 firewall ground bolt (by itself now) and the remaining G3 hell hole “forrest of tabs” ground bus.

As I’ve mentioned quite a bit over the past month, it is still pretty darn cold here on the mid-Atlantic coast, so I continue to do all those tasks that I won’t want to expend the time to do when it’s warm… and good glassing weather.  I’ve gone off on a few sideline electrical system design rabbit holes, but all for the greater good in my opinion.  I’m hoping to spend a day early to mid next week to finish up my engine and bring it home.  I’ll also continue to work to knock out these electrical system taskers up to late next week, which I will then again be heading down to NC for a long weekend visit.


Chapter 22 – Superswitch Ops Check

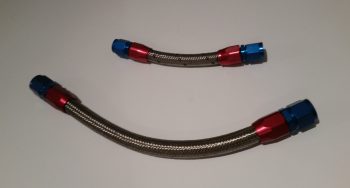
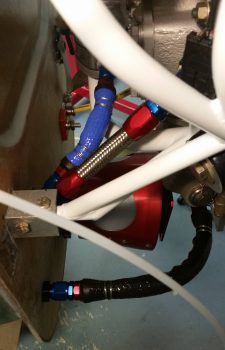
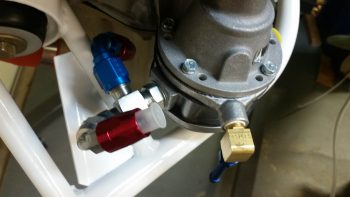
Today I put the finishing touches on hopefully what will be the last major revision of my electrical system. Specifically, as I’ve been alluding to over the last week, I’m talking about my starting and charging system…. or perhaps let’s say a focus on the big yellow power cable running down the sidewall.

As I mentioned before, I had done an assessment of the incident involving Brian DeFord’s Cozy IV.  That led me to entertain the idea of placing the Starter contactor on the cold/forward side of the firewall.  Which I then posited the idea of doing so on Bob Nuckolls’ AeroElectric Connection forum –again, Bob, et al, never stated exactly why it SHOULDN’T be done but Bob was clearly not a fan of moving the starter contactor / solenoid off the firewall.  Moreover, I discovered via back channels that a lot of canards are in fact configured with this contactor mounted on the cold side of the firewall.

More on the starter contactor wiring configuration in a bit.

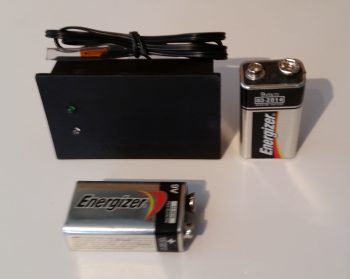
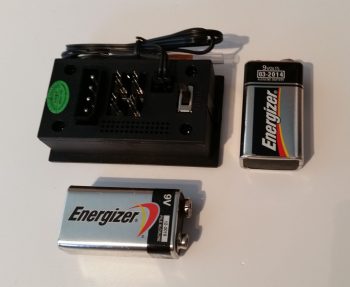
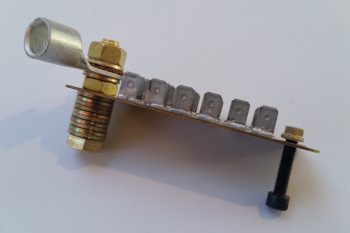
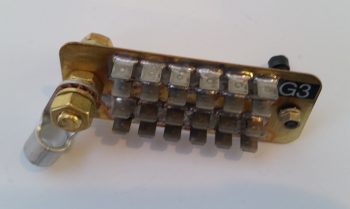
Having just wired the “Starter ON” warning lead that hangs off the Lamar solid state “Superswitch” that I am using for my starting contactor, I realized that I had been remiss all these years in actually ops/function checking this device to see if it was serviceable (obviously I assumed it was good since I bought it new from Aircraft Spruce…. that was years ago and they stopped selling them since probably around early 2012).  But we all know what happens when we assume eh?

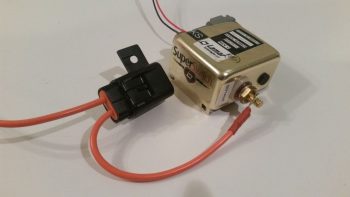
Well, there are two distinct features of a SOLID STATE contactor that make it challenging to ops check.  I was aware of the first challenge, which is clearly stated in the nomenclature of this device: “Solid State” … otherwise better characterized as NO moving parts.  Unlike the definitive “click” of a mechanical relay, or the “clunk” of a large relay/contactor/solenoid, this guy is quiet (also, for the record, much more “electrical quiet” when it comes to (not) generating unwanted noise).  Clearly you simply can’t actuate and listen for a good ops function.

The second challenge was one that I wasn’t aware of until I was researching how overcome challenge #1.  Apparently you can’t function a solid state relay unless the primary power connectors that carry a load are connected to power, since it “steals” some of this power to actuate the switching function.  I tried it with an LED/470 Ohm resistor combo connected to both a 9v, then 12v, battery…. nothing.

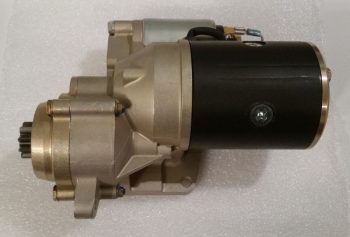
Uh-oh, had my failure to do all this early on soon after I received shipment of this device cost me a pretty penny?!  (This cost about 3-4 times as much as a “standard” B&C starter contactor).  I contacted Lamar, knowing that this item had been out production for quite some time.

As often is the case, an aircraft manufacturer will use a specific part, here it was Lancair using this Superswitch for their Columbia Aircraft (and possibly other Lancair designs).  I’m guessing that the most likely scenario is that when the Division of Lancair building the Columbia sold the line to Cessna to be reintroduced as the Corvalis, this specific part was no longer part of Cessna’s electrical system design so the inventory was left to die on the vine, dwindling its way into near-extinction, although reports from those who have used this contactor are normally overwhelmingly positive (I’m clearly extrapolating here on the “what happened” scenario, since I’ve experienced this same type of thing on a couple other aircraft parts ACS sold which then vanished from existence once ACS’s inventory sold out).

I spoke with Jim at Lamar who stated that not only does there have to be a load sensed on the primary switched power connectors (the big lugs), but that the current needed to be over an amp.  While I was looking for something that would require an amp to drive it, Jim stated to simply hook up the leads of a 12V battery to the posts, and that the Superswitch itself would serve as the load.  Ok, good to go.  He seemed rather uninterested in dealing with an obscure, obsolete part that they had produced probably well over a decade ago, so he excused himself off the phone.

Then it hit me . . . how will I know if it works or not since I will have no indication once the control switch is activated that the large terminal switches have closed? (back to challenge #1, this thing is SILENT!).  Ahh, I’ll do something that I rarely do with my Fluke multimeter, I’ll use it as an ammeter!

Well, with my thinking I didn’t want to blow up my Fluke, once I connected my test leads in series into the power circuit on the main terminals (again, just using a 12V battery), I set the ammeter function on the 10 Amp range.  I then added 12V power to the Superswitch’s control (coil) leads. Nothing.  Hmmm, ok . . .  I then set the ammeter on the 400 mA range and again added power to the Superswitch’s control leads, upon which I got the very slightest of jump in amperage showing up on the Fluke.  I tried it a number of times, all with repeatable and consistent readings. Hmmm… I still knew not a lot and I wasn’t sure what the data was telling me.

I emailed the results of my little test to Jim, who immediately emailed back that my ops check was in fact successful and the unit appeared to be working fine.  Wow, probably the most anti-climactic ops function test I’ve ever performed on a piece of equipment! But, I was happy to confirm that it is working.

Check that off the list.

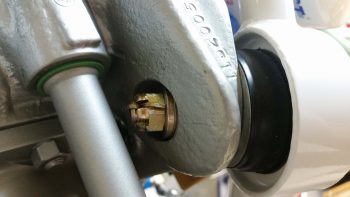
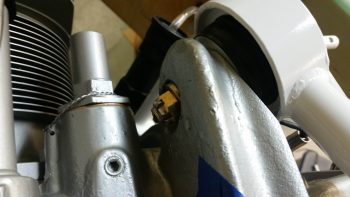
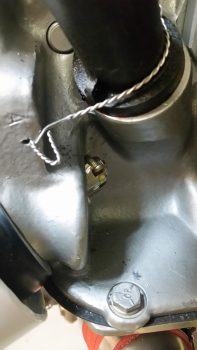
Ok, back to both the new mounting location and wiring schema of my freshly ops tested Lamar starter contactor.

I noted that there had been a lot of chatter from both Canardians and tractor bubbas about my “moving the starter contactor” proposal.  Bob and tractor guys were not very welcome to the idea, while I again found out that a TON of canards are configured with the starter contactor on the cold side of the firewall.

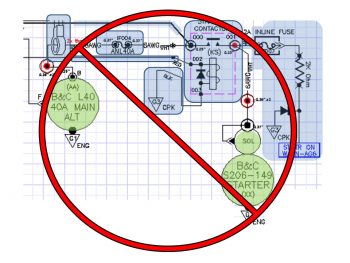
First off, in a very un-theatrical or suspenseful way, I will simply state that I am NOT moving my starter contactor to the cold side of the firewall.  So this new design below that I discussed a couple of posts back is OUT… persona non-gratis!

Why?  Well, read on . . .

One builder/flier, specifically, sent me an email that while his proposed starting circuit design interested me, I admittedly didn’t place it on my list of viable options since my goal was to simply the move the starter contactor off the hot side of the firewall and into the Hell Hole. This builder, Steve Stearns, shared with me that he simply went against the conventional wisdom of Bob Nuckolls’ Aeroelectric Connection Z-13/8 architecture, that has the starter and alternator B lead sharing the big positive power cable running down the Long-EZ fuselage.  Bob’s laudable goal in his dual use design was of course to save weight, and I’ll posit based on the convention that we simply place starter contactors on the firewall, because that’s where they belong. 

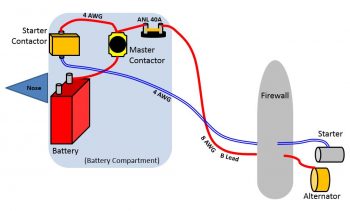
What Steve had done was separate those 2 cables back out into their respective functions so that the big cable handled the starting and another 8 AWG cable was added back into the mix specifically to serve as the alternator’s B lead (okay, my aversion to adding A) a thing and B) weight, kicked in and although <clearly> I assessed Steve’s new proposed architecture, I’ll admit honestly that my paradigms were quite in play!).

To take it one step further, Steve proposed moving the starter contactor off the firewall, just as I was looking to do, but not to the Hell Hole …. oh, no . . . go big or go home here folks: Steve’s crazy notion was to move the damn thing ALL THE WAY UP TO THE NOSE! (Whaaa…?!??!?!)  What this does is simple: it removes the big long fat high current cable that is always hot when the master switch is ON so that the segment of “exposed” always hot cable is literally 6 inches long, not 10 feet long. Hmmmm….

But add another wire?  I dunno… sounds too against the grain. I mean the “massive” amount of weight and all.  But 8 AWG?  “Well, how much does that weigh?” I asked myself out of curiosity.  So I weighed 4 feet of 8 AWG wire, and it came in at almost exactly a quarter of a pound.  4 oz?!  “Ok, how much would I need?” I again asked myself.  So I went to the fuselage and measured just a little shy of 11 feet. But, let’s make it EZ and round that figure up to 12.  So, 0.75 lb is the net increase in weight.  Hmmm, really?  My paradigm was for a big 2-4 AWG welding cable, which as we all know is HEAVY.  But, 8 AWG Tefzel comparatively is obviously much less hefty.

Hmmm?

Then there was the weight of the stuff that would inherently get moved forward in this design . . .  much farther forward!  Ok, so I would move the Starter Contactor and its associated “Starter On” warning lead, and the ANL 40A fuse link (which needs to be on the distant end from the alternator) up to the nose battery compartment.  “Well, how much do all those weigh?” I again ask myself . . . 0.764 lb.

Ok, let’s recap:

  • “Always hot” cable reduced from ~10 feet to ~6 inches (buried in the nose)
  • Starter gets dedicated 4 AWG circuit (actually 4-CCA, so more like ~3 AWG)
  • Alternator gets dedicated 8 AWG B lead, no sharing or exposed to starting current
  • Less than 3/4 pound net weight added (~1 ft aft of CG, the rest forward of CG)
  • Around 3/4 pound moved off firewall and up to nose (nearly farthest point forward)

The more I deconstructed this architecture and actually looked at the real numbers, the more and more I really liked it.  I spent a couple days researching and talking to some very smart electrical engineer types with aviation background, and none of them found any negative aspects to this design.  My overarching concern, intuitively, was having the starter contactor so far removed from the starter.  However, cognitively, and backed by the data I found and discussions I had, was that the starter contactor is really just a big switch allowing current to flow from Battery >> Master Contactor >> to Starter…. so there didn’t seem to be anything other than convention proving to be a roadblock to this working.

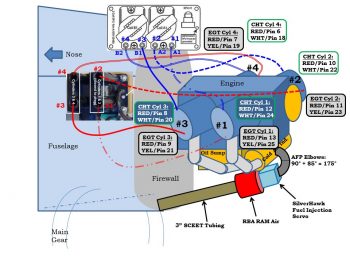
First off, here’s a more refined diagram depicting my initial chicken-scratchings on how all this is situated.

Secondly, I pulled the trigger on this design.  I ordered a few more cable terminals and 12 feet more of 8 AWG wire that will enable me to incorporate this new starting and electrical system charging architecture into my Long-EZ.  With the actual added weight most likely around 0.6 lb, and 80-90% of it all situated forward of the CG, as well as cleaning up respective starter and alternator B lead circuits so A goes to A and B goes to B, I am excited that this is a very clean and optimized design with little added weight.  In addition it really cleans up the firewall, and the Hell Hole, and is much more refined of an architecture for just a slight weight penalty.

I like it!

I would like to say a special thanks to Steve Stearns for taking the time to communicate and share this design with me (thanks Steve!).

I should also note that with such a significant design change, it took me well over 3 hours tonight to update the 2 main electrical diagrams I have that depict this architecture.  I do still have to update my master architecture wiring diagram, but that will in effect, require a whole new redesign of the diagram… but I will try to knock it out during this still-preset long cold-weather spell.

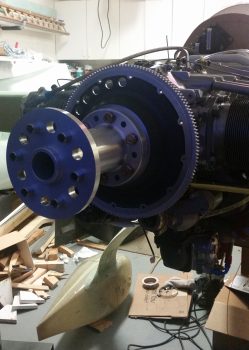
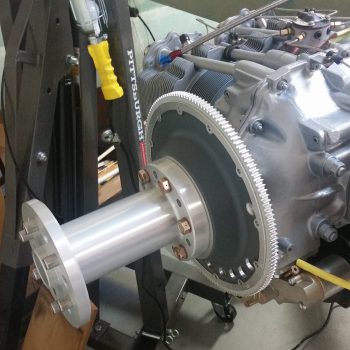
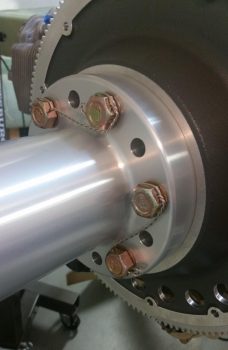
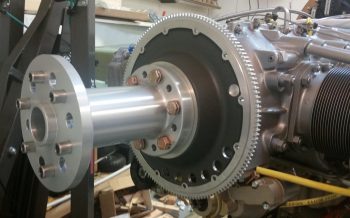
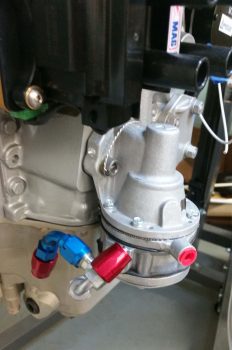
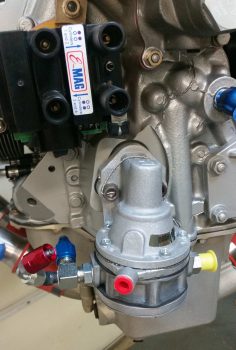
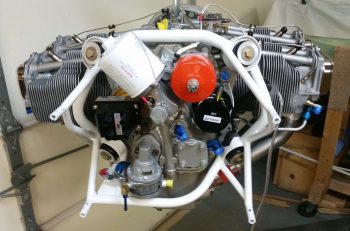
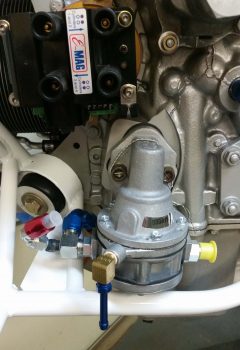
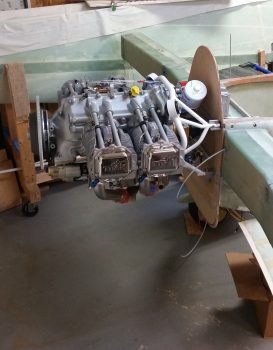
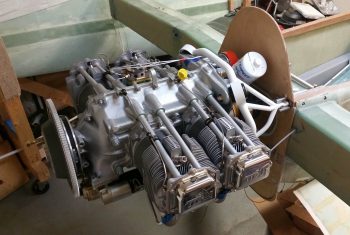
In other news, I talked to my engine builder and not only are the parts in, but they’ve already mounted most of them.  Within the next week I hope to get on their schedule to finalize some of the component installs and get that IOX-340S engine in my shop where it belongs!

Now, back to the exciting world of clearing up the electrical system tasks on my list….


Chapter 23 – Engine Build Prep

Today was all about attempting to catch up on some email, personal errands, etc. and prep for the engine build tomorrow.

While collecting up parts and components for the engine build I finally took a good look at the GRT EIS4000 Engine Info System Connector B wiring harness that contains the wire leads to the engine CHT and EGT probes.  However, after digging around in the box I didn’t find anything else other than what is pictured below, so I sent an email to GRT with the pic asking for clarification on just the exact CHT/EGT stuff I was supposed to get with the EIS4000.

Since I haven’t taken pics of the shy B&C starter and its closest buddy –also shy– the B&C 40 Amp alternator, I thought I’d do so before they get mounted to the engine.

Now, both the Canard Pusher newsletters and B&C touted this starter as “lightweight” and maybe it is compared to other starters out there, but man, when I was dragging this and the alternator down off the shelf in the shop I thought…. that’s a lot of combined weight for the very aft point of the engine, no wonder Burt wanted us to hand prop these birds!

Here’s the shy twin: the B&C 40 Amp alternator.  Looks like a quality piece of equipment . . . very robust.

And one final shot of the B&C 40 Amp alternator before it goes back in the box to get mounted on the engine in the next day or two.

Finally, here’s my engine “kit” awaiting loadout into my truck.  I wanted to wait until the morning to load the truck since that’s a lot of money sitting there …. so will keep it as safe as possible until necessary to haul it.

I’ll be up at O’dark thirty tomorrow to load out the truck with all the engine components above and make the 1.5 hour trek up to Winchester, VA for the engine build.


Chapter 22 – TCW IBBS Recharging

Today was all about researching how to swap out the valve cover gaskets on my Toyota Tacoma truck…. among other things.  I also spent a good bit of time running around buying some last minute parts and consumables for this rather big task that I am about to undertake.

One thing I wanted to report on quickly though –although I actually did this very late last night– is that by using a spare 15-pin D-Sub connector that I had on hand, I was able to hook up the TCW IBBS unit [on pins 5 & 9] to my Odyssey PC680 battery to charge the internal IBBS battery.

Now, the IBBS manual says that the unit should be charged anytime it’s left in a storage state for over 9 months.  Well, I don’t remember exactly when I got this IBBS unit, but it’s been well over a year, and maybe nearing 2 years . . . so I figured it was due some attention to ensure I didn’t let the battery get too low.

To ensure the Odyssey PC680 battery was in good shape to provide a continuous charge to the IBBS unit, I hooked up the PC680 to its charger.  I then clamped the 22AWG IBBS charging leads to the battery terminals.

I spoke with Bob from TCW to check on the exact method to check the IBBS voltage level without it being installed into the aircraft’s electrical system.  The insider trick is that pins 1 and 9 need to be spliced together, then the multi-meter probes are placed between combined pins 1 & 9 and pin 15 to read the actual internal IBBS voltage.  Bob said the voltage should be between 13.5 and 14.5 volts.  Mine was 13.9 volts, so I’m thinking all is ok.

Alright, back to my truck repair shenanigans!


Chapter 22 – The end is near!

At least the end of the wiring on the panel mockup area.

Today I got my wiring labels in fairly early and I immediately started knocking out my list of wire labels.  All told I attached well over 30 labels today.  I am close to running out of wires to actually label in & around the panel area . . . and that’s a good thing!

I was also able to finally finish wiring up the EFIS GPS to the Trio autopilot cross connect wire that I jury rigged about a month ago in finding the fix for the Trio AP not getting a GPS signal from the EFIS.  I never actually installed the circuit for final implementation, so I did today.

Another milestone I hit today was finally getting the Electrair Spark Advance AD626 Op Amp board wired to both the GRT EIS4000 and the Electroair control unit.  When I do the final install on the op amp board I’ll use a big piece of heat shrink to keep all the connectors in place.

Here’s a closer look at the Spark Advance AD626 Op Amp board with complete wire connections.

Again, while this cold spell lasts during January I’ll be knocking out as many small electrical tasks –like the ones above– until I get the list completed.