Chapter 22 – Trio Autopilot Servos

Avionics update.  Oddly enough, I have had the Trio Autopilot on my list for quite some time now as a January 2014 purchase.  Admittedly, I vacillated between buying the whole autopilot system or just buying the servos.  Specifically, I was looking at the Trio Pro Pilot, and to be clear, I put it on the “to-buy” before I knew I was going to spend a year in the Middle East for Uncle Sam… thus planning to be much further along in the build.

Now, I’m going to digress just a bit to elaborate on how I came to the decision to go with the Trio Pro Pilot Autopilot.  I had never heard of Trio before the Summer of 2012, when I was engaged in one of my many research sessions on Mike Beasley’s site.  On his panel, he had a cutout of the Trio EZ Pilot.  Being the curious type and intrigued as to Mike’s choice of autopilot, I did some research on a new found prospect.  After watching a couple of YouTube videos on the Pro Pilot–taking something to me that was shrouded somewhat in a cloud of mysticism and magic (i.e. autopilots) & making it look relatively simple–I was initially sold on the Pro Pilot.

That all being said however, I do TRY to approach my aircraft component selections somewhat clinically and empirically, so during my time in Tampa I set out to confirm my initial feel-good thoughts on the Trio Pro Pilot by contrasting and comparing to other autopilots.  The contest came down to the Trio Pro Pilot and the GRT “insta-” autopilot (just add servos!).

Now, there’s no doubt in my mind that GRT has a fantastic autopilot (cheaper and lighter too), but three things stood out in my mind for the Pro Pilot being just a cut above GRT’s autopilot:  1)  Redundancy.  GRT can easily run the Trio Pro Pilot, but at the same time, if my GRT EFIS fails, I still have an autopilot system that can be operated completely separate from my EFIS system.  2)  Ease of use.  Either the guys at Trio are true geniuses or just completely lucky, because IMO they absolutely nailed the interface and created an autopilot that is really darn easy to use (I think it’s both, but no doubt the Trio guys are geniuses… and great to work with!).  3)  Integration.  Lastly, since the Trio guys are EZ guys, there are clear-cut specific instructions on how to install these things into a Long-EZ, Cozy, etc.   No guess work or interpolating!

Ok, so back to my component purchase plan.  After pondering it a bit, I rearranged my purchasing plan and kicked the Trio Autopilot can down the road.  I figured all major electrical & avionics purchases should wait until I’m farther along in the build.  Besides, I still have one major purchase left for the engine: the cold air induction system from Sky Dynamics.  Thus, I demoted the Trio and moved up the cold air induction system and felt pretty good about holding to a prioritized plan.

Ahhh, but fate & irony always play into the story, eh.  In January, as I was spending some time perusing eBay for stuff, I ran across a guy who was selling his Trio Pro Pilot servos that he had picked up a few years ago for his Zodiac 601XL project.  His price was not that far below what a new set of servos would cost, so out of curiosity I inquired Chuck at Trio about any possible upgrades or mods that might be needed on some servos that were a few years old.  Chuck did confirm that there had indeed been some upgrades in the past few years, and that they would be happy to upgrade the servos to new specs if I purchased them.  Well, after doing some cost analysis, it just wasn’t worth getting the older servos.  So I let the servos go and moved on to other things.

Well, I noticed about a month later that, apparently, the gentleman selling the Trio servos wasn’t able to sell them and had them back on eBay for a much lower starting price.  Thus, armed with the knowledge and known cost for upgrading the servos to new specs from Chuck at Trio, I had a cost window to operate within for possibly getting the servos and saving a fair amount in the process.  Well, being a self-proclaimed eBay sniper I watched the auction for 6 days, and in the last 10 seconds there were 2 other guys that bid on it, but I was fortunate enough to win the bid.

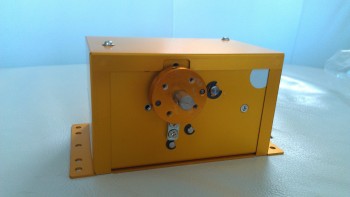
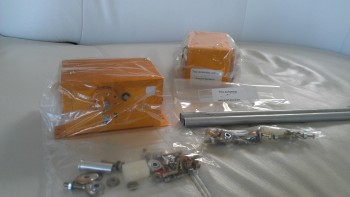
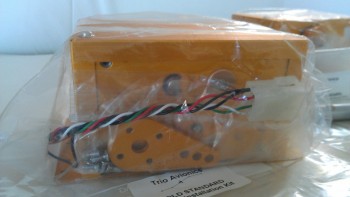
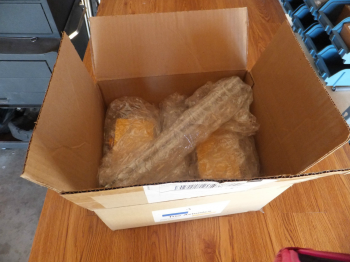
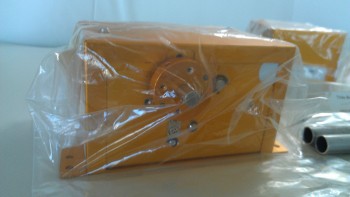
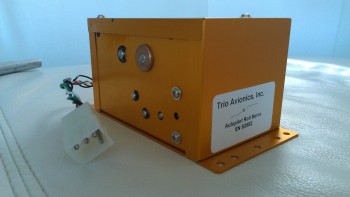
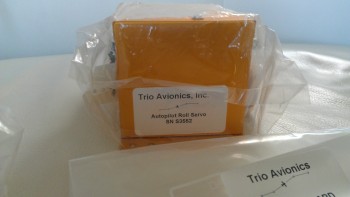
Having pre-coordinated with Chuck on my intentions, I had the seller send the servos straight to Chuck at Trio, where they checked them out, made a couple of upgrades to bring them up to new specs, and then function tested them to ensure they were A-OK operationally.  With the hundreds of dollars I saved on the servos, I had Chuck throw in a Trio Pro Pilot wiring harness and a few hardware pieces specifically for a Long-EZ install.  Below are some pics of my new Trio Pro Pilot Servos.
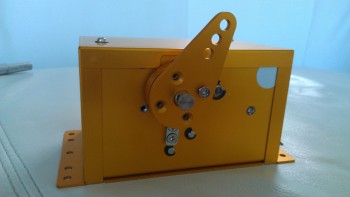
Chap 22 - Trio A/P Servo

Chap 22 - Trio A/P ServoChap 22 - Trio A/P ServosChap 22 - Trio A/P ServoChap 22 - Trio A/P Servo KitChap 22 - Trio A/P ServoChap 22 - Trio A/P ServoChap 22 - Trio A/P ServoI feel fortunate to have found these servos, and ironically stick to my original purchase plan, even though I had changed it.  I feel compelled to quote an old boss here as he defined “luck” as “when preparation meets opportunity.”
Chapter 22 – Instrument Panel

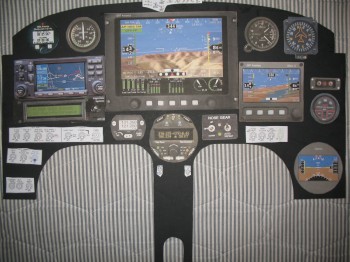
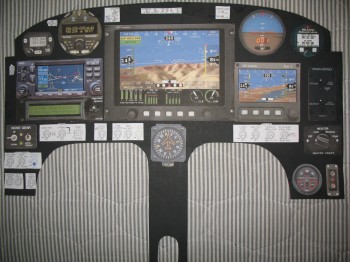
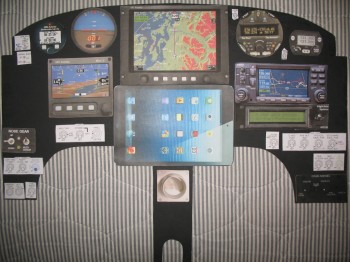
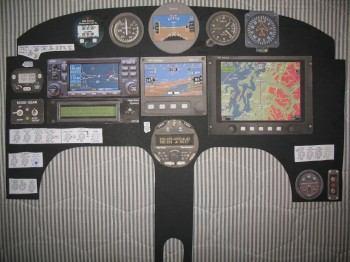
Over the past few months I’ve been going round and round on my Instrument Panel layout. I’ve researched a myriad of instruments & avionics, built matrices to compare various components–from clocks to autopilots–and am slowly getting a picture of WHAT components are going on the panel, maybe just not exactly WHERE the components will go on the panel.  Of course, since I’ve been working on my electrical system, current draw, integration, weight and cost have all been factors in the panel plan as well.

Moreover, a  lot of the panel layout will be based on ergonomics, which of course requires me actually sitting in the cockpit making airplane noises before I decide on my final configuration.

Still, I thought I would post a few pics (out of MANY) of my proposed panel options.

Chapter 22 - Instrument Panel LayoutChapter 22 - Instrument Panel LayoutChapter 22 - Instrument Panel LayoutChapter 22 - Instrument Panel Layout

Again, my panel is currently an ever-changing storyboard.  For the most part, the avionics and instruments are what I’m planning to go with presently, but as time moves on & new technologies and/or opportunities (e.g. the TruTrak ADI) present themselves the panel design can of course easily be updated.

Finally, one point of note.  My panel cutout is about 0.7″ shorter in height than my real panel, so in reality I have a little bit more wiggle room to play with when stuffing various electrowhizzies onto the panel . . .  if it all fits on my mock up.


Chapter 22 – Backup Attitude Indicator

Just an update on the continuing project planning & component acquisition efforts.  I have been spending a lot of time both on my electrical system & subsequently on my instrument panel.  As I get more research under my belt, gain a bit more knowledge, and figure things out, I then of course ask my building buddies what their plans are for whatever I’m currently carrying on about.

In one of the latter iterations of my planned instrument panel, my buddy Marco noted the myriad of redundant capabilities I had for simply displaying airspeed and altitude.  Of course I want SOME redundancy in my systems for backup purposes, but having 4-5 different ways to measure airspeed may be a bit overkill!  I hadn’t intentionally planned on having this many, just so many of the newer avionics these days have built in extras that may add more than we need if we go back and assess our actual requirements.

One of my primary culprits in this area was the TruTrak Gemini PFD.  It’s a great piece of technology and really has a lot packed into a nice, small package.  But when I went back and re-assessed my requirements, I had included it on my panel for one primary reason: as a backup attitude indicator.  I had accepted the fact that it provides airspeed and altitude information simply as a bonus.  But at what cost?  Cost here meaning actual money, since at 5.4 ounces it wasn’t necessarily breaking any feasible weight allowance thresholds.

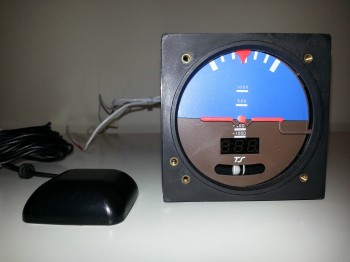
So, in the vein of saving money and sticking to a prioritized plan to get this project in the air soonest, I decided to forgo the extra ASI & ALT features built into the Gemini PFD and focus on the primary capability I needed here, again, simply a solid backup attitude indicator.  In my ensuing research I found a TruTrak ADI for sale on Ebay for way below half the cost of a new Germini PFD (and well below the new touchscreen 3-1/8″ TruTrak ADI as well).  After a number of emails back and forth with the seller–who had just pulled it out of an RV-8 during a panel upgrade–I decided to pull the trigger.

Now, I will suffer about an 8 ounce weight penalty vs using the Gemini PFD/ADI, but for now I’ll simply put the Gemini PFD/ADI (or whatever future equivalent) in the “planned upgrades” category, to be purchased down the road after my bird is flying.  Swapping TruTrak for TruTrak will be a fairly easy upgrade both physically & electrically, but will of course require a new weight and balance . . . but most likely I’ll have a few more upgrades & modifications in the mix around that same timeframe, so I’m sure a new W&B will be in order regardless.

Thus, introducing the latest addition to the instrument panel:

Chap 22 - Trutrak ADI

TruTrak ADI (3-1/8″) Features:
– Gyro / VS pitch display
– Bank Angle display
– Built-in Ground Track DG (via built-in GPS)
– High Bank Angle Warning
– Low Airspeed Warning
– Slip/Skid ball


Chapter 21 – Featherlite Strake Leading Edge Kit

Well, as I was trying to nail down some particulars & plan out how I was going to build my strakes, I went to Nate Mullins’ wonderful Long-EZ build site.  Now, before I get too far into this, you have to know that my catch snarky phrase of late–well, over the last couple of weeks–has simply been: “Sometimes it’s better to be lucky than good.”  Ok, I was going through Nate’s strake-building adventures chronicled on his MyKitLog build site, when ironically, or maybe I should say coincidentally . . . oh, what the hey, we’ll call it serendipitously, I ran across the part where he stated that when he acquired his Long-EZ project, that it came with both the Aerocad/Aerocanard strake kit, and the Featherlite Strake Leading Edge Kit.  Thus, he had to make a choice between the kits when he built his strakes, so he went with the Aerocad kit.

Now, I have bugged Mike & Larry at Feather Lite every few months, since I started building my Long-EZ in April 2011, to see if they had started making the Foam Strake Leading Edge Kits.  I’ve talked to a fair number of builders, the Old Guard, etc. to know that the strake’s leading edge can really detract from a canard/ez’s look if not done well.  I really liked the idea of capping the entire leading edge vs. building the plans method, joining the strake tops & bottoms to LE as far back & away from the leading edge as practical (in the straight, not curved, area), and having a wet leading to add to the fuel amount in the strake. Unfortunately, in late 2012 Mike & Larry had had enough.  Apparently they felt I was by then a mature enough builder that they could break the bad news to me: they had no plans of ever making the strake leading edges again (they can’t because the foam manufacturer changed the actual chemical properties of the foam… and now it can’t contour properly to the forms).

So, when I read Nate’s strake building account, I asked myself in disbelief, “Could it be?!” Well, a quick email to Nate asking if he still had the Featherlite Strake Leading Edges and would he be willing to sell them to me, fortunately came back with a resounding yes! Eureka! (Well, actually Featherlite! But hey, they’re all good guys!)

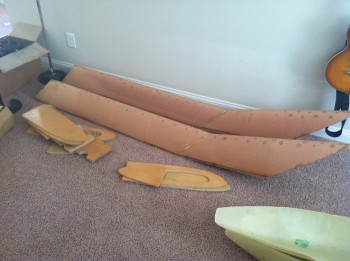
A little bit of coordination later, and a ensuing rendezvous between Nate and my ‘ol northern Virginia neighbor Richard (who now lives in Kentucky an hour or so from Nate in Tennessee) and I was the new proud owner of a “new” set of Featherlite Strake leading edges. I would say I’m the happiest guy in the world, but I think that would actually be Larry Lombard from Featherlite ‘cuz that crazy yahoo will stop calling & bugging him about those damn strake leading edges.  In addition, I’ve been able to banter about a bunch of different build ideas with my new Long-EZ buildin’ buddy Nate!

And here they are:

Chap 21 - Featherlite Strake LE KitSince Richard still visits the northern Virginia area often, he’ll be bringing up the kit in May. BTW, I was teasing Richard that there must be some cosmic connection between him and Featherlite, because he was the one who drove me to the cargo terminal in his truck to pick up my crates of Featherlite foam cores to ship them off to Germany.


Chapter 22 – ADS-B Receiver

In looking back over my notes I failed to post this in the correct order.

So the plan right now is to definitely have full ADS-B by using the Trig S-mode Transponder and a capable ADS-B receiver to provide that capability.  I have to say that one thing I really like from the GRT folks is they tend to play nice with others, this means options.  On GRT’s page where they discuss the various ADS-B receivers that will integrate nicely with their EFIS systems, they provide some pretty good info.  Of course, I original set my sights on the Navworx ADS-600B, but after looking at & assessing my actual bottom line requirements I decided that if I am going to have enough funds available to get this bird in the air within the next 10 years, I better forego the almost $2600 receiver and get a little more pragmatic (my primary goals were to have an ADS-B receiver that would integrate with my Trig S-mode transponder, display weather & traffic data on both my EFIS display and iPad, and meet the FAA’s 2020 ADS-B requirements).

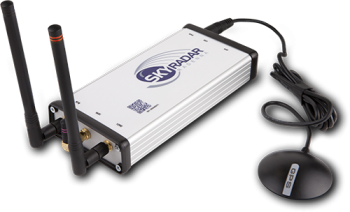
Enter Radenna’s SkyRadar ADS-B Receiver.  Although at first glance the SkyRadar seemed to be nothing more than a portable receiver, as I looked at it more and more it seemed to be a very capable receiver.  And, as with the many components I’m looking at or have bought, a number of the RV drivers give the SkyRadar enthusiastic thumbs ups. So, the SkyRadar went on the list as the most likely candidate that I would purchase in the future for my ADS-B receiver.

Chapter 22 - Skyradar-DX ADS-B Receiver

You may be asking, “What happened?”  Well, if the recent past tells you anything, then you’ll know that I’m cheap… and in being cheap I refer back to my oft cited mantra that sometimes you’ve got to spend money to save money!  Ok, the bottom line is I went to Radenna’s website to confirm some info on the SkyRadar-D, when lo & behold they had just come out with the SkyRadar-DX . . . which includes a built-in AHRS!  Moreover, they [are having] a sale where the first 50 buyers get $200 off the price that the SkyRadar-D normally sells for (the offer appears to still be going on!).  So, after a few hours of conformational research to ensure this was in fact the ADS-B receiver I wanted, I pulled the trigger.

So here’s the info on this device:

SkyRadar-DX Dual Band Receiver with Built-In AHRS

Key features:

  • SkyRadar-DX’s operating frequencies are 978MHz and 1090MHz and the latter conforms to DO-260 standard.
  • 5Hz GPS receiver
  • Artificial Horizon Information
  • Output data over Wi-Fi network (multiple displays can be connected)
  • Operates as Wi-Fi Access Point
  • USB high speed serial port output
  • Input voltage 11-36 volts
  • Power consumption less than 5 watts

The SkyRadar Receiver contains the following major components:

  • UAT receiver tuned to receive and process ADS-B data
  • High accuracy GPS module
  • WiFi module transmitting data to iPad, iPhone or iPod Touch

Chapter 23 – Oil Cooler

Hello again folks.  Today I shall discuss Oil Coolers!  So, as per usual I’ve taken my historical data on oil coolers, reviewed all of it, then went hunting for more data.  I think I’ve failed to state that a fair amount of my research is via Kitplanes magazine as well, and as a lot of you know they’ve had a couple of good articles on oil coolers lately.  Also, I know I mention the RV forum a lot, but don’t get me wrong, I’d be remiss to neglect to say that I do check out the Canard Aviation Forums pert near every time as well.  Finally, don’t get me wrong by thinking that any of the forums are the final say in selection of my aircraft components (ok, unless it’s Marc Z!).  I spend a fair amount of time (much to their chagrin I think at times) talking to builders (canards & engines), EZ flyers, the actual parts manufacturer bubbas, and of course my Long-EZ building buddies.

Thus, for my oil cooler I reached out to one of those fellow Canardians, Mike Beasley, to asked him his thoughts on oil coolers.  He came back with the recommendation by EJ Johnson & Co. to go with a Stewart Warner (now Meggitt) cooler and I wouldn’t be dissatisfied.  He said if I bought any other brand, I would probably come back to Stewart Warner, on my knees, begging for forgiveness, asking to be given one more chance to use them because I clearly wasn’t thinking right when I bought brand X.  So what did I do? (Remember, I’ve never claimed to be that bright!).  I bought brand X… literally!  Sorry Mike… good advice, but remember, I’m cheap!

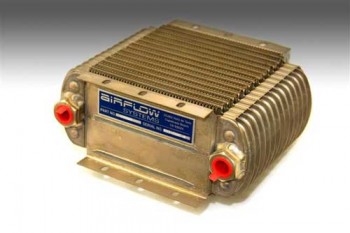
So after some back and forth discussions with Wayne Thomas from Pacific Oil Coolers and Bill Genevro from Airflow Systems (both incredibly helpful), I decided to go with an Airflow Systems Series-X 2008X.  If you know this line of coolers, you know that it’s about the biggest one they make.  So why did I order this mo-jamma?  Well, remember, not only is a Long-EZ a pusher–with the inherent cooling challenges that brings to the table right there–but I’m running a strokered engine with tapered cylinders, high compression pistons, Nickle+Carbide cylinder walls (much better rust resistance, but runs a little hotter usually), fuel injection, and cold air induction with RAM air intake.  All these are significant heat producers, so I need as much oil cooling realistically as I can get.  Of course figuring out engine & oil cooling is always a crap shoot… hard to engineer, apparently harder to predict, so I’m trying to stack the deck and HOPEFULLY get the odds in my favor just a bit!

My Christmas present to myself: an oil cooler (hoo-ah!).

Chap 23 - Airflow Systems Oil Cooler


Chapter 22 – Wig wag/Taxi Lights

Well, ’tis the season, eh?  I guess I couldn’t leave well enough on a such a good sale that Wicks was having.  After doing a bunch more reading, blog surfing and research, I decided to pull the trigger on a pair of AeroLEDs MicroSun wig wag/taxi/landing lights.  Although highly unorthodox in a Long-EZ, I plan on mounting these guys on the wingtips primarily as wig wag lights, then taxi/landing assist lights (I still plan on having one good lightweight nose mounted light for landing).

Chap 22 - AeroLEDs MicroSun Wigwag/Taxi Lights

I’ll offer up a few justifications of my purchase here!  First, currently when I home in the states I normally fly in the Washington, DC area.  Of course DC has some very busy airspace, as does most of the Eastern Seaboard/Mid-Atlantic region.  The Long-EZ is of course a small plane with a significantly narrow profile compared to most other GA aircraft.  Quite simply, I want wig wag lights because I WANT TO BE SEEN!  And as one person noted on a blog (probably VAF), LEDs often tend to be better at getting noticed (seeing the LEDs) then projecting light to actually see what’s in front of them (LED illumination). The AeroLEDs MicroSuns are small, very lightweight, and draw very little power.  And they should give off enough light to really help during night landings and taxi ops.  Which leads me to point #2:

I like to fly at night.  I have ever since I was a kid and flew often at night with my Dad. To me it’s just very peaceful, calm and serene… and I truly enjoy it.  I think Dale Martin (another night flying lover) said it best when he noted, “Amazingly enough, airplanes don’t know if they’re flying during the day or at night . . .”  (Yes, we all know pilots are the ones that make the mistakes that cause nighttime aviation boo-boos, but I think you understand his point … and mine).  Regardless, these will assist both in flight safety at all times and during night flying missions.

My last point of justification is simply this: They were 20% off!!! 


Chapter 23 – The Big Kahuna

Well, today’s purchase wasn’t the most expensive component I’ve bought for this airplane, but it’s up there.

But before I get into today’s bank account hemorrhaging, let me recount my engine saga: The original engine that I had decided on was a Mattituck TMX IO-320.  I had worked fairly extensively with Mike Yousik from Mattituck to figure out the configuration of my future engine.  In the late summer of 2012, I made a phone call to Mattituck to get some info on the TMX IO-320.  It was then that I had learned that Mattituck Engines had gone out of business.  So why I am recounting such a seemingly sad tale? (Which it isn’t by the way… I’m very happy to have gone the ECi builder’s assist route!)

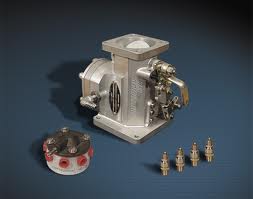
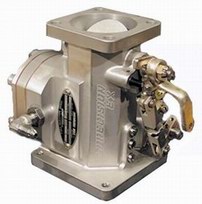
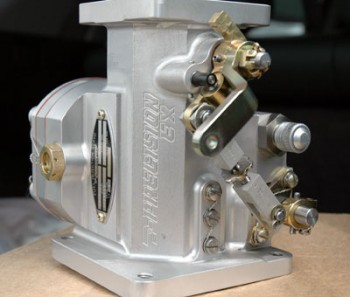
Well, the significance of my Mattituck TMX IO-320 “no more” story is that I had already extensively researched the fuel injection servo that Mattituck used on their TMX series engines: The Silver Hawk EX.

Chap 23 - SilverHawk Fuel Injection ServoChap 23 - SilverHawk Fuel Injection Servo


One key feature that the Silver Hawk EX fuel injection system has is that it does not require a fuel return line.  Now, I know a lot of folks will balk at such a crazy notion that a fuel injection system does not require a return line to the tank.  The Airflow Performance (AFP) system uses it!  I know, and I accept the fact that I am flirting with near certain death due to my return-less fuel injection system.

Chap 23 - SilverHawk Fuel Injection Servo

Ok, all snarkiness aside, as I mentioned before, I did A LOT of research on this long before I pulled the trigger on this system.  [BTW, Aircraft Spruce hornswoggled me as well by offering a pretty good holiday sale!  Also bastards!]

I had talked with engine manufacturers, engine shops, builders (read: Vance Atkinson) and of course the makers of the Silver Hawk system, Precision Airmotive, at Sun ‘n Fun.  And of course I can’t forget the myriad of feedback I read on this system on the Van’s forums…. overwhelmingly positive.

So essentially every bit of my research and all the planning I had done up to the point of learning that Mattituck Engines had gone out of business was predicated on the constant that a Silver Hawk fuel injection servo would be used on my engine.  Since I liked the features of the this fuel injection system, I uncharacteristically just picked it so that I could move on to other important decision points I need to made for this project.

Another BTW: I am in no way slamming AFP–I think they have a fantastic product and I might have just as easily have gone with them if I wasn’t already sold on the features of the Silver Hawk system.


Chapter 22 – Nav/Strobe/Position Lights

Well, this past week I was hornswoggled by Wicks Aircraft . . . damn them!  They have a really nice sale going on for all their AeroLEDs and Aveo lighting products up until 31 December… 20% off to be exact.  Which is a lot of money for expensive lights.  Thus, I threw myself headlong into the assessment & evaluation phase of the available nav lights so I could spend money to save money.  That’s my logic here & I’m sticking to it!

Ok, I’ve had my mind set on Aveo Engineering’s Andromeda Aurora for well over a year now. However, two things made my buying them from Wicks a no-go . . . the first issue being rather insurmountable: Wicks simply didn’t carry them.  So no money to be saved there.

Then there was the other issue.  As absolutely beautiful as these Andromeda lights are, I’m getting really tired of the incessant trash talk campaign that Aveo has going on against AeroLEDs.  This dynamic was highlighted even further in my research–much of it on the Van’s forum–where the AeroLEDs guy would come on the forum boards, state his points, letting the customer make up his mind, and not relying on trash talking Aveo to make his case.  Plus, the RV guys gave consistent resounding thumbs up on the AeroLEDs and the company’s customer service.

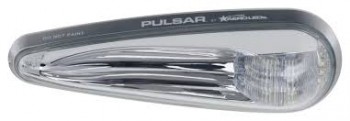
Moreover, Wicks had AeroLEDs in stock… money to be saved!  After some more research, and talking with the guys at AeroLEDs, I decided to save almost $200 and nab a pair of Pulsar LED Nav/Strobe/Position lights.  Although admittedly these lights aren’t TSO’d right now, they are up for it the near future.  And after having seen the statements by the bubbas at AeroLED on the forums, I’m more than comfortable that it will happen before I have this bird finished.

And besides all that, I think they are just really nice looking lights! (oh yeah, lightweight and fairly low current draw as well).

Chap 22 - AeroLEDs Pulsar Nav/Strobe Light


Chapter 22 – Flight Data Instrument

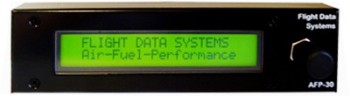
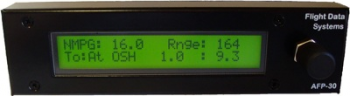
Well, since I’ve been researching out my avionics & instruments alongside my engine components, I’ve started scheduling out some purchases for some of the panel avionics that I know I’ll for sure be installing.  One such item I serendipitously stumbled across in my research is the Flight Data Systems AFP-30 Air-Data Fuel Computer.  This guy was developed by an RV driver to add some more data points that he wanted to see in his cockpit.  After researching this out and cross-referencing it in a matrix I have to compare all the functions of all possible avionics and instruments, I decided that this was definitely going on my instrument panel to provide me both unique & back-up instrument capabilities.

Chap 22 - Air-Data Fuel Computer

The AFP-30 performs functions in 3 main areas:

Air Data Computer

  • Altitude
  • Density Altitude
  • Indicated Airspeed
  • True Airspeed
  • Mach Number
  • Total Air Temperature
  • Saturated Air Temperature
  • Winds Aloft
  • Crosswind Component
  • Headwind Component

Fuel Flow Computer

  • Fuel Flow (Gallons/hour or Liters/Hour)
  • Fuel Used
  • Fuel Remaining
  • Fuel to GPS Waypoint
  • Fuel At GPS Waypoint
  • Range
  • Endurance
  • Fuel Efficiency (NMPG, MPG, MPL)

Performance Computer

  • Manifold Pressure
  • RPM
  • Percent Horsepower
  • Mach

Chap 22 - AFP-30 Air-Data Fuel Computer