Rough River 2018

As I mentioned in my last post, Marco was in town Monday (24 Sep) for training and stopped by for quite a few hours to talk shop and have dinner at a Peruvian chicken place that I turned him on to.

While here, Marco and I discussed Rough River with the underlying assumption that I wasn’t going.  Marco’s Long-EZ is down for engine repairs and he was making plans to fly over to RR with an EAA chapter buddy in his Velocity.  However, after a few “check” flights it turned out that the Velocity was having some avionics issues and needed some tweaking before flying any instrument approaches.

Thus, I got the call just a couple of days later (Wednesday) that Marco was driving to Rough River and really wanted a wingman to come with during the 12+ hour drive there … So, not wanting to leave a buddy high and dry, I decided it was acceptable to take a few days off for RR.  Especially since it only happens once a year.

Moreover, I was thinking that there’s a very good possibility that this would be my last RR to glean any good ideas before finishing my airplane!

Below are the pics I took for this year’s RR.  Be forewarned that there are no full airplane pics as I was specifically looking for interesting tidbits that I might incorporate into my build.  Also, I’m posting the pics per topic, not per airplane.

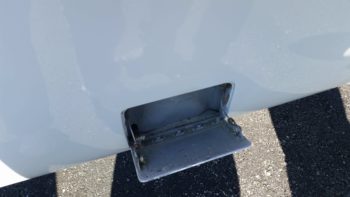
Starting off is a unique ingress/egress step that pops out of fuselage sidewall of Robert Harris’s Long-EZ, much in the same manner of many military aircraft.
Another means of providing an ingress/egress step is shown on Jim Price’s Long-EZ, with a retractable rod/tube type.
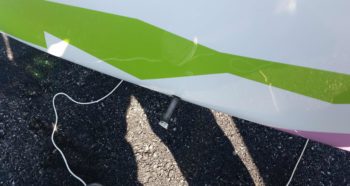
Note that the step sits just forward of the left thigh support/lower instrument panel when stowed.
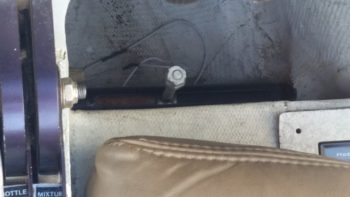
Here I tried to get a shot of Jim Price’s retractable step both on the inside and outside of the fuselage.
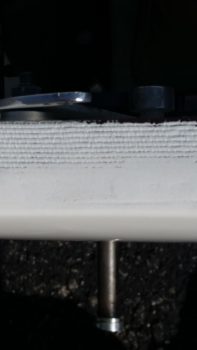
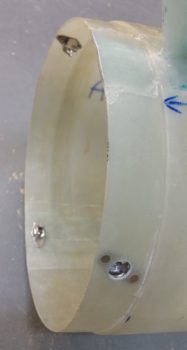
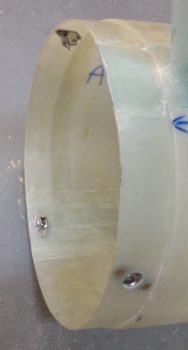
Marco’s buddy Chris from Chesapeake showed up at RR, so I took him over to introduce him to Bill James and check out Bill’s awesome Vari-Eze.  While at Bill’s Vari, I wanted to look at how Bill had done the internal lips on his removable canard cover.
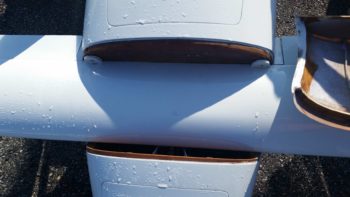
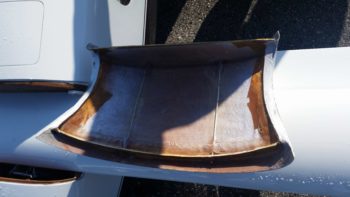
In turn, here’s a partial shot of Robert Harris’s canard and aft nose cover held in place by screws.  As you can see, there is a screw on the top side of the cover where it transitions into the inboard elevator fairing.  I too will have a screw holding the aft nose cover to the inboard elevator fairing, but my securing screw will be located on the bottom of the fairing.
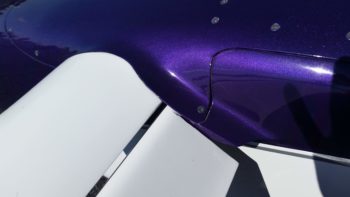
As far as the elevator fairing shape itself, I really like the one on Curtis Wray’s Long-EZ (originally built by Dave Lind).
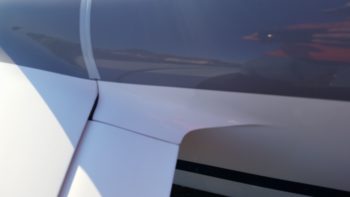
Mike Toomey had his beautiful newly finished Long-EZ at RR (he also owns/flies a Cozy III) and I took note of the fresh air vent inlet that he placed at the strake/fuselage intersection. He said it works great.  As a point of note, this is a considerably smaller version of James Redmon’s Berkut 13 fresh air inlet –which James says works great as well.
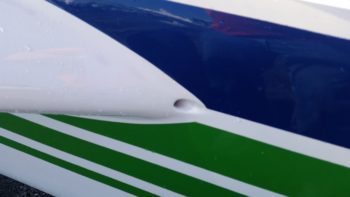
Since I have a large, oversized canopy I am very interested in keeping the front right corner of the canopy secured to the fuselage.  Below is the front right canopy latch on Curtis Wray’s Long-EZ.
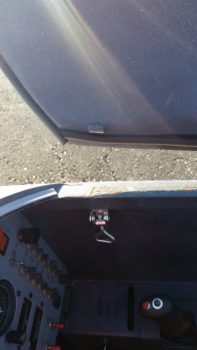
Whereas Jamie Hicks has a roller type canopy securing “hook” on his beautifully painted Vari-Eze.
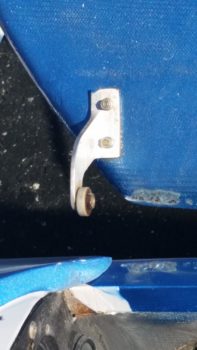
On Saturday Mike Bowden showed up with his once-twin engine Long-EZ, which is now powered by a single O-360.  Mike has been gracious enough to have some extensive discussions with me on how he constructed his canopy latch handle that I will in most part emulate.  As you may recall, I had started with the thought of using Jack Wilhelmson’s EZ Rotary Latch canopy handle, but its installed configuration impedes with my GNS480 GPS unit and F-15 throttle handle . . . yes, space is tight in my Long-EZ!

Since I hadn’t seen Mike’s bird since we discussed the canopy latch I wanted to get some good pics of it.  Mike wasn’t around when I grabbed these, and unfortunately I never got a chance to talk to him!

Here’s the external side of the latch, which resides on the upper side of the fuselage just below the longeron.
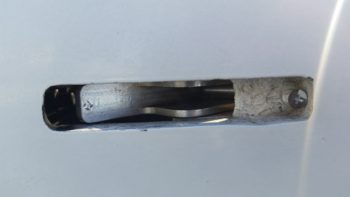
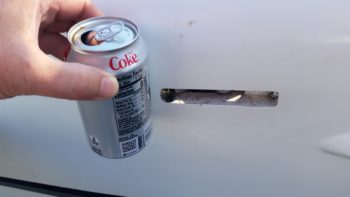
For size comparison, I held up my Diet Coke can.  Also, note the very tip of the strake on the lower right side of the pic.
Here’s the internal view of Mike’s canopy latch.  Again, my version will be heavily based on Mike’s version, but it will have a couple of distinct differences since I will have a canopy latch hook above and forward of the canopy latch handle (Mike’s canopy has a fixed windscreen on the front, negating the need for a forward canopy latch hook as is standard in most Long-EZs).
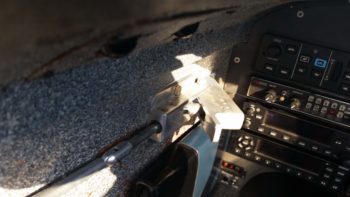
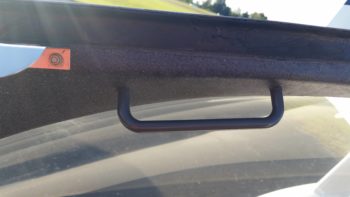
For my final canopy-related tidbit, I grabbed a shot of Curtis Wray’s canopy handle.  I like the idea of having a little handle, but mine will either be along the lines of an indent or small ridge to grab ahold of with my fingers, or a spring loaded handle that returns to a flat profile against the internal canopy frame surface once I release it.
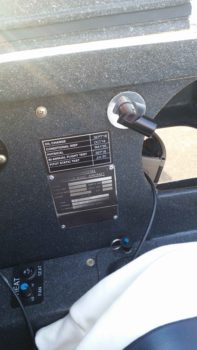
Back in the GIB area, here’s a shot of Nick Ugolini’s very nice interior on his Long-EZ.  You can see a bit of the strake window, the GIB LED map light and the heat controls.  I grabbed this shot mainly to take note of the position of the LED map light, and as a point of note in my Long-EZ: all the heat controls are up front.
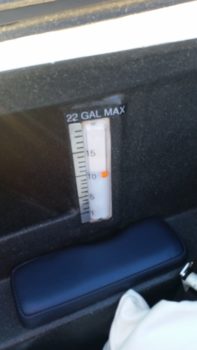
My final RR pic with one last shot of Nick U’s Long-EZ.  I really like the professional look of his fuel site gages.  I will add one final point of note, and that is I had heard a vehement disapproval of the red cork ball floats inside the fuel site gages by a number of people online.  It seems the issue was that static builds up and causes the red cork float to stick to the interior of the site gage rather than float on the surface of the fuel, thus making it hard to ascertain the real fuel level in flight (BTW, I also have fuel tank probes that feed fuel quantities to my EFIS).  But then when I asked a myriad of people at this RR whose planes had the red cork floats in the fuel site gages, none of them reported any issue other than the need for an occasional wrap of the gage to knock the red cork float back into the fuel.

I had planned on drilling a hole to remove the red cork float, but now I’ll assess it more to figure out if that’s really necessary or not.
So another Rough River is in the history books!  I really am very hopeful that my pics at next RR will include throngs of people hoarded around my finished Long-EZ!!!
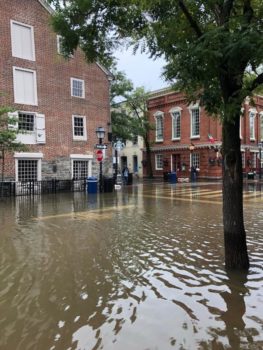
 

Hurricane Florence Extraction Operation

Well, what seems to be the norm in my build —and anyone else’s build admittedly— I had to engage in the proverbial “two steps forward, one step back” as Hurricane Florence loomed towards the coast of North Carolina.

Since I had already turned off my cable service to my house in Northern Virginia in prep for the upcoming move (and to save money) I was blissfully ignorant of Florence’s maniacal intentions until my buddy Greg texted me and asked me what I thought about “Florence.” I thought I must have forgotten some discussion we had on his vacationing in Florence (Italy?).  Upon Googling it I then became one of the watchers-n-waiters to see what would happen.

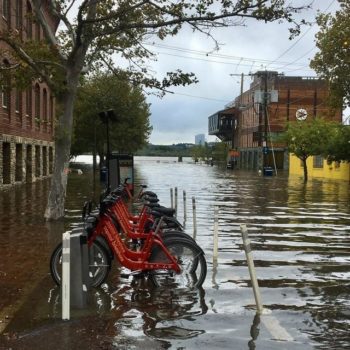
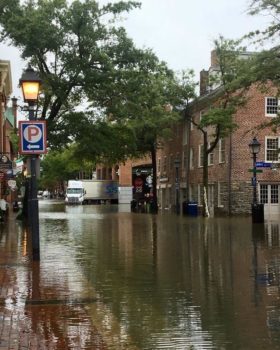
And it just so happened that on Monday evening I had plans to head up to Old Town Alexandria for happy hour and dinner with some real estate agent friends of mine.  I got a text about an hour before heading out that we couldn’t go to our usual haunt since it was under siege by a couple feet of flood water, along with the rest of the Old Town waterfront a couple blocks in from the Potomac River.  (“Uh-oh” I thought, “if this thing is already impacting us this far north, I need to take heed!”)

I immediately called Sunbelt Rentals to see if they had my trailer available for rent, which they did. [BTW, this location happens to be one of the very few out of all their locations that has a trailer wide enough to accommodate the width of the main landing gear].  Since it was right before their closing time, and I still didn’t have an exact update on what Florence was doing, I decided to hold on off on reserving the trailer.  In addition, they open at 6 AM so I could grab it right at opening time if need be.

After dinner I got a Florence update and heard of the non-mandatory evacuation by noon Tuesday, I decided my mission was most likely a go.  I set my alarm for 5:30 AM (Tuesday) and headed off to bed.

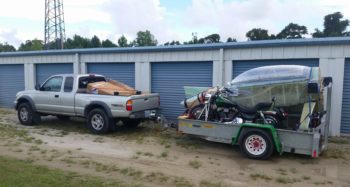
By the next morning it looked very likely that Hurricane Florence was going to hit the North Carolina coast very near my storage unit.  Thus, my fuselage rescue and evac mission was a go.  I got to the rental location just after 6 AM and rented the trailer, did the paperwork, and got it hooked up.  I was then on the road just a bit after 6:30 AM, and arrived my storage unit just before 1 pm.  It took me about 5 hours to load up my motorcycle, fuselage, wing, and miscellaneous expensive stuff (including the baggage pods, wheel pants and my main avionics box!) before heading out of there about 6 pm.

As you can see a bit in the pic below, the weather was beautiful on Tuesday and hard to believe that a hurricane was bearing down on that location.

I then scooted over towards the west side of NC and went to Greensboro for a couple of days, offloading a few things at Stacey’s house before taking off at 3:30 AM Friday (14 Sep) to head north towards home.  For the most part, I had been able to keep the unpainted airplane components out of direct sunlight, so wanting to drive while dark and avoid traffic was my main reasons for leaving so early.  As it turned out, it was a perfect time to depart Greensboro.  I hit 10-15 min of heavy rain just west of Raleigh and maybe a half hour on each end of very light rain, but for the most part it was a dry trip and the fuselage was fairly water free upon my arrival home around 8:30 am.

My friends from the Cherry Point, NC area had also traveled over towards Greensboro and stayed in a hotel, and then followed behind me a couple of hours heading up to my place in Northern Virginia.  It was great having them for the week and a half that we waited out Florence’s shenanigans and ascertained what damage she had wrought.  They then departed on Saturday, 22 Sep.  Needless to say, their visit slowed me down considerably on my house updating efforts in order to prep it to sell.  Moreover, Marco was in town the following Monday (24 Sep) for training and stopped by for quite a few hours to talk shop and have dinner at a Peruvian chicken place that I turned him on to.

During Marco’s visit we discussed Rough River with the underlying assumption that I wasn’t going.  Marco’s Long-EZ is down for engine repairs and he was making plans to fly over to RR with an EAA chapter buddy in his Velocity.  However, after a few “check” flights it turned out that the Velocity was having some avionics issues and needed some tweaking before flying any instrument approaches.  Thus, I got the call just a couple of days later (Wednesday) that Marco was driving to Rough River and really wanted a wing man to come with during the 12+ hour drive there . . . so, not wanting to leave a buddy high and dry, I decided it was acceptable to take a few days off for RR.  Details of the RR trip are covered in the next blog post . . .

[BTW, I learned from both my friends returning back to NC and the owner of the storage unit that miraculously there was no flooding at the storage unit and all my other stuff made it through the hurricane unscathed!]

Project move update

I thought I’d provide a quick update on my project move down to North Carolina.

I’m not sure if I reported it, but I had previously removed and taken my GNS480 GPS down to NC on my last trip down.  This time around, after updating some new software on the HXr and Mini-X EFISs, including NAV databases and approach charts, I removed them and packed them up in their original shipping boxes.

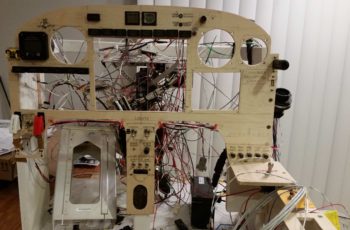
In addition, I also removed the Trio Pro Pilot autopilot, TruTrak ADI, Vertical Compass Card and Radenna SkyRadar-DX ADS-B receiver from the panel as well and packed them up for their trip south.

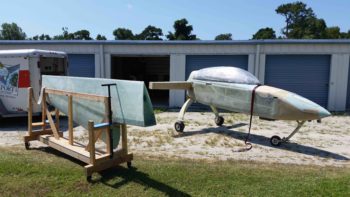
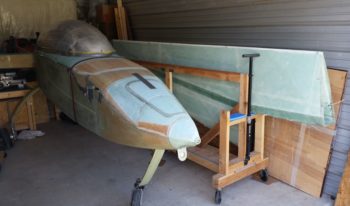
Along with a bunch of the panel components, I also packed up a good majority of parts, consumables and hardware for the build and hauled them down to NC.  As for major components (read: big), in this load I also loaded up the left wing and the wing dolly, which are shown below with the fuselage in front of my NC storage unit.

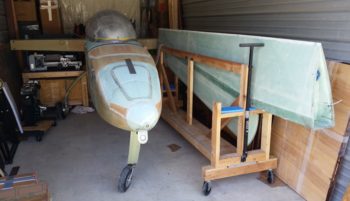
And here are a couple different angle shots of the left wing and fuselage stowed inside my NC storage unit.

You may note that in the pic below you can clearly see my mini-lathe attached to the workbench that was formerly the fuselage dolly.  As an aside, below the lathe is the EVO Harley-Davidson motor for my custom chopper motorcycle project that I actually started before the Long-EZ (and which I’ll finish after I finish the Long-EZ!).

Again, just a quick update on the move….


Chapter 23 – Camshaft bath time!

Today I carved out about an hour from house updating tasks to bake a couple of batches of desiccant to reinvigorate the moisture absorbing power of this magical stuff.

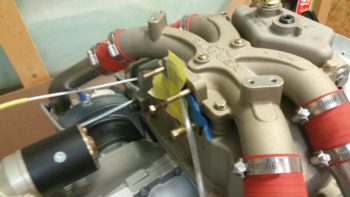
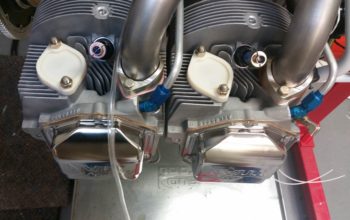
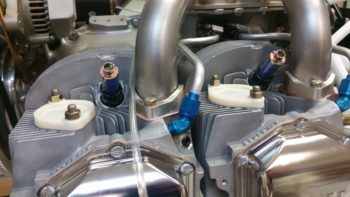
Part of that process was pulling the cylinder dehydrator plugs to replenish them as well with the high-octane desiccant.  I then replaced the freshly pulled dehydrator plugs with spark plugs and then flipped the engine inverted to bath the camshaft and upper areas of the crankcase with oil.

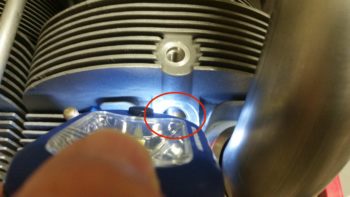
After I inverted the engine I then replaced the bottom spark plugs with the freshly replenished & renewed dehydrator plugs.  As I pulled the plugs on a couple of the cylinders I used a flashlight to take a peak inside the cylinders to check out the condition in there.  The walls and a bit of a piston in both cylinders that I checked were wet with oil and shining bright as a new penny ( . . . or maybe a dime, since it’s silver colored?!).

Happy with what I saw I tried my best to grab a pic of the cylinder wall, which you get a general idea of in the shot below.

I’m really happy with this engine stand and appreciate being able to get the camshaft soaking in a bath of preservation oil.

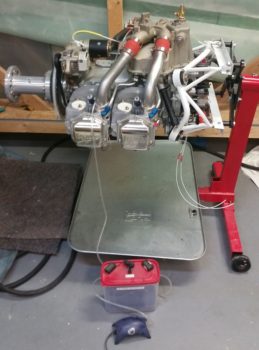
When I inverted the engine this time around, I made sure to run the output line from the engine dehumidifier into the cold air induction plenum opening, which I then ensured was as taped closed as possible (sorry for the not-so-clear pic!).

I also installed some Lycoming exhaust manifold port covers that I picked up from ACS. They cost a bit but I’ve been so busy –with no time to roll my own– that I went ahead and pulled the trigger on them. Also, as you can see, again I loaded up the dehydrator plugs with fresh desiccant.

[NOTE: At the very bottom edge of the pic below you can see a drop of oil near the clear tubing.  I found that the fuel injection nozzle port was dripping oil so I tried my best to tighten the fittings.  I got a little bit of the main fitting and good bit of the smaller fitting, and slowed the drip down considerably…. but I will need to sinch up the fittings a tad more to ensure the leaking is stopped.]

In addition, I threw away the tired desiccant packs that I had stuffed inside the exhaust manifold ports a while back and should be getting a batch of good-sized fresh desiccant packs within the next day or so to replace the ones I threw out.

I have been meaning to invert the engine for weeks now but of course had to deal with swapping plugs, refreshing the dehydrator plugs, baking desiccant, etc.  I’m really glad that I was finally able to get this done and all still looks spiffy-keen with the engine!


Chapter 19 – Baggage pod hardware

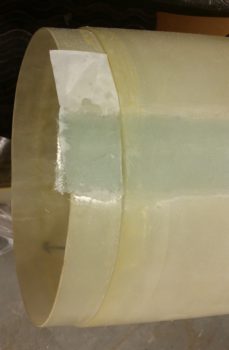
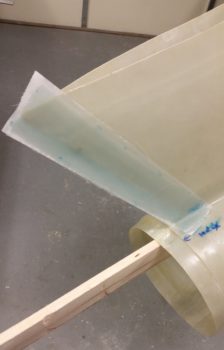
I started out today by trimming all the overhanging glass with the Fein saw.

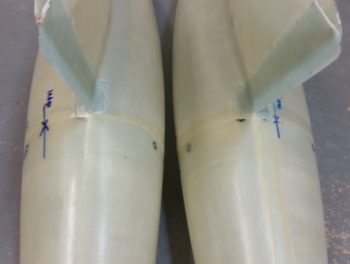
I then drilled pilot holes and clecoed the tail cones to the front pod sections.  After that, I then drilled out the wider diameter holes for CAMLOC/Skybolt 1/4-turn fasteners.

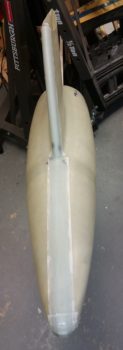
Here’s a shot of both the trimmed glass on the pylon TEs of both pods, and the top 2 CAMLOCs mounted in place.

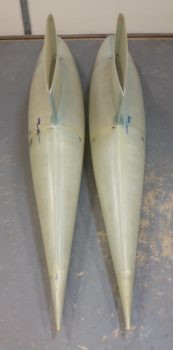
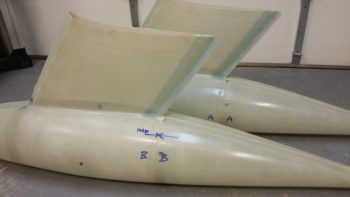
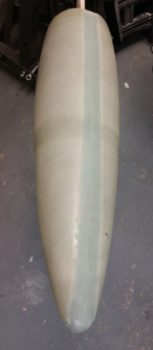
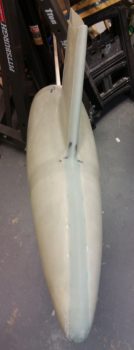
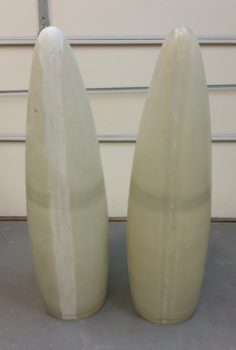
A wide view of the assembled and glassed (lower assembly) baggage pods.

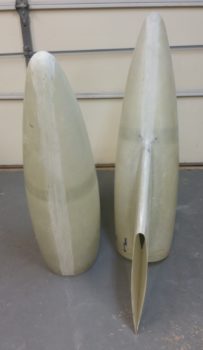
A shot showing the “business area” of the glassed pylon TEs and the attached tail cones via CAMLOCs.

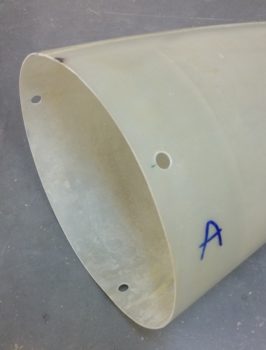
An example of CAMLOC attach holes on the tail cones.

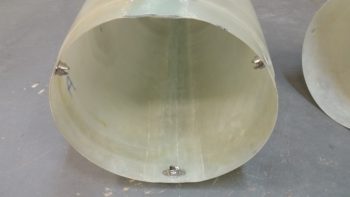
And the Skybolt lightweight stainless steel receptacles.  I have to say, these are quickly becoming my favorite 1/4-turn fastener receptacle.  Light yet strong!

One slight issue that I had is that since I added extra plies of glass to the lower flange on one of the baggage pods, I will have to order a longer CAMLOC stud to use in lieu of the -7 stud I currently have on-hand for both bottom CL attach points.  No big issue of course and I’ll simply add it to my next ACS order.

The first shot below focuses on the exterior side of the Skybolt receptacle (right side, in the hole) and the next shot focuses more on the interior receptacles.  As a point of note, to set the interior side of the rivets on the upper receptacles I had to use a small piece of 2024 aluminum as an impromptu bucking bar.

I do still have the cradles to build for these things, but for now I’m happy that the main portion of the baggage pods are assembled with reinforcement glass in place.


Chapter 19 – Pod TE Round 2

Today I pulled the peel ply from pod #1’s pylon TE layup, but I really didn’t get a chance to clean it up or trim the glass. As you can see in the pic below, I didn’t get around either to trimming the glass on the lower perimeter layup on the tail cone mounting flange on pod #2.

I did however get the pylon TE layup glassed on pod #2.  After laying up the 3 plies on each side I then peel plied the layup.  I will say that what makes this layup a little tricky is the flox wedge that lies between the 2 sides of glass coming together as the transition for the rather thick pylon TE.  Of course the goal is to get an even amount of flox all the way along the edge to get a nice uniform glass-to-glass shear bond.

With the bit of epoxy I had left over from the pylon TE layup on pod #2, I glassed in 5 plies of BID on the top flange of pod #1 to fill in the CL depression and even out the tail cone mounting flange profile.

That’s it for today’s build escapades.  I will say that for the pods themselves the heavy lifting is over for the more entailed layups.  Tomorrow my goal will be to get the tail cones mounted to the pods with 1/4-turn fasteners (CAMLOCs).


Chapter 19 – More pod stuff

I started out again by pulling the peel ply and cleaning up the major seam layup on baggage #2 earlier in the day.

Then later on I did the small glass layup on the aft bottom interface ring for the aft cone to attach to on baggage pod #2.  Optimally this would be an extension of the major seam layup, but with the joggle right there I didn’t want to mess around with a good chance of distorting either portions of the layup, so I just separated these layups into 2 distinct parts.

Although my way is not as optimal in strength as carrying the glass all the way through, I have no doubts it will be plenty strong for my baggage pod ops.  In fact, since the matching layup on pod #1 wasn’t quite thick enough, I laid up 5 small plies of BID here on pod #2.

I then laid up 3 plies of BID –as per Gary Hunter’s instructions– on each side of the pylon’s trailing edge of baggage pod #1.  Right at the trailing edge, filling in a small gap between the 2 layups, is a bead of flox.  I then peel plied the layup and left it to cure.

Tomorrow I plan to do the pylon trailing edge layup on pod #2.  In addition, after all the major baggage pod glassing is completed I’ll then attach the aft cones to the main pod structures with CAMLOCs/Skybolt 1/4-turn fasteners.


Chapter 19/23 – Baggage pod break

I took a short break this morning to pull the peel ply and clean up the edges of the major CL seam layup on baggage pod #1.

Later this evening I laid up a 4 ply pad of BID on the aft bottom end of baggage pod #1 that will serve to reinforce the lip for attaching the baggage pod aft cone.

I then laid up 3 plies of BID around the main CL seam on baggage pod #2 just as I did on the first baggage pod last night.  I then peel plied the layup.

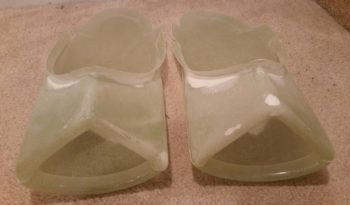
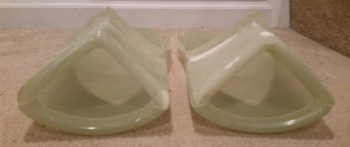
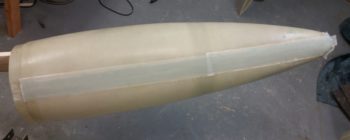
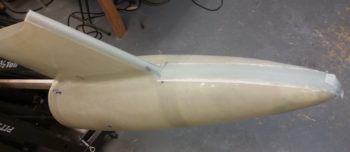
While I was looking at some pics tonight I found a shot of the cowlings from around 2012 that had a document included that I haven’t seen in quite a while.  While looking for the document I finally completely unwrapped the Berkut-style armpit intakes for the lower cowling.  As you can see, I decided to grab a couple of shots of these to include in this blog post…

Again, with my house updating shenanigans I only have a couple of hours a day that I’m allowing myself to work on the plane build.  However, I figure every hour counts and gets me much closer to the finish line!


Chapter 19 – 2 hour Break

Since the baggage pods attach to the wings, I think I’ll annotate their build in Chapter 19.

Since I’m back in full on house update mode, I am only allowing myself about 2 hours a day to work on any airplane build related stuff.  Starting in on my first 2 hour mini-build session I decided to get some of the prep work knocked out on the baggage pods.

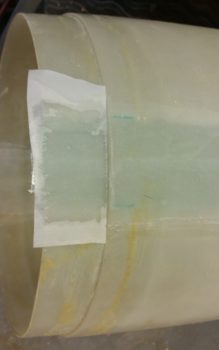
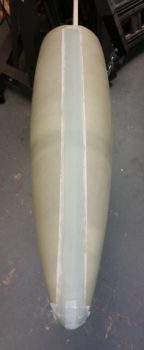
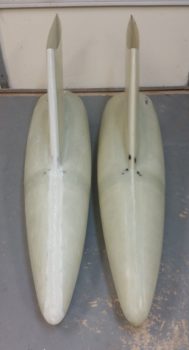
The first task was to sand the depression all away around the seam down the front of the pylon and the body of each baggage pod.  Below you can see the baggage pod on the left has been sanded while the one on the right has not.

And here’s the bottom side seam sanded as well.  The depression that Gary Hunter created about the seam is deep enough to handle 3 plies of BID.

Here we have both baggage pods’ forward sections sanded about the seams.

I then laid up 3 plies of 2″ wide BID tapes around the seams & inside the depression on one of the baggage pods.

Tomorrow I’ll lay up the 3-ply BID reinforcement layup on the other baggage pod. There’s also a layup that needs to completed on the TE of the pylon, which I will get to over the next couple of days.


Chapter 13/18 – Canopy Wrap-up

To wrap up the nose build (so far), canopy build, and fuselage move down to North Carolina, I threw together a video to cover these topics.

I’m hoping this video will help shed some light on some of my build tasks that may not have been as apparent in my description using just pictures and words in my previous blog posts.

So, with that, I’ll simply say “Enjoy!”