Chapter 6 – Back to Square One!

The journey of a thousand miles begins with one step . . .

AND:

How do you eat an elephant?  One bite at a time!  Right?!

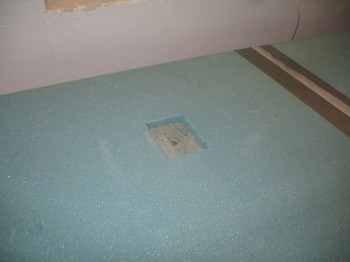
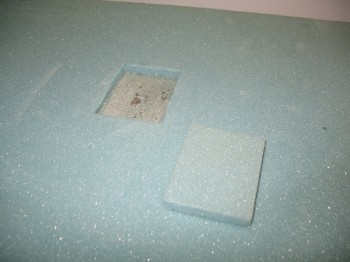
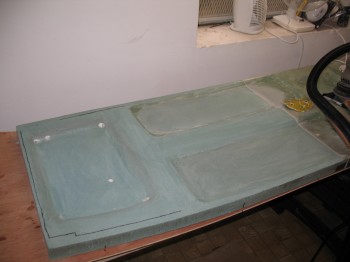
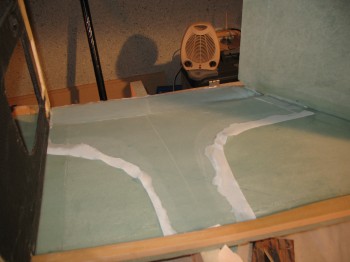
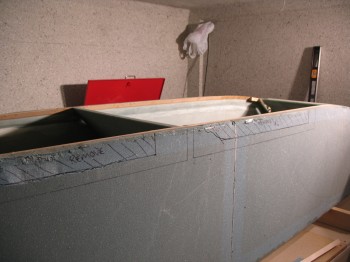
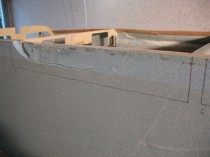
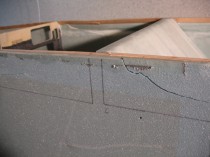
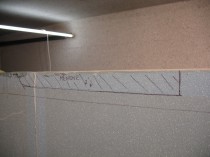
So you can call me chicken but I’m not taking any (more) chances with this fuselage bottom!  I’m going to glass it step-by-step, and make sure I concentrate on each area. With these deep funky crevices that I have to glass down into, I want to ensure I can fully focus on smaller sections of glass.  [I double checked my measurements for all my fuselage bottom divots against the plans, and they were all pretty darn close… In case you were wondering!]

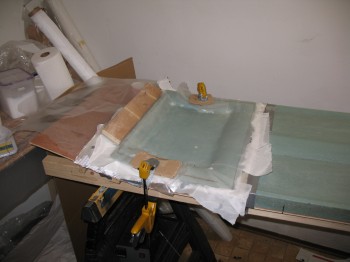
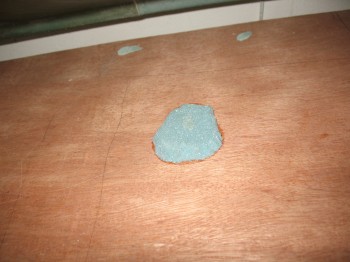
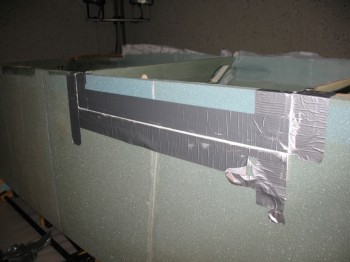
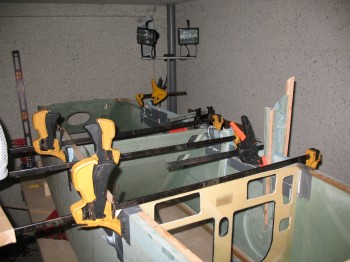
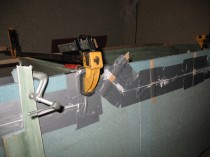
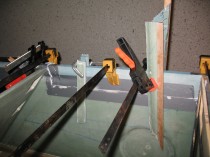
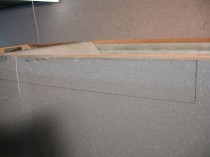
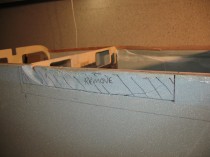
Since I now have my fuselage “HOLE” repaired on the outside of the fuselage bottom, I’m ready to glass.  The bottom fuselage foam is 1-3/4″ thick and I have to make it curve sharply downwards at around 8″ from the back edge, thus curving it sharply upwards from that 8″ point to the back edge.  I don’t really like doing this because it has the potential to jack up the glass immediately under the clamps, but my plan is that I’m going to layup the glass and then clamp the edges at the apex of the curve to drive this fuselage down into the sled and have it cure with the nice curve it needs to follow the bottom contour of the fuselage.

Chapter 6 - Glassing rear seat area Continue reading

Chapter 6 – Repairing Divot in Fuselage Bottom

In transit from Virginia to Germany, the fuselage bottom had separated from the 1/4″ plywood sled to which I had it attached.  The sled held the shape of the fuselage bottom to that of the shape of the bottom contour of the sides of the fuselage.  Since I would have to remount the fuselage bottom to its sled so it would be shaped correctly, it follows that I would have to remove it first. So that’s exactly what I did.  However . . .

Foam forcefully extracted from fuselage bottom

When I pulled the fuselage bottom off of the sled (it took a lot of convincing!) about a 2″ x 3″ sized chunk of foam ripped off of the bottom side of the fuselage and remained on the sled.  This foam came off the fuselage right under the pilot’s seat pan where the foam is at one of its thinnest points.  It looks as though a fair amount of epoxy soaked through the foam, maybe through a hole, and bonded the foam to the plywood sled underneath.  I tried to pull the foam off and reuse it to plug the divot, but it wasn’t coming off without a fight.  So I simply cut the hole rectangular and made the same shaped plug to fill it in.

Repairing divot in fuselage bottom

Repairing divot in fuselage bottom Continue reading

Chapter 6 – Repairing Fuselage Bottom

Well, another repair in the making.  Which leads me to somewhat of a philosophical observation that I made to my buddy Marco one day:

Building an experimental airplane is really nothing more than having the wherewithal to continuously fix all the mistakes you make as you build it.

With that point in mind, I spent the entire evening hunched over the back half of the fuselage bottom, sanding off all the dead micro & epoxy.  I’ve got to get to that fresh foam before I can reglass the back half of the fuselage. [Uh, so I got a little carried away last night after the fuselage repair was finished and I failed to take any “before” pics of the back end of the fuselage bottom.]

Repairing Fuselage Bottom

Repairing Fuselage Bottom

After I got the back half of the fuselage bottom down to foam, I evaluated the front half of the fuselage bottom surface.  Not nearly as good as I had hoped . . .  that botched vacuum bagging effort really took its toll on this layup.  There were a few distinct areas on the front half of the fuselage bottom that were grossly delaminated.  In the areas of smaller air pockets I simply drilled holes and injected the delams with epoxy via syringe.  The larger delaminated areas I ground out the dead glass and will add an extra ply of glass overlapping about 1″ onto the good skin of the fuselage bottom layup.  It will add a little extra weight, but there is definitely enough good fiberglass on the surface to negate grinding off all that glass down to foam to reskin.  I’ll live with the little bit of added weight.

I guess it’s all part of paying the piper in the game of homebuilt airplanes.

Chap 6 – Final Fuselage Repair Steps!

With the the left side foam prepped for glassing last night, I did a quick crosscheck and cleaned up a few minor rough spots.  I made a 2-ply UNI layup employing the “Poor Man’s Pre-preg” technique.  With plastic sandwiching my 2-plies of UNI glass I would be able to drive out more excess epoxy and easily cut the layup into the shape I needed, which was a somewhat inverted “T” shape… a “T” due to the repaired crack going up the outside of the left side fuselage wall and the subsequent slight “creasing” of the inside fuselage wall glass (running nearly entirely from the top of the fuselage down to the bottom edge).

Lower Left Fuselage Glass Repair

Before actually laying my 2-ply UNI pre-preg setup, I refloxed any seams and edges on the front seat & instrument panel to fuselage junctions.  I laid up the 2-plies of UNI (crosshatched at opposite 30° angles just like the original layup) and then peel-plied the entire layup. Continue reading

Chapter 6 – Fixing Fuselage Damage

Today I trimmed and prepped the damage area at the lower left side of the fuselage.  Note the line straight down from the middle of the foam insert piece: this is where the fuselage was cracked and was the first thing that I repaired.  Now you can see why, since the fuselage side had to serve as a support element to keep the new insert aligned and true.

Lower left fuselage repair

I micro’d the foam repair insert into place at the foam-to-foam junctions, but where the fuselage bulkheads are located that abut the new foam inserts, I actually used flox for more structural oomph.  I actually did that on the right side as well.  I just failed to mention it before. Continue reading

Chapter 6 – Right side foam repaired!

Today I took all the Frankenstein accoutrements off the fuselage (for you lesser-refined non-French speaking folk, that would mean clamps, tape, popsicle sticks, etc. Ha!).

Cleaning up the seams and the micro doesn’t seam like it should take that long, but this took a few hours to get it back into decent shape for eventual glassing on the surface.  Also, remember that although the pics show the outside of the fuselage, the same amount of work (or more!) has to be completed on the inside.  Still, the right side lower foam is looking pretty good now and I’m please with the outcome.

Right fuselage foam repairRight fuselage foam repairThe micro looks nice, not too much contamination or ridges along the seams. Continue reading

Chapter 6 – Fuselage Repair

Now that the fuselage side crack is repaired and the micro has cured, it’s time to move onto inserting the foam pieces to repair the fuselage side walls.

Microing foam repair inserts

The first step in all this is to PROTECT the foam!  From what?  You may ask.  Well, both micro and flox are wonderful stuff, as is their base component: epoxy.  But all of this stuff should be minimized on any bare foam pieces that will later be glassed.  Layups are finicky endeavors and fiberglass likes sticking to fresh, clean stuff… not old nasty crusty dried up micro, flox or epoxy.  So, to protect the surfaces we tape right along the edge of the foam on each side of the micro seam.  From there on, we just need to ensure we try to not ding or crush the foam, although dings are easily remedied with?  Yes, Micro!

To ensure that the inserted foam lines up evenly with the existing fuselage sidewall, popsicle sticks are placed every few inches to keep the surfaces on each side of the micro junction even. Continue reading

Commencing fuselage repairs

So, here we go!  Lock & load.  Tonight I’m starting on the repairs to the fuselage damaged in transit from Virginia to Germany.  The first thing I did was to mark off the cracked and damaged areas on the lower fuselage sides (the fuselage is shown inverted in these pics).

Lower fuselage repairI marked off the minimum area possible to be removed to a) keep as much of the original foam and fiberglass intact as possible to maximize structural integrity, and b) use the least amount of foam as possible for the repair inserts.

I used a battery powered thin-kerfed circular saw and a “Fein” tool to cut out the damaged areas. Continue reading

Chapter 6 – Starting the Fuselage Repair

In preparation for starting back into my airplane building, I needed to get some epoxy.  My initial research held true and I was able to buy a lot of MGS (for some reason MGS in Germany is sold under the name Larit) epoxy and hardener for a LOT less than in the States.  And best of all:  NO SHIPPING FEES!!!

Today I went to Stuttgart and picked up 6.6 gallons of MGS 285 epoxy from the “local” epoxy vendor, Lange+Ritter.  Larit has the same specs as MGS and follows the same numbering scheme.  Luckily I had my documentation from the US in case I needed to double-check any info, considering all the labels are in German.  Also, picked up two 1.3 gal jugs of the slow hardener and one 1.3 gal jug of the fast hardener.

Larit (MGS) Epoxy & Hardener

The first step in the fuselage repair is to make foam inserts to replace the crushed foam on the fuselage.  Like I said above, luckily I brought a bunch of spare foam with me.  The one slight issue I have with the foam is that I don’t have any pieces long enough, so I’ll have to micro two pieces together.  No worries . . . let the repairs begin!

Prepping spare foam fuselage repair inserts for micro