Final Shop Prep

I am very close to the point where everything is organized, functional and operational to begin building.  The major issue I have is storage.  As I mentioned before, my other townhouse in Virginia has a 10’x10′ bumpout in the downstairs area that I used as extra storage, and what really helped was that I also built a large shed in the back yard that held a ton of tools and equipment.

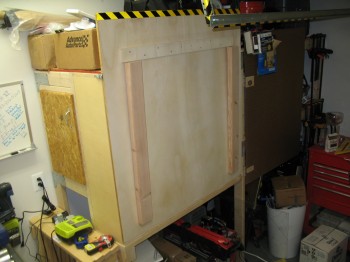
Ok, back to here.  I have a pool table in a room just beyond the garage, which until tonight was covered in a myriad of pieces of blue wing foam, all different shapes and sizes.  Well, I consolidated as much of the pieces that are less likely to be used in the immediate upcoming steps that require blue foam (i.e. canard tips & nose construction) and stuffed them into the box that I just received the new canopy in from Todd Silver.
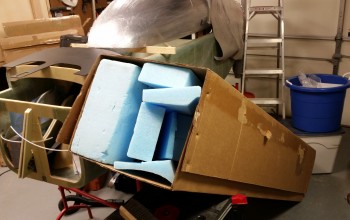
Blue Foam Storage

The foam I was able to cram into the repurposed canopy box is about half of the blue wing foam that I have, and since this stuff is not cheap to buy, and especially not cheap to ship, then I will keep as much of it as I can on hand until I’m done building this bird.

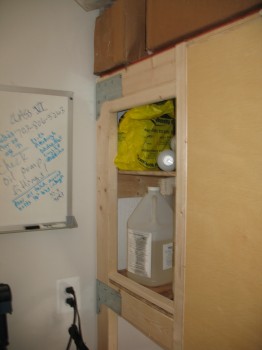
Once I got it all situated, I covered the end of the box with a doubled up garbage bag, and taped ‘er up.  Then this gargantuan box went up on the top shelf over the epoxy box & glass storage cabinet.
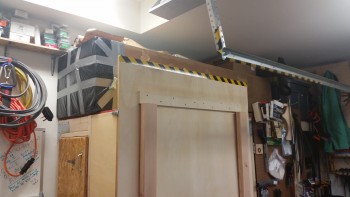
Blue Foam Box

I still  have some room in front and top of the box to store stuff as well.  The rest of the blue foam went into the garage closet that is situated about 4′ in front of the epoxy hot box, so off to the left in the pic above.

Also, to get ready for glassing I wanted to clean up the respirator masks that I use when working the MGS hardener and mixing up batches of epoxy.  Last night I dumped the respirators into the sink in some hot soapy water to let them soak overnight.  Luckily I had two sets of new filters on hand so I swapped those out and now my masks are ready to go! Let’s get some epoxy flowing!!!
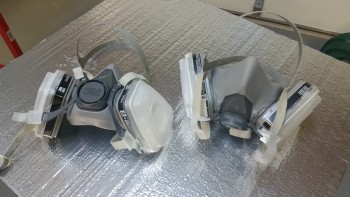
Respirators

Engine Jack

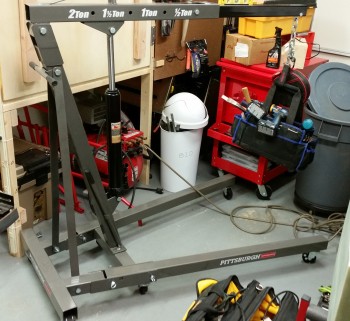
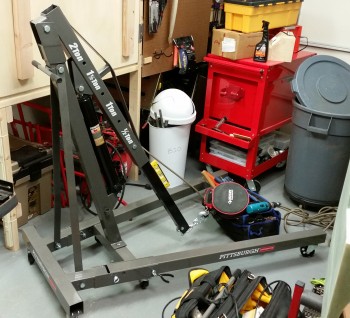
I picked up an engine jack from Harbor Freight on sale and have had it assembled for a couple of months now.  I haven’t stored it away since I noticed when I first jacked up the crane arm that after returning a few hours later it was not in the up position but was actually resting in the down position touching the garage floor.

Engine Jack

Since the past week I’ve been focused on finalizing the organization of the garage shop, and set about to figure out what was going on with my engine crane.  The plan is once I get the engine crane working correctly I can fold it up and get it stowed out of the way.  I pulled the user manual out and watched a couple of videos to figure out the fix actions.

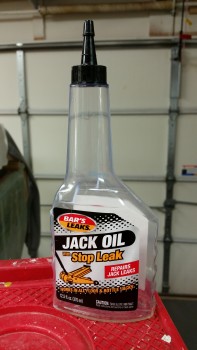
I bought a bottle of hydraulic oil to add to the hydraulic jack after multiple attempts to bleed out all the excess air clearly didn’t work.  Apparently, the jack was dry since I dumped an entire bottle of hydraulic oil into it.

Engine Jack Juice

So, now I’m able to jack up a significantly heavy load with a very, very slow crane arm descent rate.  After a couple more times of bleeding out air, if the crane arm doesn’t hold its elevation, then I’ll add some more “Jack Juice.”

Engine Jack Level

Getting there . . . parts depot

Well, while I’m sure reading about what seems to be perpetual shop prep is not  overly exciting, believe me it’s a long slog to stay motivated to get this shop prepped.  But I’m very close to getting to the point where I can start building.

I realized that I needed two things to be able to work effectively in this shop: a storage shelf for EZ specific parts and an epoxy mixing station.

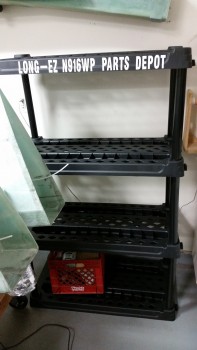
So I picked up some shelves at Lowe’s and installed them.  Since I had some white lettering I couldn’t resist labeling my “parts depot” late in the evening after putting the shelves together.

More Storage

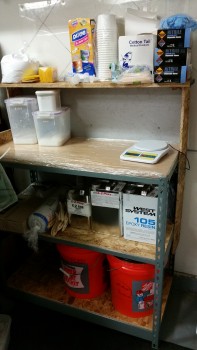
Once I had the shelving unit in place, I assembled the epoxy mixing station, cut the shelves for it (since I dumped/burned all my wood pieces in Germany) and put it into position.

Epoxy Station

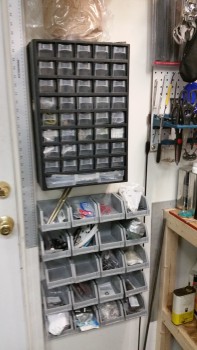
While I was organizing all my building materials, over the last few days I’ve also accomplished a near 100% inventory of parts, pieces, components and hardware.  It’s been literally years since I’ve had all my building stuff in one place, so I spent hours consolidating my hardware and electrical components into their appropriate storage bins (which I also mounted).

Parts Storage

More power!!!

With cold winter weather continuing and temps consistently dipping down into the 20’s (F) I clearly needed to heat the garage before I could start building again.  I did some research and ended up buying two heaters from Northern Tools.

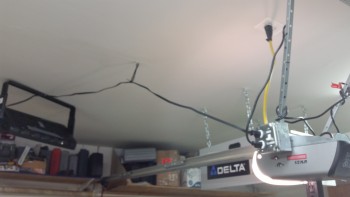
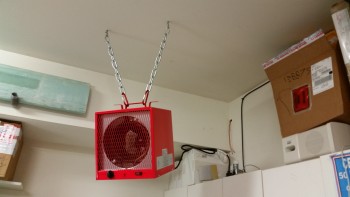
The first heater is a 120 volt ceiling mounted heater that I positioned towards the large door side of the garage.  I quickly realized that with such a hot heat source blazing away at the front corner of the garage, that I had to have some type of cutoff switch to keep the garage door from being able to be opened . . .  lest I end up with a scorched garage door as it would sit–when opened–just a foot or so below a very hot heater.

I installed a box to the side of the garage door opener with plugs for both the heater and the garage door, and an either/or switch that allows only the heater or the garage door to be powered at any one time.  This solved the potential issue of frying my garage door paint and/or a possible fire.

Heater Switch

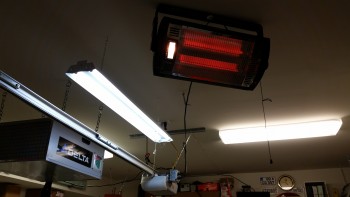
While I had the ladder positioned to install the heater and switch, I went ahead and installed a hanging light bar to add some much needed light to the front of the garage.

Shop Heater

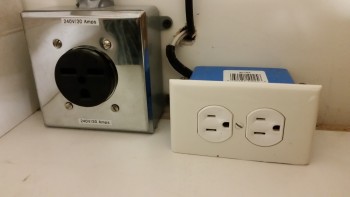
After the front of the garage heater was installed, I turned my sights on the second mo-jamma heater I received from Northern Tools: Big Red!  The issue with Big Red was power since it required a 240 volt / 30 amp circuit, which I didn’t have in the garage. Behind the back wall of the garage sits an HVAC/utility room and a half bathroom.  Behind that is a billiards room, with the electrical junction box on the back wall in the corner.

Thus, to use “Big Red” I needed to run a heavy 10 ga cable from the electrical box to the back wall of the garage.  I should add that this new cable run would allow me to use the 240V/30Amp plug for my TIG & MIG welders in addition to “Big Red.”

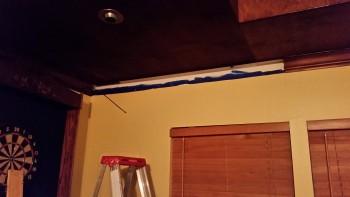
I decided the best way to run the cable from the electrical box to the garage was behind the crown molding that I had put up in the pool room.  Since I will pull this circuit when I eventually sell this house, I’m not concerned about someone discovering this cable run by accident.  So, I started by pulling down a piece of crown molding to get access to both run the wire cable forward to the garage and down behind the wall into the electrical box.

Wire Run

It was quite a pain to run the line behind the crown molding, but through trial, error, blood, sweat, tears and some cussing, I eventually got it.  While I was running the 10 ga cable I went ahead and ran a 14 ga 120V/15amp line as well to have a plug on top of my cabinets.

Added Power

Here’s a pic of Big Red installed!

Big Shop Heater

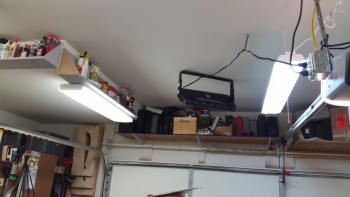
After I got Big Red installed, I grabbed a light bar from my old shop at the other house to add the final light coverage I could really use at the front of the garage.  Here’s a pic of the installed light bar (on the left) below.

More Light

Dritz Electric Scissors

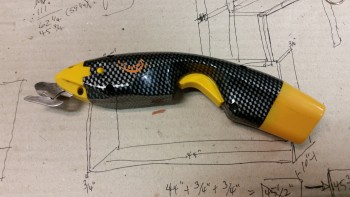
I’ve been working on my Dritz electric scissors over the past week along with everything else.  I charged the battery as soon as I unpacked the kit, but when I installed the battery and tested out the scissor the blades were jammed & not moving.  They were definitely trying, but clearly something was restraining the scissor action.  Well, after disassembling the nose of the scissor, which requires taking apart the entire handle, I found a whole lot of corrosion inside the nose on the scissor blade assemblies.

I sprayed it down with WD-40 and hit it with a soft wire brush, and repeated this every couple of days for about a week. Finally, I was able to remove all the corrosion and get the scissor set back together.  When I tested the scissors, they worked as well as the first time I pulled them out of the box and used them!

Dritz Scissors

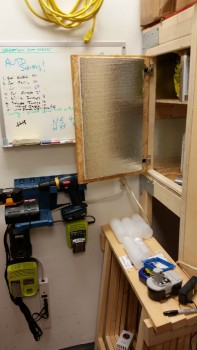
Epoxy Hot Box

I finally finished the epoxy hot box.  I wired the two heating lights through a regular light switch that plugs into the wall.  Also, I finished hot wire cutting the Styrofoam insulation tiles & installing them.

Epoxy Hot Box

After finishing the hot box, I installed a 75 watt light bulb in the bottom bay and a 40 watt bulb in the top bay.  After firing it up, I quickly realized that the insulation was working as advertised… it may have been working a little too well.  The hot box quickly shot up over 125° F.

Over the last few days, I tweaked the bulb strength to dial in the temp between ~90-100° F.  The box is so well insulated, that I finally ended up with ONE 7.5 watt bulb in the bottom bay and the box stays right around 100° F.


New Canopy

I’ve been talking with Todd Silver for a number of months now on getting a new canopy.

Why?  Well, here’s the story:
The first canopy I got from Todd was one that I went down and picked up out of his shop in Ft. Lauderdale in early 2013 while I was deployed to Tampa, FL.  I had wanted a little bit larger/longer canopy so that I wouldn’t have the windscreen up so close to my face, and a little bit taller to have just a little bit more “cabin” space.  However, I should have analyzed the shape of the canopy more thoroughly before throwing it in the back of my vehicle and hauling it back up to Tampa.

Fast-forward to late 2013, once I was settled into my job in Qatar, where I had more time to ponder various build aspects since I wasn’t actually making layups or sniffing epoxy fumes.  I took my pics of the canopy, traced them out (poor man’s CAD) and then overlaid them onto an outline of a close depiction of my fuselage.  I checked this out a number of times from as many angles as I could find.  The main depiction of what I found is here:

Old CanopyThe canopy profile is very close to a true section of a circle on a standard curve. What this meant is the highest point of the canopy sat behind the rollover structure and really wasn’t adding any usable space, but was most certainly adding drag.  Now, to be clear I picked this canopy out of a lineup and the result of my dissatisfaction with it was my fault, not Todd’s.  Todd was nothing but exceptionally helpful as I was looking at his canopies.  In addition, the shape of the canopy also meant a fairly flat and low profile directly in front of the pilot’s seat, and a sharper curve aft where the canopy met the firewall structure.  To be clear on another point: this canopy is beautiful.  It just happened to have the wrong characteristics that I was looking for.

Now, I confirmed my misgivings with the canopy when I came back to the states for a couple of weeks from Qatar in March 2014.  I hauled the canopy down to my buddy Marco’s shop (since my project–but obviously not my canopy–was in storage) and we trial fitted it on his fuselage.  Now, I widened my fuselage 1.4 inches at the pilot seat, but the rest of the fuselage is widened at the same ratio as the original plans fuselage (except my firewall).  Being more of a maverick, Marco chose to widen his fuselage 2 inches the entire length.  When we put the canopy on his fuselage it displayed and confirmed the characteristics I was concerned about (see pic above), but it also proved to me that the dimensions were just too big, since the canopy was close to being oversized even for Marco’s bigger fuselage.

With confirmation in hand, I approached Todd and let him know my concerns.  I sent him the pic above along with this pic below depicting more of the shape I was looking for (BTW, I used Steve Volovsek’s canopy as a style reference).

Desired Canopy

As you can see, the most “bubbly”part of the canopy is directly over the pilot as it flattens out behind the pilot for a good intersection angle with the firewall.

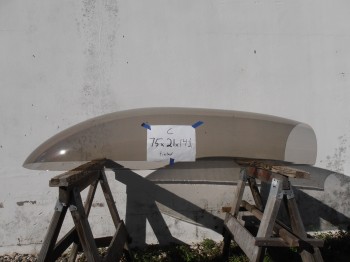
Thus began a conversation over the next few months about the size, shape, etc. of the canopy I was wanting.  Since I wasn’t in a hurry to get a new canopy until after I returned from overseas and settled in, Todd and I waited until I got back to finalize my choice of a new canopy.  Well once back, Todd of course delivered in spades.  He sent me a lineup of pics of a few different canopies (I think knowing full well which one I’d pick) that were all very close to what I wanted, with one being spot on:

New Canopy

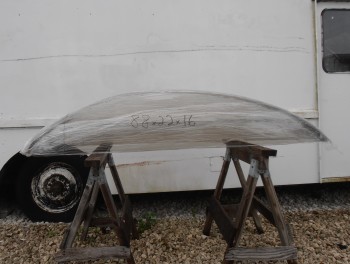
Compared to my existing canopy on-hand:

My CanopyTodd was a champ and gave me a great deal even though I was the one who initially picked the “wrong” canopy.  Once I picked out my new canopy he shipped it out the same day.


Workshop Finished!

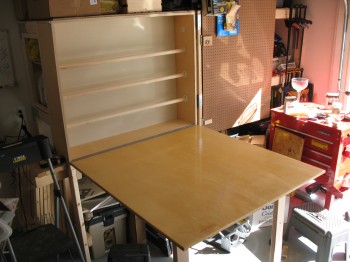
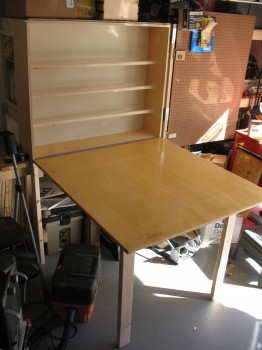
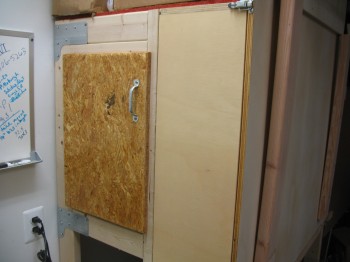
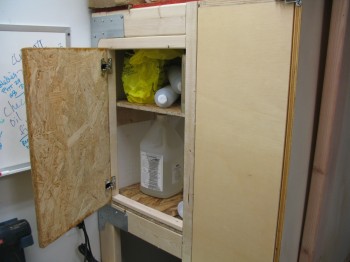
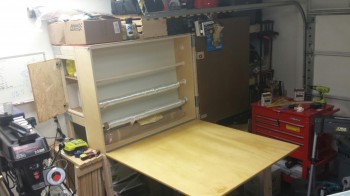
I finally finished the glass storage cabinet & cutting table and the epoxy hot storage cabinet!

Glass cutting table

Epoxy hotboxIt took about a week on & off to varnish the epoxy cabinet door and the glass cutting table. I’m pleased with the outcome and could then press on with the final install steps.

IMG_0261IMG_0257

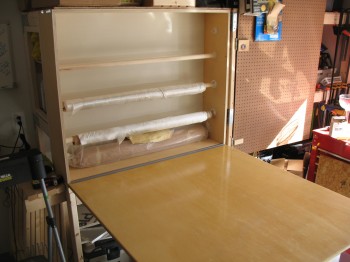
I mounted the swing out support legs for the glass cutting table.  This table BTW is almost twice the surface area as my last table that I used before in Virginia and Germany.

Fold-up cutting table

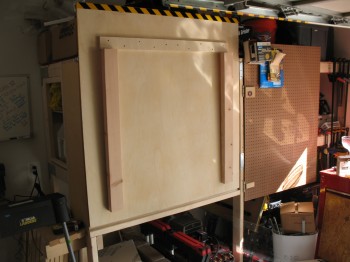
I then drilled the hinge holes in the back of the epoxy hotbox cabinet door with a forstner bit, added a handle and then mounted the cabinet door.

Hotbox door

Hotbox cabinet

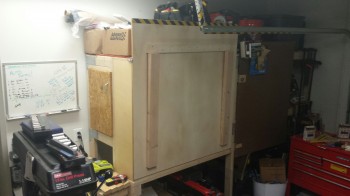
Here’s some shots of the entire setup:

Hotbox & glass cabinets

Glass cutting table/cabinet

Glass/epoxy station

And one last shot of the whole shebang . . .

Glass cutting table


Need MORE build space . . .

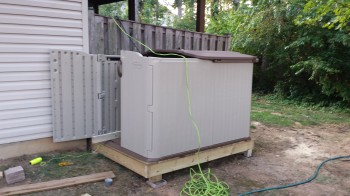
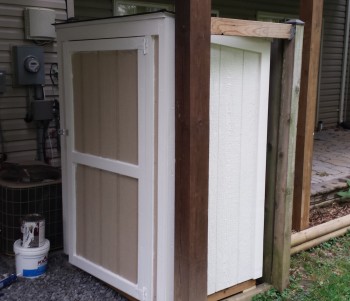
Ok, while it’s nice to have all my tools back on hand and available to use, my garage work shop is much more crowded than it was in my other house in Virginia.  The simple cause for my work space woes is that at my old house I had a nice 10×10 ft shed that I kept all my woodworking saws and tools in.  At this house I have no shed, yet.  The issue here is that the HOA folks won’t allow me to put in a normal sized shed.  Soooo, after a bit of research I decided to install a plastic slide top storage unit and build a smaller shed out of leftover materials that I ironically pulled out of my shed located at my other house (which is currently rented out).

Thus, my shed projects begin… all to allow build space for the Long-EZ!

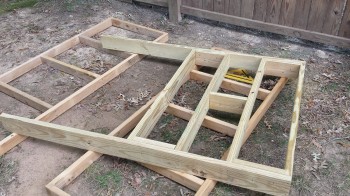
The first order of business for the plastic shed was to build a stable base on uneven ground.  Luckily I had plenty of 5/4 board for the top, but I had to buy a few pressure treated 2×6’s for the base.  After those were on hand I set to work building the base:

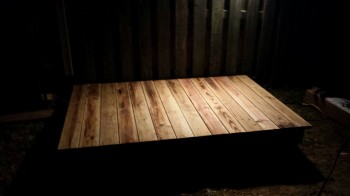
Tool Storage Shed Base I finished right about 8 pm, the bewitching hour that I prefer not to arouse the neighbors’ ire with saws buzzing and nail guns blasting.  Here’s the finished base:

Plastic storage shed base

Once that was completed, I was now at the EZ part which actually putting the shed together… this took all of about 30 minutes.

Tool Storage Shed

Finally, I spent another good 5 days off and on building the smaller, yet taller, shed underneath the deck.  Here’s a shot of it before the final paint went on:

Shed

Huzzah!  Now I finally have places for my woodworking tools and space in my garage to build the Long-EZ.


More toys!

Well, after numerous initial discussions with my good OZ-based EZ-building buddy Dave Berenholtz (check out his build log here), the Sky Dynamics engine gurus, and my engine guy Tom, I decided to forego the pain that would ensue if I decided to go with a traditional Slick mag along with my Electroair electronic ignition, and then swap the initially cheaper Slick for a PMag many hours later.  Yes, after Dave so graciously shared his tale of woe as to the difficulty of doing exactly what I had in mind, and after researching the electrical connections required, and the switches, and the  . . . you get the idea.  Much easier to just bite the bullet, design it right the first time, and then get ‘er done with one shot/one kill. [See my 12 May 2014 post]

Thus, being able to fully & justly blame my mate Dave for a much lighter wallet, I called (from Qatar) up Brad at E-Mag back in late May and had a wonderfully enlightening conversation on the myriad of capabilities of the P-Mag system.  Convinced that I was VERY CLOSE to making the right decision, I told Brad I would call him back to pull trigger once I was 100% sure I was going in the right direction and had researched every option. In addition, I knew with Oshkosh looming on the horizon that I would want to put an order in not too far out to ensure that Brad wouldn’t be sold out when I wanted to have a P-Mag on hand.

Well, after some more intense research and another half-dozen discussions with home-builders around the world, I called Brad back a few weeks later and told him that I was completely sold on the P-Mag and would need a unit come late August/early September.

But why did I need a P-Mag then?  Well, I had discussed with my engine builder Tom at Aero Engines in Winchester, VA, that after arriving back in the States I wanted to get the engine built within a month or so.  Although it will be delayed just a bit, within the next month or two I should be building my new ECi IOX-340S under his watchful eye. The PMag was the last major component for the engine build that I needed, and I wanted to make sure that I had it on hand so that an experienced engine builder–knowledgeable on P-Mags–would ensure that I installed it 100% correctly.

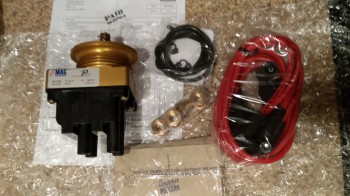
P-MagWell, sure enough Brad gave me a call in late August and my P-Mag unit arrived just a few days later, with a bag of microwave popcorn included no less!  Now that’s customer service!